Wednesday, March 31, 2010

Marinara Sauce


I knew there had to be a decent tomato sauce for pasta that was easy to make, yet didn't come out of a jar! So I pulled out my trusty cookbook by the lovely Giada De Laurentiis, Everyday Italian. Since it hasn't been tomato season for months, I was happy to note that her marinara recipe calls for canned crushed tomatoes.

I was considering lessening the amount of olive oil, 1/2 cup seems excessive to me, but I do trust Giada. (It really wasn't too oily). I did like that I didn't have to sit and chop everything at once. I chopped the onions and garlic, then while they were cooking chopped the carrots and celery. It's really quite simple.

Other than that, medium-high was a bit too high for the onions and vegetables, so I reduced the heat to just under medium. It could simply be my burner (it's a big one), so for the simmer I moved to a different burner. Just keep an eye on things so they don't get too brown before you add the tomatoes.

Giada says this is the basic tomato sauce she uses the most, and this recipe makes a healthy amount (probably enough for freezing). Giada doubles the recipe and freezes half in two-cup portions, which gets another vote from me!


Marinara Sauce

Makes about 2 quarts (8 cups) 1 quart will serve 4 over pasta as a first course

1/2 cup extra-virgin olive oil
2 small onions, finely chopped
2 garlic cloves, finely chopped
2 celery stalks, finely chopped
2 carrots, peeled and finely chopped
1/2 teaspoon sea salt, plus more to taste
1/2 teaspoon freshly ground black pepper, plus more to taste
2 (32-ounce) cans crushed tomatoes (the only size I had were 28-ounce, so that's what I used)
2 dried bay leaves

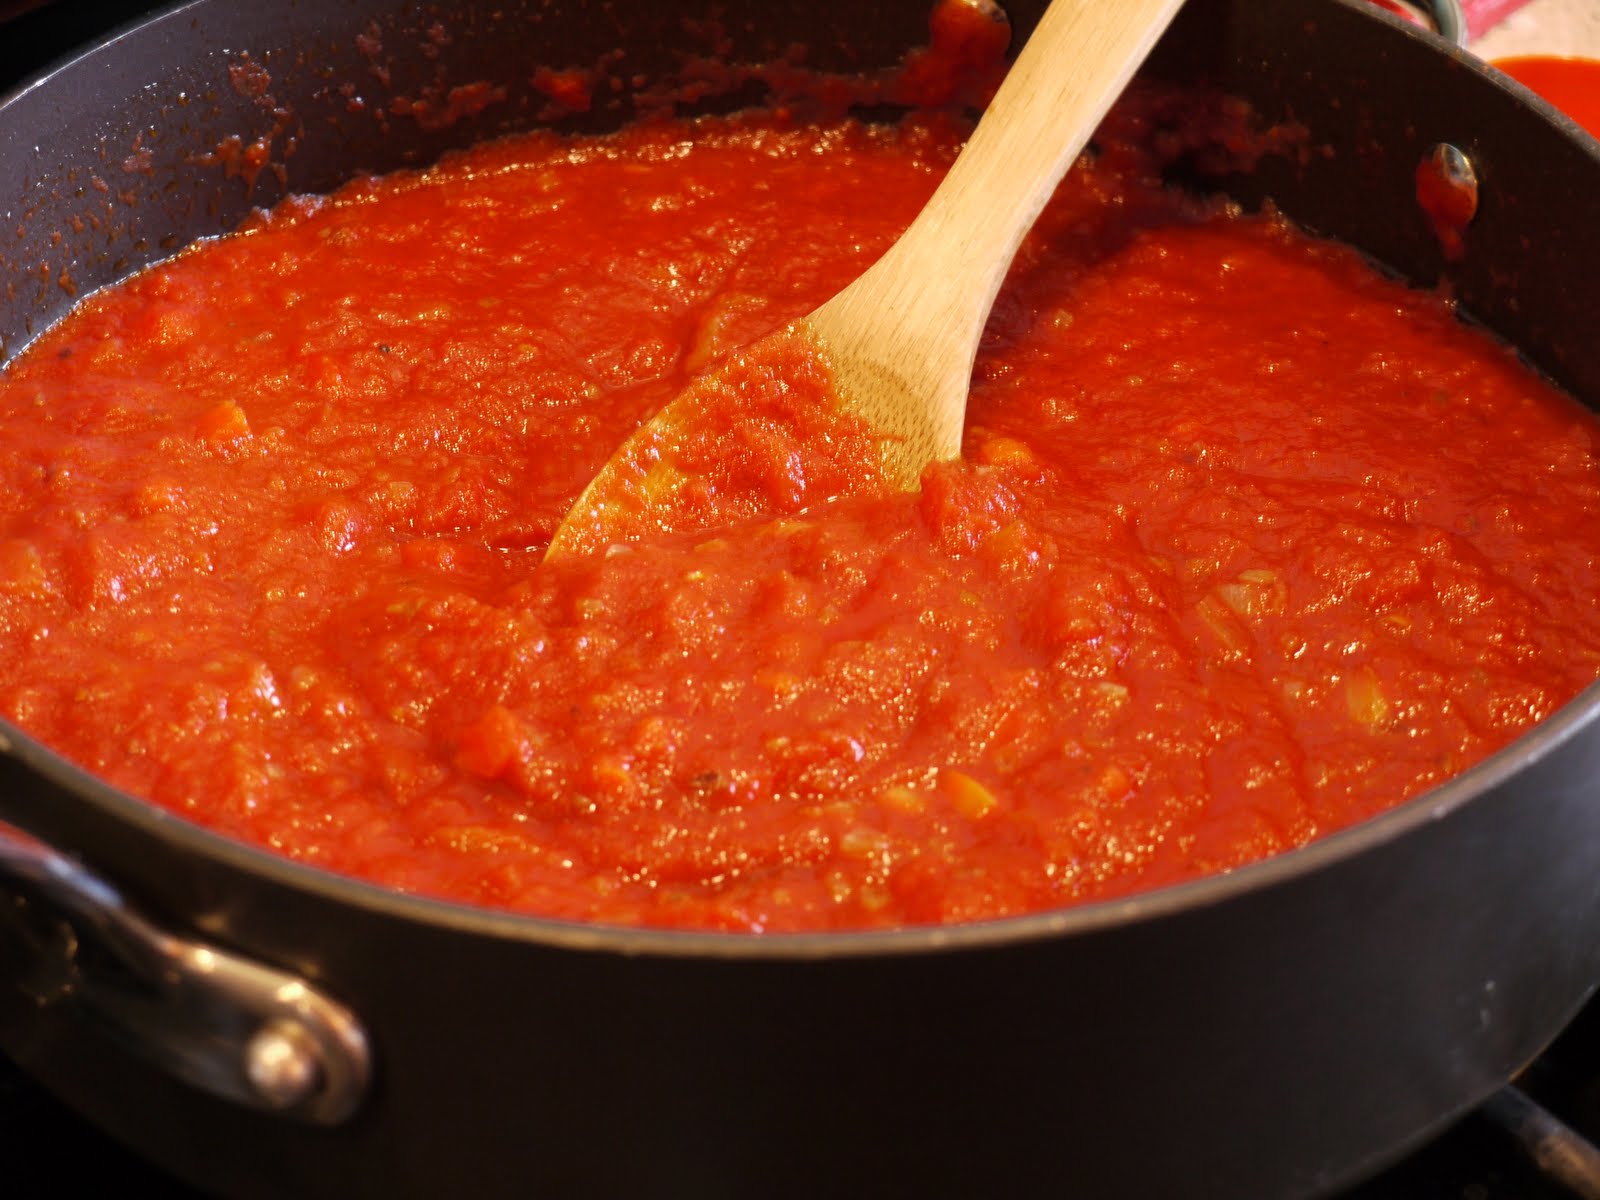
In a large pot, heat the oil over a medium-high flame. Add the onions and garlic and saute until the onions are translucent, about 10 minutes. Add the celery, carrots, and 1/2 teaspoon each of salt and pepper. Saute until all the vegetables are soft, about 10 minutes. Add the tomatoes and bay leaves, and simmer uncovered over low heat until the sauce thickens, about 1 hour. Remove and discard the bay leaves. Season the sauce with more salt and pepper to taste.

The sauce can be made 1 day ahead. Cool, then cover and refrigerate. Rewarm over medium heat before using.

Store extra sauce by allowing it to cool completely, then pour two-cup portions into freezer bags and freeze for up to three months.

Saturday, March 27, 2010

Ham & Cheese Mini Frittatas

First, I will tell you, I'm not a big Rachael Ray fan. In fact, I can't even say I'm "a fan" of hers. You'd have to be from a different universe to not know who she is though, and for Christmas someone got me one of her cookbooks. I think she's the main reason you won't read the word "delish" very many times here.

This is the first recipe I've tried out of the book. Not because I've been avoiding the book, just because it's not the first book I reach for.

Anyway, I was intrigued by these mini frittatas, and have been wanting to make them. I also would like to test whether they can be assembled the night before, because that would make them even better (if they also taste good, of course).

Oh Rachael. Who in the world tested these recipes?? I wanted to double the recipe, so I used 16 large eggs, and was pathetically short. I had to use 8 more eggs!! Yes, a total of 24 EGGS in order to "double" a recipe that calls for 8. Not only is it annoying to have to mix up another batch, now I'm just hoping they turn out since I'll have a house full of people in half an hour.

Luckily, the frittatas cooked up very cute and delicious. I'm still upset about the big error in the recipe, so I'll be making changes as I type. And crossing things out in my book, in pen, because that's how I roll. I just popped them in the oven as the guests started to arrive, so they were still hot when we were ready to eat brunch.

Forgot to take a picture of the magnificent 24, so these are what we had left. I can't wait to try variations. Chives were fresh from the garden (they're the first thing to come back--Spring is here, folks).


Ham & Cheese Mini Frittatas
makes 12 frittatas

3 tablespoons butter, melted (I didn't melt or even measure my butter)
1/4 pound deli-sliced Swiss cheese, finely chopped
1/4 pound ham steak or Canadian bacon, finely chopped
a splash of milk or half-and-half
3 tablespoons snipped or chopped fresh chives
salt and freshly ground pepper
a few drops of hot sauce
8 12 eggs, well beaten

Preheat the oven to 375 degrees F.

Brush a 12-muffin tin liberally with butter (use more if needed). Divide the chopped ham and cheese evenly among the muffin cups. Add the milk, chives, salt and pepper, and hot sauce to the eggs and fill the cups up to just below the rim with the egg mixture. Bake the frittatas until golden and puffy, 10 to 12 minutes. Remove to a plate with a small spatula (and tongs) and serve.

Alternative fillings: You can also try defrosted chopped frozen broccoli and shredded Cheddar, or chopped cooked bacon with shredded smoked Gouda and sauteed mushrooms.

Friday, March 26, 2010

CSN Stores Giveaway!

I didn't feel like there were enough entries to use the random number generator thingie, plus there were a couple comments that didn't count anyway, so I just took a few minutes and wrote everyone's name and comment number on a piece of paper, folded them up, and put them in a big bowl. I shook them up, swirled them around, then had H-Bomb pick one piece of paper out of the bowl above his head...

And the Lucky Winner is:

#2, Cheryl, who said, "
Hmmm, the possibilities are endless but I'm thinking dessert - Sour Cream or Yogurt Coffee cake - it looks deep enough to serve a chicken or pasta dish as well. Maybe Martha's One pot chicken & brown rice."

Congratulations, Cheryl!
Contact me to claim your prize!
I'm soooo looking forward to a coffee cake and/or chicken or pasta served on a lovely platter!

~~~~~~~~~~~~~

Sorry, contest is closed!
Thanks to everyone who entered!!


I was approached by Sean at CSN stores, who asked if I'd like to review a product for them or host a giveaway on the blog. As hard as it was to turn down something new for MY kitchen, I thought it would be more fun to give you all a chance to WIN something for YOUR kitchen!

The amount of products CSN stores offers is staggering...featuring everything from counter stools to chandeliers, grills to swing sets, on over 200 different websites, they have it all!


We have some counter stools very similar to these surrounding the new bar in our kitchen, and we actually purchased our kitchen pendant lights from CSN. Who knew someday I'd get to share this company with you!

As difficult as it was to narrow down a product to giveaway here, I stuck with cookware. A weakness of mine is serve ware, so that's where I headed. Serving bowls, platters~even everyday food looks great if it's served on a nice dish.

I chose something that I would want to have and use in my home (actually took a poll of a few close friends to help with the decision!) to give to you~ a beautiful serving tray!


In addition to being lovely, this tray is 13" in diameter, with built-in handles. It's made of authentic European stoneware, using a traditional hand-painted technique known as Bunzlauer. Tiny sponges saturated with food-safe ceramic paint are hand stamped on pre-fired pieces. The process often requires over 10 types of sponges for each item.


The pieces are then covered with lead-free glazes and fired at 2200°F, assuring long-lasting beauty and protection. Durability and resistance permit safe microwave, oven, and dishwasher use, as well as resistance to chipping.

Would you like to win this serving tray?

  1. Just leave a comment to tell me what you'd serve on it if I were coming over for dinner!
  2. If you'd like an extra chance to win, and you really love this blog, become a follower via Google Friend Connect (or mention that you're a follower) and let me know in a separate comment on this post.
  3. For another extra entry, become a fan on facebook (or mention that you're a fan) and tell me in a separate comment on this post.
  4. For another extra entry, blog about this giveaway with a link back to this post (and leave me a comment here with a link to your post!)
The rules:
  • Sorry, contest is only open to residents of the US and Canada.
  • The giveaway will end on Friday, March 26th, at midnight MST. Winner will be chosen randomly.
  • I will email the winner, who will have 48 hours to respond by email, or I will have to choose a different winner.
  • Please leave your email address on each comment/entry, or make sure your profile is public. If I can't contact you, you can't win!
  • Please don't become a follower or fan if you don't really want to follow the website.
  • I did not receive any compensation for this post. I was simply approached by CSN, and chose to pass the offer on to my readers!

Good luck to all!

Thursday, March 25, 2010

Brussels Sprouts and Hazelnuts

You probably remember when my son was starting 1st grade, and I sort of freaked out and got a bunch of "fast" cookbooks for weeknights. Well, this is one of the winners. So far every recipe has been great. And fast. That's probably why they named it Great Food Fast.

Tonight, I had some Brussels sprouts we needed to use up. And we also happened to have some hazelnuts around (this is rare because although we love them, you can't buy them around here). So this recipe was a perfect accompaniment to our Turkey Burgers. (the burgers are something new the boys are excited to try)

One boy loves Brussels sprouts. One boy does not. (but I bet he would if he tried!) Number One and I thought these were tasty. (even if I left off the salt and pepper)

The camera battery was dead~sorry no picture today! They were bright green, speckled with nuts!

Brussels Sprouts and Hazelnuts
Serves 4

1 pound Brussels sprouts, trimmed and scored
1 tablespoon butter
2 tablespoons chopped blanched hazelnuts
Coarse salt and fresh ground pepper

In a large skillet over medium heat, bring 1 cup water and 1/2 teaspoon salt to a boil. Add the Brussels sprouts; reduce the heat to a simmer. Cover; cook, stirring occasionally, until tender, about 20 minutes (add more water if the pan becomes dry).

Uncover; raise the heat to medium-high, and cook until the water has evaporated. Add the butter and hazelnuts; cook until the nuts are fragrant, 3 to 5 minutes. Season with salt and pepper.

Saturday, March 20, 2010

Bertolli Spring Pasta with Four Cheese Rosa


FedEx Express made a surprise visit again! As part of the Foodbuzz Tastemaker Program, I received two new Bertolli pasta sauces: Four Cheese Rosa, an Alfredo blend with four cheeses and tomatoes; and Arrabbiata, a spicy tomato sauce with red peppers.


Tonight, after taking stock of what we have in the house, I decided on a Spring Pasta with the Four Cheese Rosa Sauce for dinner. (I'll let you know what we make with the Arrabbiata!)

With chicken and lightly sauteed vegetables, the Four Cheese Rosa was delicious. Creamy and flavorful, with just a hint of tomatoes. Everyone loved it.


Spring Pasta with Four Cheese Rosa
Serves 4, with leftovers

1 pound penne or your favorite pasta
1 tablespoon butter
1 tablespoon olive oil
1 pound ground chicken (or a couple boneless skinless breasts, diced)
1 shallot, diced
coarse salt
6-8 mushrooms, roughly chopped
1/2 pound asparagus (about 20 stems), cut in 1-inch pieces
1 jar Bertolli Four Cheese Rosa Alfredo Sauce

Prepare pasta according to directions.

While pasta is cooking, heat butter and oil together over medium heat, add chicken and saute' until cooked through. Add shallots and saute' until beginning to turn golden, sprinkle with salt (maybe 1/2 tablespoon), then add mushrooms and saute' for a few minutes. You want to time the cooking of the vegetables to match the pasta, so with just a few minutes left on the pasta timer, add the asparagus and saute' until bright green. Reduce heat, add Four Cheese Rosa Alfredo Sauce and heat through, stirring.

By the time the pasta is done, the sauce should be heated and ready. Toss pasta with sauce, and serve immediately.

Friday, March 19, 2010

CARIBBEAN COURT-BOUILLON CHICKEN & STRAWBERRY BANANA RICOTTA BROCCOLI

Dave over at My Year on the Grill recently made Caribbean Court Bouillon Talapia. It looked so yummy that I had to try it. I had all the ingredients except the Talapia so I thought I'd try it with chicken. I have to report that the chicken kicks ASS so I can't wait to try it with the Talapia.

I had never heard the word Courtbouillon before either, so I was glad Dave had done research... Court-Bouillon is a cooking method that uses a flavored liquid for poaching or quick cooking foods.

Dave altered the original recipe to fit him and Jackie and then I altered it to fit hubby and I too.


5 tablespoons melted butter
5 tablespoons sifted flour
1 cup Celery, diced (I was out so used carrots instead)
1 cup Red Bell Pepper, diced
1 cupVidalia Onion, cut into thin rings
1 head minced Garlic
3 Roma tomatoes (1 pureed, 2 chopped)
3 tablespoons Jerk spices (2 mixed in Sauce, 1 sprinkled on top of fish)
4 ounces CRUZAN Black Strap Dark Rum - I didn't have the black strap rum, so I used Bacardi gold
2 tablespoons Curacao
8 ounces chicken stock
1 1/2 pounds chicken tenders
Green Onion to garnish
Parsley to garnish
Pineapple slice to garnish
3 cups Mahatma Rice
  • Make a Roux.
  • Add the Vegetables and 2 tablespoons of the Jerk spices.
  • Mix well and saute till the vegetables start to get tender.
  • And here is the fun part... Add the RUM & the CURACAO... It will sizzle!
  • Add the stock.
  • Bring to a gentle simmer and allow to simmer for 30 minutes, stirring occasionally.
  • Start the Rice... It takes 20 minutes to cook the rice.
  • Put the fish on top of the simmering liquid. Do not turn, it is being poached. Sprinkle some of the Jerk spices over the fish.
  • Cover the pan and allow the simmering magic to do what it does... it takes 20 minutes, but again, do not touch the fish.
  • For presentation, use a wide spatula to remove the chicken and keep warm.
  • Plate the rice, top with the reduced liquid and vegetables, top with the chicken.
  • Add the garnish.
  • And for a final Caribbean flare, add a slice of pineapple on the side.
8 ounces ricotta cheese**
8 ounces strawberry banana yogurt**
1 tablespoon Curacao
Broccoli spears
  • Whisk together the ricotta cheese and yogurt.
  • Add Curacao and warm through.
  • Pour over broccoli spears.
**We're at the stage of cleaning out the fridge and cupboards again so I improvised to use up these 2 ingredients and they were a yummy addition.

Taste & Create: Meethi Paratha


Join the fun!! Taste & Create is a monthly food blog event, created by the lovely Nicole of For the Love of Food...read the Vegetable Kurma post for more details!

For this month, my partner was Padmajha of Seduce Your Tastebuds. To go with her Vegetable Kurma, I was planning to make Meethi Paratha. However, somehow I missed the "let it stand a few hours" part of the recipe, and by the time I realized this, it was too late and already mixed up. So we had our Paratha the next night.

And then after it was all mixed up, I realized I had forgotten to add SALT. I didn't feel like I should try to mix it more and risk the dough getting tough, so I just left it out. Although the boys liked the flat bread (especially with spinach in it), it really needed salt. I ate mine with butter + salt, and it was good.

top paratha with butter + salt!

I still need more practice with the whole flat bread making process, somehow it ends up too sticky and then too floury when I'm rolling it out...maybe more flour in the dough, less water? Anyway, live and learn! And practice makes perfect (I hope!)


Meethi Paratha

2 cups whole wheat flour (I used half whole wheat and half all-purpose flour)
1 cup meethi leaves (I substituted spinach)
1 teaspoon mustard (I used ground mustard)
1 teaspoon jeera (cumin)
1 teaspoon chile powder (I used 1/2 teaspoon)
1 teaspoon oil
Salt to taste
Water


1. Heat oil in a frying pan and put in mustard and jeera.
2. When they splutter add the meethi leaves and stir for a few minutes.[Some people skip this step but PJ prefers to saute the leaves a little].
3. Let it cool.
4. In a bowl mix all the ingredients with the sautéed meethi leaves adding warm water to form dough.
5. Let it stand for a few hours.
6. Pinch off a lump of dough and roll it out evenly.
7. Heat a griddle and cook it till you see brown spots on either side.
8. Drizzle oil if necessary.
9. Serve hot with a dollop of butter,pickle,yoghurt

Wednesday, March 17, 2010

Taste & Create: Vegetable Kurma


Is there anyone out there who hasn't heard of Taste & Create? In case there's one person who hasn't, Taste & Create is a monthly food blog event, created by the lovely Nicole of For the Love of Food, in which participants are randomly paired off and tasked with preparing a recipe from their partner's blog. It is very fun and as challenging as you'd like since you get to choose what you'll prepare, and there are lots of participants from foreign lands (Nicole herself lives in Germany) so you never know with what sort of cuisine you'll end up. I love it. And you all should try it!!

For this month, my partner was Padmajha of Seduce Your Tastebuds. I've done so many Taste & Creates that I honestly can't remember if PJ and I have been partners before?? At any rate, I do love perusing her blog and trying to figure out what all the ingredients are!

I chose to make Padmajha's Vegetable Kurma. She says "Vegetable Kurma is the most preferred side dish for Chapthi / Poori /Parotta in South India. Each restaurant or household has its own version and each one is as tasty as the other."

We are big Kurma fans. Once when Number One and I were dating, I spent 5 hours preparing a Lamb Kurma for him...it was just okay because although it needed more spices, I had no idea which ones to add. He loved me for it though. Every single time we go to our favorite Indian restaurant (a few times a year, since it's a 4-hour drive), I order Lamb Coconut Kurma. Every single time. So anyway, I knew this was the dish to make.

I was going to make Meethi Paratha to go with the Kurma, but by the time I mixed it up and read the part about it needing to rest "several hours" it was simply too late. I will make the Paratha tomorrow! In a pinch, we ended up eating our Kurma with tortillas.

I saved the water from boiling the vegetables (I used potatoes, carrots, broccoflower, peas and corn with a bit of salt) to add to the kurma at the end. After looking at Padmajha's pictures again, it is apparent that I should have added more liquid...I also used a can of diced tomatoes, and I wish I had run the tomatoes through a food processor first to make them smaller. I was also wishing I had done that with the onions.

But before I get too far into all that, this dish is delicious! I loved the smell of the coconut paste (which I should have processed longer to avoid the bigger chunks of cinnamon), and it really wasn't that hard. I do chronically underestimate the time it takes ME to prepare Indian food, but that is no one's fault but my own.


I didn't have curry leaves, and didn't substitute anything for them. I actually made a double batch of kurma tonight, but only used 1 teaspoon of chile powder and did not double the garlic because I thought the cloves I had were quite big. I used dried coconut, again all that I had. I probably should have used more coconut, and next time I may add some coconut milk in place of some of the water. I did like using the water from the boiled vegetables--no lost vitamins!--but I wanted a bit more coconut flavor. I had enough veggie water left to put in the freezer to add to soup in the future.

We served this as a main dish, because for me it's labor-intensive, and I didn't have time to make anything else! It's good to eat vegetables for dinner once in a while!


Vegetable Kurma

2 cups boiled mixed vegetables [ carrots, beans, peas, cauliflower, corn, potato]
1 small onion, chopped
1 small tomato, chopped
1 bay leaf
a few curry leaves
1 teaspoon mustard (I used ground mustard)
1 teaspoon chile powder
2 teaspoons oil (I used about a tablespoon)
Salt to taste

Grind to a smooth paste with a little water:
5 tablespoons grated coconut
1 small piece cinnamon (I used about 1/2")
1 teaspoon fennel seeds
5 small cloves garlic
1/2" piece ginger, peeled and chopped

1. Heat oil in a pan and put in the mustard, bay leaf and curry leaves
2. When it crackles add the onion and sauté till translucent
3. Add the tomato and cook till mushy
4. Put in the ground paste, chile powder, salt and mix well. Add a little water if it is dry.[The color of the kurma will be pale at this stage.On further cooking the color will deepen.]
5. Cook for a few minutes till the raw smell of the masala disappears. (just keep smelling it, you'll know the difference)
6. Add the cooked vegetables and water to get the desired consistency.
7. Simmer for 5 minutes and remove from heat.

Serve as a side dish.

Tuesday, March 16, 2010

Baked Breakfast Eggs

Here's another winner from Good Mood Food: Simple Healthy Homecooking, the fabulous new cookbook from the author of The Good Mood Food Blog, Donal Skehan.

I'm always on the lookout for new recipes to serve for breakfast, or more importantly, brunch. (yes, we will have another brunch on the ranch! I promise!) This one looks great, and I happened to have all the ingredients on hand. I also want to test this recipe for it's Make Ahead-ability, but I'll report back on that one later.

Right now, I'm hungry! I only made one egg, and it was easy. I almost threw another egg into my ramekin, because it looked a little sparse, but I wanted to see how it cooked up. I think another egg in the ramekin would be okay, but it would have definitely required more cooking time.

These eggs are delicious, and seem decadent--they taste like they took time to make. When my egg came out of the oven and I took the first bite (on artisan bread toast with butter, of course), H-Bomb must have smelled it. He came over for a look, saw the spinach (which he loves, thank you Popeye!), and went to grab his own spoon. He said it was yummy!

With the technique of baking eggs, the possibilities are limitless! The recipe reminded me of a couple other baked egg recipes we've got here, Baked Eggs and Mushrooms in Ham Crisps and Ina's Herb-Baked Eggs. The Ham Crisp recipe is definitely the most impressive, but all three of these recipes are delicious and company-worthy.

I don't think making this for a crowd would be too difficult, if you could at least partially assemble the ramekins ahead of time...I will let you know.

not the best picture, I'll try harder next time!

Baked Breakfast Eggs
Makes 4 portions

4 free-range eggs
3 1/2 ounces goat cheese
2 large handfuls fresh spinach
4 slices cooked ham, diced
2 garlic cloves, finely chopped
1 tablespoon olive oil
Pinch of sea salt and freshly ground pepper

In a hot frying pan saute garlic for about 30 seconds in olive oil. Add the spinach and keep moving around the pan until it has wilted and become soft.

Remove from the heat and separate into four medium-sized ramekins. (I used a 7-ounce ramekin, which may be a bit big? but it worked)

Top with a sprinkling of diced ham and a slice of good quality goat cheese. (I crumbled mine)

Break an egg into each ramekin and season with sprinkle of salt and pepper.

Bake in the oven at 400 degrees F for 10-12 minutes or until the white of the egg is no longer transparent.

Serve with some crisp bread to dip into the rich, runny yolk.

Sunday, March 14, 2010

Steak Marinade

This is a great all-around marinade for any kind of steak you want to throw on the grill! I found it in Big Sky Cooking by Brokaw/Wright. The original recipe calls for Elk steaks... being that that isn't readily available where I am, I settled for a couple thin sirloin steaks.

Here's what you'll need to marinate 6-8 (6-8oz each) steaks.

1/2 cup soy sauce
1/4 cup olive oil
3 Tbs honey
3 cloves garlic, minced
1 Tbs fresh ginger root, minced
Juice of 2 limes

  • Combine all ingredients in a nonreactive pan, add your steaks.
  • Cover and refrigerate for 3-4 hours or overnight.
  • Remove from the refrigerator about 1 hour prior to grilling to bring steaks up to room temperature.
  • Grind black pepper generously over each side of the steaks.
  • Grill as usual!!!

"3rd Date" Chicken


This is actually a recipe from my husband's stash. He obtained it from his mom or dad (not sure which). He has prepared it, usually on the 3rd date, to impress the ladies (quite successfully or so I've heard). Truth be told, it's super easy to make but tastes so delicious one would think he spent all afternoon making it. He has promised our son that he'll pass the recipe along to him when he's old enough. Being that he's only 4, I'll post it for you all in the meantime.

Tonight I made this along with my sister's recipe for Polenta and a side salad. Yummy!

Here's what you'll need:

4 boneless chicken breasts
1 clove garlic, minced
1 Tbs dried oregano
1/4 cup red wine vinegar
1/4 cup olive oil
salt/pepper to taste
1/2 cup pitted prunes
1/2 cup small green olives
3 bay leaves
1/2 cup brown sugar
1/2 cup white wine
parsley for garnish

  • Combine the chicken, garlic, oregano, salt/pepper, vinegar, olive oil, prunes, olives & bay leaves in a bowl. Cover, refrigerate and marinate for a few hours or overnight.
  • Preheat oven to 350 degrees.
  • Arrange chicken in a single layer in a baking dish (9X11 glass pan works great). Pour marinade over evenly.
  • Sprinkle chicken with brown sugar and pour white wine around the bottom of the pan (I used some Pinot Grigio left over from the other night).
  • Bake for 60 minutes, basting frequently.
  • Sprinkle with parsley before serving.
  • Serves 4-6


Friday, March 12, 2010

Chicken Thigh Supper

I was first introduced to The Good Mood Food Blog back in August, 2008 when my friend Nicole of For the Love of Food ran across this fairly new, colorful Irish food blog with amazing photographs and interviewed Donal about it. I was intrigued and checked back every so often to see what was happening. Since then, Donal's world has taken off by leaps and bounds! He is doing cooking demonstrations all over the place, including a huge one in Paris at the end of the month; is interviewing and cooking for publications and talk shows; is in a band; and has published a cookbook! It's all so exciting!

Naturally when I found out about the cookbook, called Good Mood Food: Simple Healthy Homecooking, I had to get my hands on a copy. Not only are Donal's recipes fresh and beautifully photographed, his philosophies on food and healthy eating are in line with my own. He's also planting a bigger garden this year, so that will be fun to follow as well.

It's also fun because my heritage is mostly Irish, but honestly I don't know much about the country. (some day we'll get over there). And he's just so cute and enthusiastic about whatever project he's got going!

The cookbook is in English, with metric measurements for the most part, so you've got to do some converting. And realize that a "tin" of tomatoes means a "can," that sort of thing. It's quite fun to read, and easy to follow.

The first recipe we tried is called Chicken Thigh Supper. I just happened to have all the ingredients on hand. I started a bit late for a school night, but that's my own fault, and it was worth the wait!

I love the bacon in the dish, it adds so much flavor, and it was heavenly smelling the onions, garlic and herbs cooking. This is an excellent dish, and you all should try it tonight. I am even including it in my Chicken in a Fabulous Sauce category! (and you know it's got to be FABULOUS to join those select few recipes!)


We'll definitely be preparing more recipes from the cookbook, but be sure to follow Donal's blog for new recipes, and pick up the Good Mood Food cookbook for yourself!

*I've converted the measurements to their U.S. equivalents, and put the ingredients in order of use; as usual notes in italics are my addition*

Chicken Thigh Supper
adapted from Good Mood Food cookbook
Serves 4

2 tablespoons olive oil
6-8 chicken thighs (skin on, bone in--we used 8)
about 1/3 pound pancetta or bacon, diced (we used bacon)
2 garlic cloves, sliced thinly
1 red onion, chopped in half moons
2 sprigs fresh rosemary (I used about 1 tablespoon dried because my rosemary plants didn't survive)
2 sprigs fresh thyme
2 teaspoons English mustard powder (I used ground mustard)
1- 14.5 ounce can diced tomatoes
1/3 cup red wine

In a large deep frying pan, heat 1 tablespoon of olive oil, and brown the chicken and pancetta, until you get a nice colour on the thighs. Set chicken and pancetta aside on plate covered with kitchen paper. (I couldn't decide what "kitchen paper" was, paper towels? waxed paper??, so I just used a plate).

In the same pan, add the rest of the oil (I didn't add more oil) and fry the garlic, onion, rosemary and thyme for 2 minutes. (this is the moment you want to smell what's cooking!) Sprinkle over the mustard powder and stir through.

Add the tomatoes and red wine, and bring to the boil. Add the chicken and pancetta pieces back to the pan, turning the chicken pieces to coat.

Cover the pan and cook for 20 minutes over a low heat or until the chicken is cooked through. You may need to extend the cooking time depending on the size of the chicken thighs. I don't add salt to this recipe as the pancetta can be quite salty, but make sure to taste it and add seasoning if needed. (ours didn't need anything at all--just perfect!)

Serve with a tasty salad and some hearty wholemeal bread.

Thursday, March 11, 2010

Crisp and Chewy Chocolate Chip Cookies

I love Martha Stewart Living magazine. As soon as it arrives in my mailbox each month, I sit down and read it cover to cover, making note of all the recipes I'd like to make someday, and all the good ideas in its pages. Martha and her staff are just so damn perfect, there is always something in there that I just have to make or do or try. Always. (I have tons of ideas, just no staff to make them happen!!)

This month is no exception. Except for the fact that I haven't actually made it past this recipe, on page 68. Number One's been asking for quite a long time when I'd make regular chocolate chip cookies. When I came across this recipe, I knew the time was now. I've had my magazine lying on the counter, open to the Crisp and Chewy Chocolate Chip Cookies page, since yesterday. So I wouldn't forget to make these cookies. Just waiting on the 2 1/2 sticks of frozen butter to thaw and soften.

After the cookies are baked, I feel like I can get on with my life! (and read the rest of the magazine!)

For practical information, I don't have a set of different sized scoops, so I just used soup spoons (you know, the big ones). I did use parchment paper on the baking sheet, because I'm a firm believer in it. It's a pretty straightforward recipe, no special tricks.

And I have two of my ovens going for this endeavor. I would have three ovens going, but there was an incident with the generator, which affected the water supply this morning, so I haven't gotten around to washing the dishes yet, which includes the rest of my baking sheets. So only two ovens at the moment, but at least it cuts the total baking time in half!

The key to a chewy cookie is to take them out of the oven when they don't "look" done--after 14-15 minutes, mine were light and puffy, with just a hint of golden brown around the edges.


After cooling, the cookies sink down, no longer quite as puffy,
and they will stay chewy in the middle.


A big mistake people make is thinking the cookies need to look completely done right out of the oven. They don't--they should actually look slightly raw/uncooked. With cookies, it's better to underbake than overbake. I learned this lesson years and years and years ago when I was a bakery/deli girl in our local grocery store. (you know, the place I also got that perfect recipe for Classic Baked Beans). I guess I learned a lot in that old store.


These cookies are wonderful, crisp and chewy. (in case you had any doubts) I got 30 cookies out of the batch, so mine must be a bit smaller than suggested, but that's okay. They are a bit different from the Tollhouse recipe, but not so much that I can even explain it. Maybe some day we'll do a taste test, I don't know how else we're going to use up the 4 1/2 pound bags of chocolate chips from Costco!


P.S. The other good news? The recipe on the very next page is for a chocolate layer cake--which I've been craving for some time myself!


Crisp and Chewy Chocolate Chip Cookies
Makes 20

2 3/4 cups all-purpose flour
1 1/4 teaspoons salt
1 teaspoon baking powder
1 teaspoon baking soda
2 1/2 sticks unsalted butter, softened
1 1/4 cups packed dark-brown sugar
3/4 cup granulated sugar
2 large eggs
1 teaspoon vanilla
1 1/2 cups semisweet chocolate chips

Sift together flour, salt, baking powder and baking soda.

Preheat oven to 350 degrees F. Beat butter and sugars with a mixer on medium-high speed until pale and fluffy, about 4 minutes. Beat in eggs 1 at a time. Add vanilla. Reduce speed to low. Add flour mixture; beat until combined. Mix in chocolate chips.

Using a 2 1/4-inch ice cream scoop (about 3 tablespoons), drop dough onto parchment-lined baking sheets, spacing about 2 inches apart. Bake until golden around edges but soft in the middle, about 15 minutes. Let cool for 5 minutes. Transfer cookies to a wire rack, and let cool completely.

Make Ahead: Dough can be refrigerated for up to 5 days. Cookies can be stored at room temperature for up to 3 days.

Wednesday, March 10, 2010

Taste & Create Partner List


Here is the Taste & Create partner list! Please remember to submit your creations to Nicole's Taste & Create website by March 24th. If you have any questions or problems, please feel free to email me at cowgirlmin07 [at] gmail [dot] com.

If you'd like to enter next month's Taste & Create, the fabulous event which pairs food bloggers randomly and tasks them with preparing one of their partner's recipes,
please visit the how it works page for an email address to sign up~sign up deadline is the 8th of the month. And don't forget to tell your friends how fun this event is!

Without further ado:

Culinary Delights & titillating eatables


Seduce Your Tastebuds & The Bad Girl's Kitchen


Dragon Musings & No Reason Needed


My Year on the Grill & A Bolder Table


3 Sides of Crazy & One Little Corner of the World

Tuesday, March 9, 2010

Herbed French Dip Sandwiches

Who doesn't love a French Dip? The other day, I was flipping through a little recipe booklet called "Slow Cooker Specialties" from Taste of Home books, and noticed this recipe for a French Dip. I just happen to have some beef roasts in the freezer, so I thawed one.

I have to admit here that I'm not a huge fan of Taste of Home. I think they generally take too many shortcuts, and a lot of the recipes just aren't great. I think I probably got the booklet along with a "free trial" of a cookbook which was promptly returned. Some people do like the Taste of Home series. Just not me. =)

This morning, I threw the ingredients together, and had it going before 7AM. Super easy, and it smells great so far, I just hope it tastes good!


...the verdict is dismal.

I said in the comments "There's not much that's more disappointing than a mediocre French dip." If only I had known. There is so much wrong with this recipe it's hard to know where to begin...

Do you know what happens when you cook soy sauce (plus an extra cube of bouillon!) for 10 hours in a crock pot? It is reduced to nothing more than pure sodium. And they suggest you dip your sandwich in it? Well, after 10 hours in soy sauce, the beef is so dry that you simply MUST DIP IT in something, so desperate is your body for assistance in chewing and swallowing. Not to mention the shredded beef is just the wrong texture for a true French Dip...

I don't think the recipe is beyond HOPE...the flavor of the beef is pretty good, it's just too dry and there's nothing delicious in which to dip it. It's a darn good thing we had some Redd Ranches Famous BBQ Sauce left in the fridge!

Don't try this at home. My opinion of Taste of Home has yet to be swayed.


Herbed French Dip Sandwiches
Yield: 12 servings

1 lean beef roast (3 to 4 pounds)
1/2 cup soy sauce
1 beef bouillon cube
1 bay leaf
3 to 4 whole peppercorns
1 teaspoon dried rosemary, crushed
1 teaspoon dried thyme
1 teaspoon garlic powder
Hard rolls or French bread

Remove and discard all visible fat from roast. Place in a slow cooker. Combine soy sauce, bouillon and spices; pour over roast. Add water to almost cover roast. Cover and cook over low heat for 10-12 hours or until meat is very tender.

Remove meat; reserve cooking juices. Shred meat with two forks. Serve on hard rolls or French bread slices. Serve cooking juices as a dipping sauce.

Monday, March 8, 2010

Multigrain Blueberry Coffee Cake

This recipe is from the blog project of a friend of a friend, who said, "I thought you'd be interested in this project, Cooking with My Kid." Of course I was.

This friend of a friend is cooking with [her] kid, every day for a year. It's a very ambitious project, and I should know because I cook with my boys sometimes, and they LOVE it, and sometimes I love it, but some days I'm just not in the mood for "helpers."

So let's just say 365 recipes in a row, in 365 days, would likely push me over the edge.

With all this in mind, it's cold and snowy/rainy outside, my oldest kid is in school, and my youngest is watching Diego. I can't compete with Diego. So my plan was to whip up this Trader Joe's Multigrain Coffee Cake myself and eat it. Except that by the time the blueberries thawed, Diego was long over, so I had a helper too. He's a good little stirrer.


You may know that there isn't a Trader Joe's for miles, indeed we have to drive a state or two to find one. I shopped there last month when we were in Tucson, but forgot about this recipe, so sadly I don't have any Trader Joe's Multigrain Pancake Mix.

When I remembered I really wanted to make this cake, I picked up the closest thing I could find (while I was in the store with no list in front of me, so let's just hope for the best), Hodgson Mill Insta-Bake Whole Wheat Variety Baking Mix with Buttermilk. Again, we're hoping for the best here. You can make pancakes with this insta-bake stuff, so it's got that in common with TJ's. We'll see...

The cake was really calling out to me for a streusel topping and maybe some nuts, but I opted for a mix of raw sugar + cinnamon instead.


I baked it in a 9-inch pie plate, for about 35 minutes.

This is a tasty coffee cake, definitely can taste the multigrains in it. Although the raw sugar added a bit of a nice crunch, I will definitely add a streusel topping next time.


My little helper just asked for another piece. I said, "it's so yummy!" And he said, "Yeah! And I love it! 'Cause if I didn't like it, I would be sad."


Multigrain Blueberry Coffee Cake
adapted from Cooking with My Kid
Prep Time:
10 minutes
Cooking Time: 25 to 40 minutes

1 egg
1 cup buttermilk (I used about 1-2 tablespoons vinegar + milk to equal 1 cup)
3 tablespoons vegetable oil
2 1/2 cups multigrain pancake mix
1/2 cup sugar
1 teaspoon cinnamon
1 1/2 to 2 cups fresh blueberries (I used frozen berries, thawed)

For topping: 2 tablespoons sugar mixed with 1 teaspoon cinnamon (I used raw sugar for this)

Preheat oven to 350 degrees. Grease mini loaf pans or a 9-inch baking dish.


In a large bowl whisk together egg, buttermilk and oil. Add pancake mix, sugar and cinnamon. Stir until just blended. Fold in blueberries.


Transfer mixture into prepared loaf pans or 9 inch baking dish. Sprinkle top with cinnamon sugar mixture.


Bake for 25 to 40 minutes depending on pan. Coffee cake is done when top is golden brown and toothpick comes out clean.

Sunday, March 7, 2010

Pork Tenderloin with Garlic Orange Vinaigrette and Sauteed Spinach

A long, long time ago, I made Pork Tenderloin Medallions in a Port Wine Sauce. It was an amazing dish, but I've lost the recipe. One day I'll recreate it. Today, as I searched for something similar, I ran across this recipe from Everyday Food magazine. I happened to have all the ingredients, including a bunch of spinach that we need to use up.

I didn't have pork tenderloin, rather an almost five pound pork loin roast, so I had to improvise. I cut the roast in half, and stuck half in the freezer. I browned the half roast in oil on all sides as directed, then placed it in a pan and in a 400 degree F oven for about 10 minutes to start. After 10 minutes, I checked the temperature, and just kept roasting until it was done. It ended up roasting for about 35 minutes, then I tented it with foil while I steamed the spinach.

This is delicious and savory, and the spinach is a perfect accompaniment.


Pork Tenderloin with Garlic Orange Vinaigrette and Sauteed Spinach
Serves 4

4 tablespoons olive oil
2 pork tenderloins (about 1 pound each), trimmed and patted dry
Coarse salt and ground pepper
1/4 cup orange juice
2 tablespoons Dijon mustard
1 tablespoon honey
1 garlic clove
4 bunches flat-leaf spinach (about 2 pounds total), thick stems removed, washed well

In a large skillet, heat 1 tablespoon oil over medium; season pork with salt and pepper. Add pork to skillet, and cook, turning occasionally, until an instant-read thermometer inserted in thickest part registers 145 degrees, 20 to 25 minutes (reduce heat if pork browns too quickly). Transfer pork to a plate, and cover loosely with aluminum foil; let rest 5 to 10 minutes (reserve skillet).

Meanwhile, in a blender, combine orange juice, mustard, honey, garlic, and 2 tablespoons oil. Season with salt and pepper, and blend until smooth; set vinaigrette aside.

In reserved skillet (if bottom of skillet is blackened, use a new one), heat remaining tablespoon oil over high. Add as much spinach as will fit; toss until wilted, adding more spinach as there is room, 3 to 5 minutes total. Drain off excess liquid, and season spinach with salt and pepper.

Slice pork and drizzle with vinaigrette; serve with spinach.

Saturday, March 6, 2010

Poor Boy Stroganoff


Back in November, I won a cookbook! Kate, over at Warm Olives and Cool Cocktails was purging her cookbook collection, and decided to share her books with us. And I won! Shortly thereafter, Kate had an accident, but I heard she's recovering. Get well soon, Kate!

Kate's sister mailed out the cookbook, and Americas Best Lost Recipes joined my collection. Kate's requirement is for winners to choose, prepare and blog about a recipe from the cookbook. After some deliberation, because I really wanted to make some doughnuts but didn't feel like I had time, I finally decided on this beef stroganoff.

The egg noodles I used require 18-28 minutes to cook, so I didn't think they'd be "nearly tender" in 5 to 7 minutes. I boiled them for about 18 minutes. Everything else went as planned, and it was easy to put together.

Delicious! We will definitely have this again, although it's not very photogenic. Smile, Stroganoff!


Poor Boy Stroganoff

Carole Weinberger, Orlando, Florida
Serves 6


Classic Beef Stroganoff, which dates back to the 1890s and a Russian count of the same name (only spelled Stroganov), is essentially a fancy stew made with filet mignon, mushrooms, onions, and sour cream. This version, which is made with ground beef, won't break the bank and is good for everyday meals. Rather than serving the stew over egg noodles, the noodles, beef and sauce are layered into a baking dish, topped with a little cheese, and baked as a hearty casserole.

Salt
8 ounces egg noodles
2 tablespoons unsalted butter
1 pound lean ground beef
1 small onion, chopped fine
8 ounces white mushrooms, sliced
1/4 teaspoon pepper
2 tablespoons all-purpose flour
1 garlic clove, minced
1 (8-ounce) can tomato sauce (I used 1/4 cup + 1/8 cup tomato paste plus 1/2 cup water)
1/4 cup dry red wine
1 1/4 cups low-sodium beef broth
1 cup sour cream
1/2 cup grated Parmesan cheese

Adjust an oven rack to the middle position and heat the oven to 375 degrees F. Bring 2 quarts water to a boil in a large pot over medium-high heat. Add 1 tablespoon salt and the noodles and cook until nearly tender, 5 to 7 minutes. Drain and set aside in a colander.

Meanwhile, melt the butter in a large skillet over medium-high heat. Cook the beef, breaking up any large clumps with a wooden spoon, until lightly browned, about 8 minutes. Using a slotted spoon, transfer the beef to a paper-towel lined plate.

Pour off all but 2 tablespoons fat from the pan, add the onion, and cook until golden, about 5 minutes. Add the mushrooms, 1/2 teaspoon salt, and pepper and cook until the mushrooms begin to brown, about 7 minutes.

Add the flour and cook until it begins to brown, about 1 minute. Add the garlic and cook until fragrant, about 30 seconds. Stir in the tomato sauce, wine, broth and beef and bring to a simmer; cook until slightly thickened, about 5 minutes. Off the heat, stir in the sour cream.

Spread one-third of the sauce over the bottom of an 8-inch baking dish and top with half the noodles. Repeat with half of the remaining sauce and the remaining noodles. Finish with the remaining sauce. Sprinkle the Parmesan evenly over the top and bake until the filling is hot and the top is browned, about 20 minutes. Let cool 5 minutes. Serve.

Friday, March 5, 2010

Garlic Shrimp Pasta

Once upon a time, we had a Housewarming party. (okay, I'll admit it was just a few months ago) In addition to the real-life party, I opened it up to virtual participation. One guest showed up online, and it was the lovely steph from a whisk and a spoon. She brought Southwestern-style Garlic Shrimp Tapas, and guacamole and oven-baked tortilla chips! I've been drooling over steph's shrimp since then.

When a night came that I didn't know what to have for dinner, but had a bag of uncooked shrimp in the freezer, I thought of steph's shrimp. My shrimp had some issues, namely it was frozen, sort of small, and still had the shell on. I couldn't make the shrimp spicy and serve it up to the boys, and I wanted to serve it with pasta.

This is what I came up with, I totally used steph's techniques and recipe, just left out a couple ingredients. I encourage you to try steph's Southwestern-style shrimp, but if you need a quick family meal, you've come to the right place.

I thawed the shrimp by placing them in a bowl and running cold water over them until they were ready. Then I drained the shrimp. I left the shells on because I just didn't want to deal with peeling that many shrimp, and I decided it would add an element of fun to the dinner table--look, boys, you get to take the legs off your shrimp!

I marinated the shrimp and put some water on for pasta, this time we used about 1/2 pound of spaghetti.

I'll just get on with the recipe. This garlic shrimp pasta was delicious and light, and easy! Everyone loved it. (and I forgot to add the parsley)


Garlic Shrimp Pasta
adapted from a whisk & a spoon
serves 4, with a bit leftover

half a pound of pasta, al dente


about 1 pound large shrimp, peeled and deveined if you wish
6 medium garlic cloves, minced or pressed
1/2 cup olive oil
1/4 teaspoon salt
1 bay leaf
1 Tablespoon chopped flat-leaf parsley


Place an oven rack in the middle position and preheat oven to 500°F. In a bowl, combine the shrimp with about one third of the minced garlic, two tablespoons of olive oil and salt. Let shrimp marinate for 30 minutes at room temperature (this should be long enough for your oven to preheat).


Once the oven is hot, pour the remaining olive oil into a medium-size, shallow casserole or baking dish (or a seasoned Spanish cazuela). Add the remaining minced garlic and the bay leaf and bake until sizzling, about 3-5 minutes.


Add the shrimp and marinade to the sizzling oil, and return the dish to the oven. Bake (stirring once) for another 3-4 minutes, or until the shrimp are cooked through. The shrimp is done when there is no more gray, but rather all the shrimp are whitish-pink. For me this took several minutes longer, just keep an eye on it. Remove shrimp from oven. Throw out the bay leaf and season with additional salt (if necessary).


Meanwhile, drain cooked pasta and put in a large bowl. When shrimp is done, toss shrimp and oil with the pasta, until pasta is coated. Sprinkle with parsley. Serve immediately.


*If you don't peel and devein the shrimp, make sure you tell your family they'll have to do it at their plates.

Blog Widget by LinkWithin