Thursday, April 29, 2010

Paul's Grilled Cabbage

~~~~~~~
**I wrote this post on my actual birthday, April 9,
but couldn't get the pictures to load.
So here it is, 20 days later!!**

~~~~~~~


I know what you're thinking, because I was thinking the same thing. It just sounds sort of nasty, right? My mom mentioned it yesterday on the phone, one of my parents' friends in Florida was bringing some over for dinner. Okay then, whatever. (I do like raw cabbage, but I'm not a fan of cooked cabbage, unless it's in my Corned Beef & Cabbage)

But then today, when I talked to my dad, he was kind of raving about the cabbage. And describing it to me in detail, telling me exactly how to make it. He said they dug in with forks when Paul arrived, then had more with dinner. He said my mom (who doesn't really like cabbage) liked it a lot. He said it had bacon in it. I grabbed a pencil.

I've never met Paul, but I know for a fact that he thinks I'm hot. He told me so on the phone last year. So despite his advanced years, I guess he gets a point for that one. Sort of. And if he can cook too, well that's a bonus. (Little does he know, I don't generally look like a model. Just the one time when I was actually modeling. Generally I look like I could use a shower, a nap, or at least a hairbrush! Haha.)

So I figured this would go great with the grilled steaks we're planning to have for my birthday dinner tonight. Did I tell you I'm 40 today? I know it's unbelievable.

I don't have any measurements, but when you're grilling you should feel free to wing it a bit. That's what I do.


Paul's Grilled Cabbage. With Bacon.

1 head of cabbage, sliced in 6-8 wedges (core and all)
12-16 slices of bacon (I'm using thick bacon, so I'm using 6-8 slices)
butter, softened
minced garlic (I used garlic powder)
salt
pepper (I forgot about the pepper)


Preheat your grill to low. (I used a grill pan because my grill is still over at the bunkhouse).


Cut rectangles of aluminum foil that can be wrapped around an upright cabbage wedge. Place 1 or 2 strips of bacon in the middle of each piece of foil, then perch a cabbage wedge on top. Standing up.

Spread about 1 tablespoon or so of butter on the top of each wedge (or if you don't have softened butter, you can balance a slice of butter on top of the cabbage wedge. I'm speaking from experience, of course). Sprinkle each wedge with minced garlic and salt, or garlic salt (or garlic powder + salt). Grind some fresh pepper of each wedge.


Carefully wrap up each wedge, starting by bringing the long edges to the top above the wedge and folding down securely, then folding the edges in securely as well to make little packets of cabbage and bacon that will remain standing up. (If your foil just isn't big enough, cut a new piece. Don't feel badly, I had to do it too).

Place each packet on the grill, bacon side down, and grill over low heat for 1 hour. Carefully unwrap and serve! The cabbage will be perfectly cooked, not too mushy, and the flavors are wonderful.

Wednesday, April 28, 2010

Taste & Create: Curried Tilapia with Coconut Rice & Wilted Spinach


It's Taste & Create time again! T&C was created by Nicole of For the Love of Food. It's a super fun event in which food bloggers are paired off and tasked with preparing a recipe from their partner's blog.

This month, I ended up with two partners, including Megan of A Bolder Table. So hard to choose just one recipe! I did a search for coconut, and found this recipe for Curried Mahi Mahi with Coconut Rice.

First, I had to figure out what Kecap Manis is...I couldn't find it at the store (I don't think anyone is surprised by this), so I decided to hunt for a recipe. I found a recipe at Gourmet Sleuth spelled Ketjap Manis, but of course I changed it. You can find the Kecap Manis recipe here.

Next, mahi mahi isn't available at our store either. I know, it's unbelievable. Luckily, since they installed the new freezer in the meat section, we can get frozen tilapia that's very good and very affordable. So I decided to go with that, and I'm going to grill the fish. I'm not a big fan of broiling...

Megan didn't say how much fish to use, so I just thawed five filets, enough for the four of us and an extra just in case.

Other than the grilling, I pretty much followed Megan's recipe. My notes are in italics below. At the last minute I decided to use my trusty grill pan, well-oiled.

I ended up grilling the fish on my grill pan for about 6 minutes per side, and it was perfectly cooked!


Curried Tilapia is EXCELLENT. We will definitely be making this again. Coconut Rice got mixed reviews, and all but one loved the spinach. What a great meal! Thanks, Megan!

Curried Tilapia with Coconut Rice & Wilted Spinach

When the fish is thawed, marinate it for an hour or so.
For this dish the marinade is:
  • 1 tablespoon peanut oil*I used 2 tablespoons oil because the marinade seemed too thick
  • 2 tablespoons coconut fat (from the top of an undisturbed can of coconut milk)*my coconut milk didn't have any fat on top, it was more of a solid, so I just scooped out 2 tablespoons
  • 1/2 tablespoon onion powder
  • 1/2 tablespoon garlic powder
  • fresh ground black pepper
  • Aleppo pepper (or red pepper flakes)*I left this out because I have two small boys
  • 1 teaspoon turmeric
  • a pinch of paprika
  • a pinch of ground coriander
  • 2 TB Kecap Manis (known as Sweet Soy Sauce in Indonesia)
Whisk the marinade together until well combined, turn fish to coat evenly. Let the fish marinate in the fridge for an hour or so while prepping the rest of the meal. When the rice is almost done, start broiling or grilling the fish, flipping it once, for about 5 minutes on each side or until flaky.

To make Coconut Rice:

Follow instructions for the rice of your choice, but add some coconut milk and fat to the water while it cooks. Super simple and delicious. *I used half water and half coconut milk.

We also did as Megan did, and wilted some fresh spinach in a pan with some peanut oil and a little soy sauce for some greens on the side.

Monday, April 26, 2010

Kecap Manis

This is a recipe to go along with one of my Taste & Create entries this month, Curried Tilapia with Coconut Rice, which calls for Kecap Manis.

First, I had to figure out what Kecap Manis is...besides an Indonesian sweet soy sauce. I couldn't find it at the store (I don't think anyone is surprised by this), so I decided to hunt for a recipe. I found a recipe at Gourmet Sleuth spelled Ketjap Manis, but of course I changed it. I decided to use jaggery instead of sugar, and the only lemongrass I could find was in a tube. Luckily it stores "indefinitely" in the refrigerator because I only need a couple tablespoons for the fish!

Here's the recipe, adapted from Gourmet Sleuth.


Kecap Manis
Makes about 1 1/4 cups.

3/4 cup jaggery
1 cup Tamari (or soy sauce)
2 tablespoon water
1 tablespoon minced lemon grass
1 clove garlic, minced
1 star anise

Caramelize jaggery in a heavy pot.**

Gradually stir in the rest of the ingredients. Bring to a boil, lower heat and simmer for 10 minutes.

Cool and strain through cheesecloth. I couldn't find my cheesecloth, so I just used the finest sieve I have, and funneled it into an old soy sauce bottle. It will store in the fridge indefinitely!


**This is a weird process, jaggery doesn't caramelize like granulated sugar does...it will melt on the underside, but the top doesn't become shiny. When it was mostly caramelized, I stirred it (a huge no-no in the sugar world, I know). Then I added the liquids--not gradually enough, I might add. The jaggery hardened up immediately. I boiled/simmered longer than 10 minutes to try to incorporate the jaggery.*

Sunday, April 25, 2010

CADILLACS ~ PARMESAN ROAST BEEF SANDWICHES, DINER STYLE

As I get older I have noticed that there are fewer and fewer mom and pop style diners. I find this very sad. Some of the best soups, salads and sandwiches I have ever had were diner style. With all the chain restaurants these days they do okay, but they also do formulaic recipes with as few ingredients as they can get away with to make it palatable, at least in my opinion. This recipe I made from memory of a fantastic sandwich I had in a roadside diner somewhere in Texas many years ago.


PARMESAN ROAST BEEF SANDWICHES
8 ounces thinly sliced roast beef (close to shaved)
1 firm tomato
1 medium onion, thinly sliced
4 ounce can mild green chiles,
VERY well drained*
4 slices thick quality sourdough bread

1 cup shredded sharp cheddar cheese

6 tablespoons Parmesan cheese
4 tablespoons butter

2 tablespoons Worcestershire sauce

mayonnaise
  • Heat 1 tablespoon butter over medium heat in a small skillet.
  • Saute' onions until JUST tender.
  • Add green chiles and Worcestershire sauce. Drain well if there is any excess oil.
  • Toss roast beef with onion mixture until heated through and well blended.
  • Grill the tomatoes until cooked through.
  • Butter 2 bread slices. Sprinkle Parmesan cheese over butter and immediately press down gently so cheese nestles into the butter. This will form a crispier crust.
  • Press bread buttered side down on hot grill.
  • Add grilled tomatoes.
  • Top with shredded cheese.
  • Top with roast beef mixture.
  • Spread mayonnaise on top slices of bread and top sandwiches.
  • Spread butter on top side of bread and sprinkle with Parmesan cheese, pressing firmly again to imbed Parmesan cheese.
  • Flip sandwiches and grill until golden.
*I accidentally picked up jalapenos this last time.
NOTE to self. ALSO good, but way HOT!!!
aprons 3

Tuesday, April 20, 2010

Strawberry Almond Butter Tart

I had planned to make Pine Nut Cookies tonight, as a quick dessert for an impromptu dinner party with old friends. Then I came home and facebook informed me that it was one of said friend's birthday, so plans quickly changed.

Yesterday I bought a case of strawberries because they were on sale (and I had delusions about finding time to make jam during this seriously busy week). I raided the strawberries, and the pantry, and found all the ingredients for this quickly assembled, yet impressive, tart.

The recipe comes from the cookbook Short and Sweet: Sophisticated Desserts in 30 Minutes or Less, which I often turn to for quick and impressive desserts. Although this tart pushes the 30 minute time frame, it is excellent and really doesn't take much longer. Unless, like me, you've broken multiple egg slicers using them on strawberries, and in fact are in between egg slicers and have to slice the strawberries by hand. Then I'd say it takes closer to an hour.


I always slice the strawberries, I think it looks better that way. This time I did wedge three whole strawberries in the middle.


Everyone enjoyed this dessert! Happy Birthday, Stacey!

Strawberry Almond Butter Tart
8 servings

1/2 cup (4 ounces) canned almond paste, broken into 6 pieces (I always use the whole 7-ounce tube, with no other adjustments--works every time)
1/2 cup granulated sugar
10 tablespoons unsalted butter, cut into 15 pieces
3 large eggs
1/2 cup all-purpose flour
1/2 cup purchased lemon curd or 1/3 cup lemon or apricot jam or preserves (I've used both lemon curd and apricot preserves, both are delicious)
2 pints strawberries, hulled

Preheat the oven to 375 degrees F. Coat a 9- or 10-inch tart pan (with or without a removable bottom) with nonstick oil spray. In a food processor, blend the almond paste with the sugar and butter until smooth, stopping once or twice to scrape down the sides, about 20 seconds total. (this always takes me longer than 20 seconds)

Add the eggs and process until blended, about 10 seconds. Add the flour and process until blended, about 5 seconds.

Spread the dough in the prepared pan. Bake until the top is golden and springs back when lightly pressed, 20 to 25 minutes. Cool in the pan on a rack for at least 8 minutes. (The pastry can be stored at room temperature, covered, for 1 day or frozen for up to 1 month).

Spread the top of the pastry with the lemon curd or jam. Leave the berries whole if they are small or slice them if they are large. Cover the top with whole berries, hulled sides down, or overlap the sliced berries to cover the top. Serve immediately or refrigerate for up to 4 hours before serving.

Monday, April 19, 2010

Taste & Create: Moo Goo Gai Pan


It's Taste & Create time again! T&C was created by Nicole of For the Love of Food. It's a super fun event in which food bloggers are paired off and tasked with preparing a recipe from their partner's blog.

This month, I ended up with two partners. Chaya, of Sweet & Savory Says it All was one of them. I chose Chaya's Moo Goo Gai Pan, which she had adapted from Sweet & Simple Recipes. I decided to go back to the recipe's roots for this one. Please refer to the link above for Chaya's eggless version.

Shell was here visiting for the week, so we decided to make this recipe together. We decided the garlic salt would have to go, so I simply minced some fresh garlic and sauteed it with the ginger in the beginning.

We doubled the recipe, so I fried the chicken in batches. I really think the egg white is an essential ingredient, it really made the chicken taste authentic. I don't know if the egg white is authentic or not, but I wouldn't leave it out.


I was so busy eating this delicious chicken that I have forgotten everyone's reactions. Other than to say that everyone loved this chicken, and the leftovers were tasty too. We served it with brown rice. I will definitely be making this again!


Moo Goo Gai Pan Recipe
Serves 4

4 boneless, skinless chicken breast halves
1 egg white
1 tsp. white wine
2 tsp. cornstarch
4 Tbsp. vegetable oil, divided
3 slices ginger root
2 cloves garlic, minced
1 1/2 cups snow peas
1 1/4 cups sliced mushrooms
3/4 cup chicken broth
1 Tbsp. cornstarch
1 Tbsp. water
Salt, to taste

1. Cut the chicken into bite size pieces. In a large bowl, mix the egg white and wine. Add the chicken and toss to coat well.

2. Sprinkle 2 teaspoons of the cornstarch over the chicken and toss to coat; set aside.

3. In a large skillet, heat 3 tablespoons of the vegetable oil on high heat. Sauté the ginger root and garlic for 30 seconds.

4. Add the chicken to the skillet and stir fry until cooked through. Transfer the chicken mixture to a bowl.

5. Heat the remaining vegetable oil in the skillet. Add the snow peas, mushrooms and stir. Reduce the heat to medium.

6. Add the chicken broth to the skillet and bring to boiling. Add the chicken mixture. Cook until the mixture comes to a boil, stirring frequently.

7. In a small bowl, combine the water and the remaining cornstarch and mix well. Stir into the chicken mixture. Heat until thickened, stirring constantly. Season with salt to taste.

Sunday, April 11, 2010

Taste & Create Partner List!


It's that time again! Here is the Taste & Create partner list! Please remember to submit your creations to Nicole's Taste & Create website by April 24th. If you have any questions or problems, please feel free to email me at cowgirlmin07 [at] gmail [dot] com.

Have fun!!


A Bolder Table & The Bad Girl's Kitchen


Eats Well With Others & My Year on the Grill


One Little Corner of the World & Macon Dinner


No Reason Needed & Always Eat on the Good China


Culinary Delights & The Misadventures of Mrs. B


Sweet and Savory Says It All & The Bad Girl's Kitchen


If you'd like to enter next month's Taste & Create, the fabulous event which pairs food bloggers randomly and tasks them with preparing one of their partner's recipes, please visit the how it works page for an email address to sign up~sign up deadline is the 8th of the month. And don't forget to tell your friends how fun this event is!

Tuesday, April 6, 2010

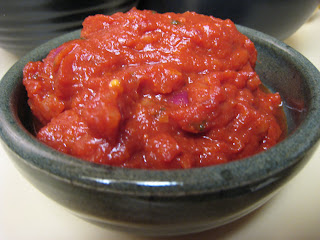
Sweet and Sour BBQ Sauce


This BBQ sauce is based off of the flavors from a traditional Vietnamese Sweet and Sour recipe given to me by an amazing chef named Duc in Hoi An, Vietnam.


First I made this pineapple and onion mix and sauteed it on medium for 10 minutes until the onions were soft and the pineapple was partially cooked. I used:
  • 1/4 red onion, chopped
  • 4 cloves garlic, finely chopped
  • 1 cup pineapple, coarsely chopped
  • 1/2 cup white wine
  • green onion
I removed that from heat and started to mix together the base for my BBQ sauce.


I combined the following ingredients and mixed well.
  • 1 six ounce can tomato paste
  • 1/4 cup maple syrup
  • 3 TB soy sauce
  • 2 TB rice wine vinegar
  • 1 TB onion powder
  • 1 TB garlic powder
  • 1 TB toasted sesame oil
Then, I put the BBQ sauce base in my Vita-Mix with all but 1/2 cup of the pineapple onion mixture and blended it for 30 seconds or so.

Monday, April 5, 2010

Roast Duck

It has been years since I've roasted a duck. In fact, Number One says I've never roasted a duck for him, and we've been married now for over seven years. The time is long overdue.

The other day, I had to make some room in the freezer, so I pulled out a duck. I decided it would make a nice Easter dinner, if not exactly a traditional one.

I rinsed the duck, inside and out, and removed the giblets from the cavity. I believe when I used to roast ducks, I stuffed the cavity with a whole orange and a whole apple, because that is the way my friend's grandmother roasted ducks. This time, I cut the orange and the apple in half before stuffing all four pieces in the cavity. I also rubbed the outside of the duck all over with kosher salt. I put the giblets (minus the neck) in the bottom of a roasting pan, with about an inch of water. The duck, salt-covered and stuffed with fruit is sitting on a rack in the roasting pan.

I preheated the oven to 375 degrees F (as directed on the duck package). This baby is almost 7 pounds, so it will roast for approximately 2 1/2 hours, or until a thermometer inserted in the thigh reads 180 degrees F, the legs move freely and the juices run clear.


This is a very easy and very delicious dinner. We served it with a salad and lightly sauteed asparagus and mushrooms.


Roast Duck

1 whole duck, giblets removed and rinsed
1 whole orange (cut in half if desired)
1 whole apple (cut in half if desired)
Kosher salt

Preheat oven to 375 degrees F. Place duck on rack in roasting pan. Place orange and apple in cavity. Place giblets in the bottom of the pan, along with about 1 inch of water. Rub entire duck with Kosher salt (a few tablespoons total).

Roast duck according to weight (see list below), or until a thermometer inserted in the thigh reads 180 degrees F, the legs move freely and the juices run clear. Keep an eye on the duck, add water if needed, and if the duck is getting too brown, loosely drape a piece of foil over the top for the last 1/2 hour or so.

4 pounds, 1 hour 25 minutes
4 1/2 pounds, 1 hour 40 minutes
5 pounds, 1 hour 50 minutes
5 1/2 pounds, 2 hours
6 pounds, 2 hours 15 minutes
6 1/2 pounds, 2 hours 25 minutes

HAM & CHEESE QUICHE

I have used this same recipe for traditional quiche for years and adapted it today to use what I had on hand. It was a pleasant success.

Be sure and visit me over at Always Eat On The Good China for more great recipes.


1/2 pound diced ham
1 cup finely grated sharp cheddar cheese
1 shallot finely chopped
4 eggs
2 cups whipping cream
1 teaspoon sea salt
1 teaspoon white pepper
1 teaspoon sugar
1 deep pie crust
  • Preheat oven to 425°.
  • Pre-bake the pie crust and cool before filling.
  • Lightly saute shallot and ham.
  • Sprinkle the ham and onion and grated cheddar cheese evenly into crust.
  • Beat the eggs, whipping cream and seasonings until well blended. Pour over mixture in pie crust.
  • Bake 15 minutes and then reduce heat to 300° and bake an additional 35-45 minutes or until just golden and knife comes out clean.
  • Let stand 10 minutes before slicing.
aprons 3

Saturday, April 3, 2010

Sauce Vinaigrette [French Dressing]

Another recipe from Julia's Mastering the Art of French Cooking, to round out the menu for book club today.

La Carte

Râpée Morvandelle
Gratin of Shredded Potatoes with Ham and Eggs and Onions

Salad Composée avec sauce vinaigrette
Mixed Salad with Vinaigrette

Charlotte Malakoff aux Fraises

Almond Cream with Fresh Strawberries


I made everything on Friday, all I have to do today is toss the salad with dressing, and bake the Gratin (which smells fantastic, by the way). Of course this vinaigrette was the easiest part! I can't wait!

***Pictures soon!***


Sauce Vinaigrette

[French Dressing]
For about 1/2 cup

For: salads and simple marinades
Salad dressings are always best when freshly made; if they stand around for several days they tend to acquire a rancid taste.

1/2 to 2 tablespoons good wine vinegar or a mixture of vinegar and lemon juice
1/8 teaspoon salt
Optional: 1/4 teaspoon dry mustard
6 tablespoons salad oil or olive oil
Big pinch of pepper

Optional: 1 to 2 tablespoons minced green herbs, such as parsley, chives, tarragon, basil; or pinch of dried herbs

EITHER beat the vinegar or lemon juice in a bowl with the salt and optional mustard until the salt is dissolved, then beat in the oil by droplets, and season with pepper, OR place all ingredients in a screw-top jar and shake vigorously for 30 seconds to blend thoroughly.

(guess which method I chose?)

Stir in the optional herbs and correct seasoning just before dressing the salad.

Friday, April 2, 2010

Charlotte Malakoff aux Fraises [Almond Cream with Fresh Strawberries]


I was looking for a quick dessert to serve to the girls in our book club, to round out the menu with Râpée Morvandelle and Salad with Sauce Vinaigrette. This almond cream with fresh strawberries sounds like it will fit the bill beautifully.

I have opted to not use ladyfingers, as Julia said I could. She wrote, "If you cannot buy [ladyfingers], or have not the time to make them, omit the ladyfingers altogether and turn the almond cream into a ring mold [not]...or into a serving dish, or into individual dessert cups." Individual dessert cups I can do. She continues, "Although the dessert cannot then be called a charlotte Malakoff, it will still be delicious, and can be nicely decorated with fresh strawberries."

I wish she had said what it would be called...I have no idea, so I'm still calling it Charlotte Malakoff. I won't go into detail about the molding/unmolding and all the directions for the inclusion of ladyfingers because that's not how I'm making mine. I'll just tell you how I'm serving these, and call it good. And hopefully delicious!

I love this dessert. Everyone loved this dessert. It is so creamy, yet light, and just so good and beautiful.


Charlotte Malakoff aux Fraises
Almond Cream with Fresh Strawberries-a cold dessert
For 8 to 10 people

Preparing strawberries: Hull 1 quart fresh strawberries. Wash them quickly if necessary, and set on cake rack to drain thoroughly. Thinly slice about half the strawberries. (my addition)

The almond cream:

1/2 pound softened unsalted butter
1 cup sugar (preferably the very finely granulated" instant type)
1/2 cup orange liqueur
1/4 teaspoon almond extract
1 1/3 cups pulverized almonds

2 cups chilled whipping cream
a chilled bowl
a chilled beater

Cream butter and sugar together for 3 to 4 minutes, until pale and fluffy. Beat in orange liqueur and almond extract. Continue beating for several minutes until sugar is completely dissolved. Beat in the almonds.

Whip the cream until the beater, drawn across the top of the cream, leaves light traces. Fold the cream into the almond and butter mixture.

Divide a third of the almond cream into individual serving dishes. Neatly top each dish of almond cream with a layer of sliced strawberries. Repeat with another layer of almond cream and sliced strawberries, and finish with the almond cream. Refrigerate for 6 hours or overnight.

Just before serving, top each dish with a couple whole strawberries, husk end down.

**I had planned to top each dish with whole strawberries, but mine were just too big. I sliced all the strawberries and arranged one whole sliced berry on top of each dessert dish.

Thursday, April 1, 2010

Râpée Morvandelle [Gratin of Shredded Potatoes with Ham and Eggs and Onions]

My friend Jenny started a book club last year, and last month it was finally my turn to choose a book! It may not come as a surprise that I chose Julie and Julia. I had been wanting to read the book, but before I had a chance to, my step-mother-in-law and I went to see the movie together. She said something like, "it's about food, and blogging, and I knew you'd love it!" She is so very thoughtful, and we had a wonderful afternoon at the theater.

As soon as the book arrived (I wanted it in hardcover, not the movie tie-in re-release), I pored through it. Then I started in on Julia's My Life in France. I won't give away everything about the book, other than to say I loved it. I was also happy to see my favorite Poulet au Porto make an appearance (if only briefly on screen) in both movie and book! My only complaint is that I WANT TO KNOW what Julia said about Julie!! But no such luck.

Of course this all coincides with our trip to France this coming July!

So anyway, back to the dish at hand. Since I chose the book, I am hosting the book club gathering on Saturday. I wanted to serve something delicious (yet simple?) and of course it simply had to be out of Julia's Mastering the Art of French Cooking. (which may automatically seem to be an oxymoron in Julia's book) And I have to admit, I could never ever attempt Julie's "cook every recipe in the book" feat with this book. It's just too complicated and to me, it's hard to follow. Sorry, Julia, I had to say it. But the recipes I have tried have been fabulous!!

I was happy to find a little note in this recipe that read: "(*) May be prepared ahead to this point." Perfect.

This is a Gratin of potatoes, with ham, eggs and onions. I think it will be perfect with a simple salad served with Julia's vinaigrette.

This dish was fabulous, and there wasn't a crumb left, although I must admit I probably wouldn't make it very far in advance the next time...the potatoes didn't fare well in the fridge overnight, although they weren't too far gone to rescue. I should have put some plastic wrap directly on the mixture to prevent the blackening...and as Julia said, "who will ever know?" I'm just telling you so you can avoid it!


Râpée Morvandelle
Gratin of Shredded Potatoes with Ham and Eggs and Onions
For 4 people

1/2 cup finely minced onions
2 tablespoons olive oil
2 tablespoons butter
1/2 cup (3 ounces) finely diced cooked ham
4 eggs
1/2 clove crushed garlic
2 tablespoons minced parsley and/or chives and chervil
2/3 cup (3 ounces) grated Swiss cheese
4 tablespoons whipping cream, light cream, or milk
Pinch of pepper
1/4 teaspoon salt
3 medium-sized potatoes

2 tablespoons butter
An 11- to 12-inch baking dish or skillet about 2 inches deep or individual baking dishes about 6 inches in diameter
1/2 tablespoon butter cut into pea-sized dots

Preheat oven to 375 degrees.

Cook the onions slowly in the oil and butter for 5 minutes or so, until tender but not browned.

Raise heat slightly, stir in ham, and cook a moment more.

Beat the eggs in a mixing bowl with the garlic, herbs, cheese, cream or milk, and seasonings. Then blend in the ham and onions.

Peel the potatoes and grate them, using large holes of grater. A handful at a time, squeeze out their water. Stir potatoes into egg mixture. Check seasoning. (*) May be prepared ahead to this point.

Heat the butter in the baking dish or skillet. When foaming, pour in the potato and egg mixture. Dot with butter. Set in upper third of preheated oven and bake for 30 to 40 minutes, or until top is nicely browned. Serve directly from the dish or skillet.


Blog Widget by LinkWithin