Showing posts with label Breads. Show all posts

Tuesday, November 22, 2016

WENDY'S BRAN MUFFINS

The worst aspect of this recipe may be that it is scaled to make only eight muffins. However, the recipe can be doubled easily, and I recommend that you do double it if you are baking for more than one. Another option is to use the recipe as-is to make about 26 bite-sized muffins; those take about 10 minutes to bake.

I make a single batch for just myself. Typically, I eat three muffins the first day and finish the batch over the next couple of days. I eat the muffins warm or at room temperature. I eat them without butter or jam. However, I have eaten them with a slice of Cheddar cheese.

This is a good recipe for kids to try and, if they like the results, to add to their personal cookbook of recipes kept in a binder.


Wendy’s  Bran  Muffins
Makes 8

1 cup wheat bran
1/2 cup all-purpose flour
1/4 cup whole-wheat flour
1/4 cup brown sugar
1/2 teaspoon baking soda
1/2 teaspoon salt
1/3 cup chopped walnuts, if desired
1 egg
3/4 cup buttermilk at room temperature
1/4 cup vegetable oil
1/2 teaspoon vanilla extract


1. In a medium-sized bowl, stir together bran, all-purpose flour, whole-wheat flour, brown sugar, baking soda, and salt. 
2. If desired, add walnuts and then stir.
3. In a small bowl, beat egg.
4. Add buttermilk, vegetable oil, and vanilla extract to beaten egg; beat well.
5. Make well in dry ingredients and pour combined wet ingredients into well.
6. Stir gently only enough to moisten dry ingredients.
7. Divide batter evenly among eight greased or paper-lined regular-sized muffin tins.
8. Bake in 375°F. oven for 12 to 14 minutes. Serve warm or at room temperature.

NOTE: To go fancy, add a half walnut to the top of each uncooked muffin.


Unbaked mini-muffins
Baked full-sized "fancy" muffin
Baked mini-muffins


Monday, February 1, 2016

CHEDDAR SCONES

I took these scones to an after-church potluck, cutting them into bite-sized pieces. They are yummy and fattening and have little redeeming value in terms of nutrition. When making them at a high elevation, use scant measures of the baking powder and baking soda.


Cheddar  Scones
Serves 8 or more


2 cups all-purpose flour
1 tablespoon baking powder
1 teaspoon baking soda
1/2 teaspoon dried thyme leaves
1/4 teaspoon salt
6 tablespoons butter, frozen
2 cups (8 ounces) sharp Cheddar cheese, shredded
2 large eggs
2/3 cup buttermilk plus additional 2 tablespoons


1. In medium-sized bowl, stir together flour, baking powder, baking soda, thyme, and salt.
2. Grate frozen butter into bowl. Stir.
3. Add shredded Cheddar cheese to bowl and stir.
4. In small bowl, whisk eggs. Then whisk in 2/3 cup buttermilk.
5. Add wet ingredients to well made in dry ingredients. Stir with fork just until dough holds together.
6. Knead dough on lightly floured surface for only about 10 times.
7. Pat to about 1-inch thickness. Cut into desired shapes. For instance, small pieces for appetizers, wedges for dinner bread.
8. Place scones on large ungreased cookie sheet about 2 inches apart.
9. Brush tops lightly with remaining buttermilk.
10. Bake scones for 12 to 20 minutes, depending on size of scones.

11. Serve warm.

Friday, August 29, 2014

Sunset's Versatile Cornbread

Sunset Magazine's  Versatile Cornbread
Serves 6

1 cup all-purpose flour
1 cup yellow cornmeal
2 tablespoons to 1/3 cup granulated sugar
2-1/2 teaspoons baking powder
3/4 teaspoon salt
2 large eggs
1 cup buttermilk
1/4 cup butter, melted and cooled

In a bowl, stir together flour, cornmeal, sugar to taste, baking powder, and salt.

In another bowl, beat eggs.  Add buttermilk and melted butter to eggs and beat well.

Pour liquid mixture into flour mixture and stir just until batter is evenly moistened.

Bake batter in buttered 8-inch square pan in a 400°F. oven until bread springs back when lightly pressed in the center and it begins to pull from the pan’s sides, about 25 minutes.

Cut bread into 9 squares. Lift from pan with a slender spatula. Serve hot or cool.

NOTE:
Yogurt may not be substituted for buttermilk here.
May use 6 mini-loaf pans instead of square pan.

Sunday, February 9, 2014

Coconut Lime Pull-Apart Bread

You probably know I regularly participate in a couple monthly blog events.  Both of these events expose me to new food blogs, and who doesn't enjoy perusing new blogs?  ;-)

Taste & Create is a fun one, (created by my friend Nicole who passed the torch to me when she opened her own bakery/cafe in Germany), in which participants are randomly partnered up and tasked with creating a recipe from each other's blog.  (click the link above and email me at cowgirlmin07[at]gmail[dot]com if you'd like to join us!)

The Secret Recipe Club is interesting too, participants are assigned blogs and make recipes, but there are no partners, everyone is in sort of a daisy-chain of food.  (click on the logo at the bottom of this post to get on the list for this one)

This month, the blog I was assigned for Secret Recipe Club was:


It didn't take long to decide on one of Jeanie's Pull-Apart Breads!  The hard part was deciding whether to make Orange or Coconut Lime!!  A quick question to Number One, and Coconut Lime Pull-Apart Bread was the winner.

This bread goes together easily, rises beautifully and isn't too hard to put together, if a bit messy!

The results are so good that we'll be making this again, in Orange, Cinnamon, and whatever other flavor we can think of!


Coconut Lime Pull-Apart Bread, before glazing


Coconut Lime Pull Apart Bread
 Adapted from The Tasty Cheapskate
Makes 1 loaf 
Prep time: 20 minutes
Rise time: 1 1/2 hours
Cook time: 30 minutes

1/3 cup milk
1/4 cup butter
1/4 cup water
1/4 cup sugar
2 1/4 teaspoons yeast
1 1/2 teaspoons vanilla
2 eggs
2 3/4 cups all-purpose flour (added by the cup)

Filling:

1/2 cup sugar
1/4 cup butter, melted
Grated zest of 2 limes (reserve about a teaspoon or so for topping)
1/2 cup coconut (I prefer dried raw, unsweetened)

Heat milk and butter until butter melts (Jeanie does this in the microwave, so I did too). Add cool water, so that the mixture is warm to the touch, but not hot (about 110 degrees). Stir in yeast and sugar. Add eggs and vanilla and mix well.

To this, add 1 cup of flour and mix. Then add another cup of flour and mix. It should be about ready to turn out to knead. (If not, add another 1/2 cup flour). Turn it out to knead adding remaining flour as it gets sticky. I actually ended up using 3 cups of flour total, including what I put on the pastry sheet and kneaded in. The dough should be soft, but not sticky.  It is a nice, substantial dough.

Place dough in a bowl, cover with a lint-free towel and let rise for about an hour, until doubled in size.

Punch the dough down and roll it out into a rectangle that is about 12 x 20 inches, about 1/4 inch thick, on a well-floured surface.

Melt butter for filling and drizzle it on, spreading around with a pastry brush so it covers the entire surface area.

Mix sugar, lime zest and coconut well.  Sprinkle evenly over dough.

Cut the dough short-ways into 5 (12x4") strips.  Stack the strips on top of each other. I scooped up the sugar, zest and coconut that fell off and sprinkled it back on the layers.

Cut this long stack into 6 rectangles that are roughly 2 inches wide. Carefully stack them cut side up in a well-greased loaf pan.  Scoop up any sugar mixture that's fallen off and sprinkle it on top.

Cover and let the loaf rise again.

Bake at 350 degrees F for 30-40 minutes. 

Jeanie says:  "The top will get a little crusty and you'll worry you might be cooking it too long, but don't worry, that's just caramel-y sugar forming on top. Remove from oven, let it cool slightly, and then take it out of the pan and, yup, tear it apart." 

Unless you want some glaze, in which case, continue on:


Coconut Lime Glaze

4 tablespoons coconut milk
1- 1 1/2 cups powdered sugar
juice from one lime
reserved lime zest for looks

Mix together and pour over bread while it's still warm.
THEN tear it apart and enjoy!!


Secret Recipe Club

Sunday, November 10, 2013

Homemade Soft Pretzels

I thought I'd tell you:  I regularly participate in a couple monthly blog events.  

Taste & Create is a fun one, (created by my friend Nicole who passed the torch to me when she opened her own bakery/cafe in Germany), in which participants are randomly partnered up and tasked with creating a recipe from each other's blog.  (click the link above and email me at cowgirlmin07[at]gmail[dot]com if you'd like to join us!)


The Secret Recipe Club is interesting too, participants are assigned blogs and make recipes, but there are no partners, everyone is in sort of a daisy-chain of food.  (click on the logo at the bottom of this post to get on the list for this one)

This month, the blog I was assigned for Secret Recipe Club was:


I was initially tempted by Dee's various apple recipes...Apple Pie Swedish Pancakes led to Apple and Walnut Coffee Cake and Apple Skillet Pancake and
Apple Almond Crostata and...and...and...

Somehow, I ran across this recipe for a savory, spicy little treat called Jalapeño Three-Cheese Swirls.  And at that moment, I had chosen.  Or so I thought!

When I had gathered the ingredients and the time came to make the Jalapeño Swirls, I clicked over to Dee's pizza dough recipe, where I stumbled across THIS

I've been wanting to make Soft Pretzels for years, and never bit the bullet.  The Time Is NOW.


I was really intrigued with the sausage-wrapped pretzel option, but I'm all out of sausages of any sort.  Next time.  For now, I'm just going with a classic Soft Pretzel.  And I am SO EXCITED!!!

The dough is super easy to mix up.  The trickiest part is getting the pretzels OUT of the simmering water...I used a slotted spoon, but was wishing for a flatter utensil which must be down at the ranch!  Take it from me, tongs definitely do NOT work!  ;-)

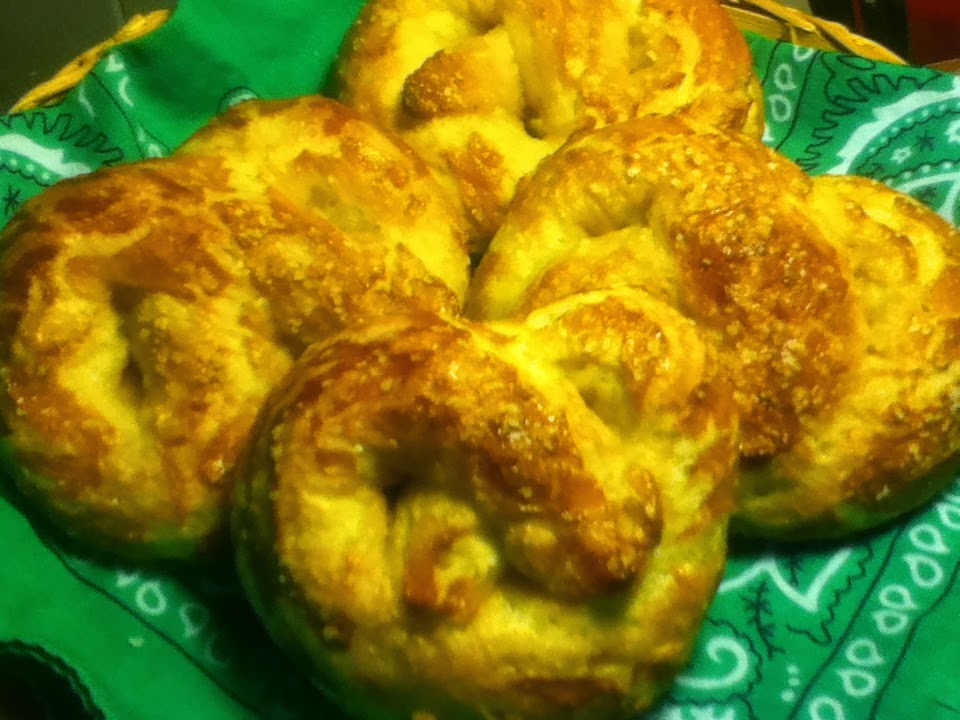
The other tip I would add:  roll the pretzel "snakes" long and skinny, then form.  We shaped ours not taking into account the rising they would do, so they turned out more like rolls than a classic pretzel.  Not that I'm complaining!


For some reason our first pan also came out a lot lighter than Dee's...I baked the second pan a few minutes longer, and they browned right up.  I may actually prefer the lighter, softer pretzels as opposed to the crunch of the darker pretzels.  I think I'll need to keep making and eating more pretzels to "perfect" this recipe!  ;-)  Delicious with a dab of Dijon!  Can't wait to try them with sausage inside.


Homemade Soft Pretzels

Recipe adapted from On The Move, via Growing Up Gabel


1 cup warm water
1 Tablespoon active dry yeast
1 Tablespoon sugar
2 Tablespoons oil
1 teaspoon salt
2¾ cups all-purpose flour
 
12 cups water
¼ cup baking soda
 
1 egg yolk, lightly beaten
1 Tablespoon water
Coarse salt, to taste


In a large bowl, combine water, yeast, and sugar.  Add 1 cup flour.  Add in oil and salt and 1 more cup of flour. Stir to combine.

Add enough flour to make a smooth, elastic dough, slightly tacky is fine. (At this point, I hadn't realized that the "enough flour" was about 2 3/4 cups, so I think I only used about 1 additional cup--it seemed to match the smooth, elastic, slightly tacky description...Fingers crossed!)  Knead dough a few times in the bowl.  Cover bowl and let dough rise until doubled (about 1 hour).

Pre-heat oven to 475 degrees. Grease baking sheets. (I used parchment paper instead)

Bring the 12 cups of water to a boil in a large stock pot. SLOWLY add in baking soda (slowly to minimize foaming). Keep water simmering.

Gently punch down dough and divide in to 6 or 12 pieces (depending on size of pretzel you want).

Roll each piece of dough out to an 12-18″ rope. Shape in to pretzel shape and pinch ends to close up. OR, use a dough rope to wrap up a link or smaller piece of sausage, encasing it completely and pinching the ends to secure. Repeat with remaining dough and sausages.

Boil each pretzel for 10-15 seconds, making sure all sides are boiled.  Place pretzels on greased baking sheets, 1 inch apart.  Cover pretzels and let rest for 5 minutes.

Whisk together egg yolk and water and then brush on top of pretzels. Sprinkle salt on pretzels.  Bake for 10-12 minutes or until golden brown.


Secret Recipe Club

Tuesday, September 24, 2013

Pumpkin Streusel Bread

(marks on top are from turning out onto rack)

I saw a recipe for Vegan Pumpkin Walnut Bread floating around facebook the other day.  Since I've learned the hard way not to trust "recipes" on facebook, I tracked down an original version from 2009 by Joy the Baker.  I was fully prepared to follow the vegan recipe, but then I decided I just didn't want to.  There is no reason at all for me to forgo eggs and butter and dairy products, especially when the tradeoff is a cup or two of vegetable oil.  I asked in a comment what the substitutions would be...to get the recipe back from vegan.  Well, that was four days ago and I'm still waiting for an answer.  (I know the post is four years old, but still!  Don't I try to answer all your comments here, no matter how old the post?)  Anyway, I do hope I get an answer some day but I just couldn't wait any longer! 

So I did some more searching.  Shell has a recipe on here for Pumpkin Bread.  I found several other recipes around the internet too, each calling for different ingredients (sour cream, milk, oil, butter, etc.) and different spices in different proportions.  I decided to pick and choose the ingredients I wanted and equalize the proportions to make two loaves of pumpkin bread.  I also naturally wanted to use my own roasted pumpkin puree that I had in the freezer.  (directions for roasting pumpkin are within my Fresh Pumpkin Pie post--which the boys requested when they saw the pumpkin thawing!)  Unfortunately I didn't have walnuts, so I went with a streusel topping instead.  Next time I will definitely add walnuts along with the streusel topping, so they are listed below. 

This recipe worked perfectly for me!  I have two beautiful loaves of Pumpkin Streusel Bread cooling right now, although the boys have tasted it and proclaimed it delicious.  The bread is tender and the texture is just right.  I'll definitely be making this one again, and I'm so glad I have two whole loaves!  Okay, a loaf and a half...


Pumpkin Streusel Bread
makes 2 loaves

4 cups all purpose flour
2 teaspoons baking soda
2 teaspoons baking powder
2 teaspoons salt
2 teaspoons ground cinnamon
2 teaspoons ground cloves
2 teaspoons ground ginger (I am out of ginger at the moment, but I fully intend to add it next time)
1 cup (2 sticks) butter, softened
1 cup brown sugar

4 large eggs

4 cups fresh roasted pumpkin puree
2 teaspoons vanilla extract

1 cup sour cream
1 cup buttermilk (or 1 tablespoon lemon juice + milk to equal 1 cup)

2 1/2 cups chopped walnuts

Streusel topping:
1/2 cup flour
1/2 cup sugar
1/2 teaspoon salt
2 tablespoons cinnamon
2 tablespoons butter
1/2 cup chopped walnuts

Position rack in center of oven; preheat to 325°F.

Butter two 9x5x3-inch loaf pans.

 Stir dry ingredients together in a medium bowl, set aside. Using electric mixer, beat butter in large bowl until light, about 2 to 3 minutes. Gradually beat in brown sugar. Beat in eggs one at a time. Beat in pumpkin and vanilla.

Whisk sour cream and buttermilk in small bowl. Beat flour and sour cream mixtures alternately into batter in 2 additions each. Fold in 2 1/2 cups of nuts. Spoon batter equally into pans; smooth tops.

For streusel topping, stir together flour, sugar, salt and cinnamon.  Cut in butter, stir in walnuts.  Sprinkle tops of loaves with streusel topping. Bake bread until toothpick inserted into center comes out clean, about 1 hour 10 minutes. Cool in pan 10 minutes. Loosen edges with a butter knife, turn out onto rack and cool.

Sunday, August 26, 2012

French Toast Casserole

We love French toast, but I hate having to make recipes that require one of us to eat while it's hot and the next batch is on the griddle. This recipe makes us both happy at the same time and is a time saver because I throw it together the night before AND it uses what might otherwise be wasted. We love sourdough bread, but the heels are sometimes a little tough. I save the heels from each loaf in the freezer and when I have enough I make this casserole. It's absolutely perfect for Thanksgiving or Christmas morning. The smell of the cinnamon baking is one of the best smiles you can give your family. 

FRENCH TOAST CASSEROLE
CASSEROLE
8-10 sourdough heels (or regular slices work too)
8 eggs
3 cups milk
4 teaspoons sugar
1 teaspoon cinnamon
1 teaspoon vanilla
3/4 teaspoon sea salt
TOPPING
3 tablespoons butter, cubed or sliced thin
3 tablespoons sugar
3 teaspoons cinnamon
maple syrup - OPTIONAL - it really is great without it
  • In a large mixing bowl whisk together the eggs, milk, 4 teaspoons sugar, vanilla extract and sea salt.
  • Cube bread.
  • Add bread to the egg mixture and toss to coat well.
  • Grease a 13x9 baking dish.
  • Pour bread mixture into baking dish, cover and refrigerate overnight.
  • Remove casserole from refrigerator 30 minutes before baking.
  • Preheat oven to 350˚.
  • Dot casserole with butter pieces.
  • Combine topping sugar and cinnamon - sprinkle over top.
  • Cover** and bake 45-50 minutes, or until toothpick comes out of center clean.
  • Let stand 5 minutes before serving.
**If you want a crispy top, uncover 10 minutes before it's through.

Sunday, August 14, 2011

Sylvia's Ozark Cornbread

A couple years ago, I received The Cornbread Gospels cookbook by Crescent Dragonwagon in the mail, a gift from the author herself. Pretty cool, right? I haven't made much cornbread in those two years, admittedly neglecting this informative cookbook, but recently someone posted a link to a recipe for a cornbread-based dressing, featuring eggplant and shrimp. I was intrigued, and I will be making and posting that recipe shortly. In the meantime, I needed to make some cornbread on which to base the dressing!

Out of the hundreds of cornbread recipes in the "Gospels," I chose this one. For reasons I can't explain, other than it looked pretty simple and I had all the ingredients.

Upon mixing up the batter, the consistency had me a bit worried, it seemed very thin. I needn't have worried, the cornbread baked up perfectly. It's a delicious cornbread with a lovely crumb, however I'm going to show my decidedly Northern roots when I say that this "Southern" cornbread needs just a bit of sugar for my taste, if I were eating it plain. Luckily I'm mixing it into that other recipe, so the lack of sugar is just fine.


Make this if you're in the mood for a true Southern, healthy cornbread. I have to admit, the more cornbread I ate, the more I liked it...let me know what YOU think!


Sylvia's Ozark Cornbread
Makes 8 wedges

Vegetable oil cooking spray
1 tablespoon butter
2 cups stone-ground yellow cornmeal
1 teaspoon baking soda
1 teaspoon salt
2 cups buttermilk, preferably measured into a 4-cup measure
2 eggs
1 tablespoon mild vegetable oil

Preheat the oven to 400 degrees F.

Spray a 10-inch cast-iron skillet with oil, add the butter, and put it into the oven to heat. Meanwhile, stir together the cornmeal, baking soda and salt in a medium bowl.

In a smaller bowl, or in the 4-cup measure, beat the buttermilk with the eggs and oil.

Combine the two mixtures. As always, be careful not to overbeat, stirring until wet and dry are just combined.

Scrape the batter into the hot skillet and bake the cornbread until it is golden brown and crusty at the edges, 23 to 27 minutes. Serve hot, in wedges.

Wednesday, August 3, 2011

Bruce Paltrow's World-Famous Pancakes

When I noticed that Gwyneth was coming out with a cookbook, I was intrigued. I have subscribed to her GOOP newsletter almost since the beginning, which has featured some great recipes in it, although honestly I don't think I've ever actually tried any of them...

I ordered the cookbook anyway. My Father's Daughter: Delicious, Easy Recipes Celebrating Family & Togetherness, by Gwyneth Paltrow, begins with an essay of sorts, essentially about Gwyneth's late father, their relationship to food and to each other, and it is very touching and heartwarming.


There are many recipes in this book that I WILL be making. For now, I tried the "world-famous" pancakes. Besides being a pancake fan myself, Gwyneth's description of them touched a chord with me:

"Now if there is one image of my father that is the most "him"--that is to say encapsulates all of his elements and delivers them in one picture--it would be him over his cast-iron griddles making his world-famous pancakes. These things have been legendary in our house for decades. He first got the recipe out of the Joy of Cooking and adapted it over the years to utter perfection. The recipe below is so truthful to his pancakes that it's almost hard for me to eat them, I keep expecting him to walk into the kitchen."

Just beautiful sentiment. Food is very powerful in evoking memories.
(This book may inspire me to resume work on my own family cookbook...whose entire layout was unfortunately irretrievable from my late laptop...)


One of the nice things about this recipe is the fact that you mix them up the night before. It does make a LOT of pancake batter, so I will report back as to how it performs after being refrigerated for a couple days. The recipe is easy to put together, don't forget you can make your own buttermilk by adding vinegar or lemon juice to milk! Just let the milk sit while you mix up the other ingredients.

The only issue is that the level of heat for the griddle is not listed...I used a medium-low temperature.

While these pancakes are not quite "legendary" yet in our house, they are darn good. I ended up adding about 1/2 cup milk this morning to the batter, and the consistency was just about perfect.


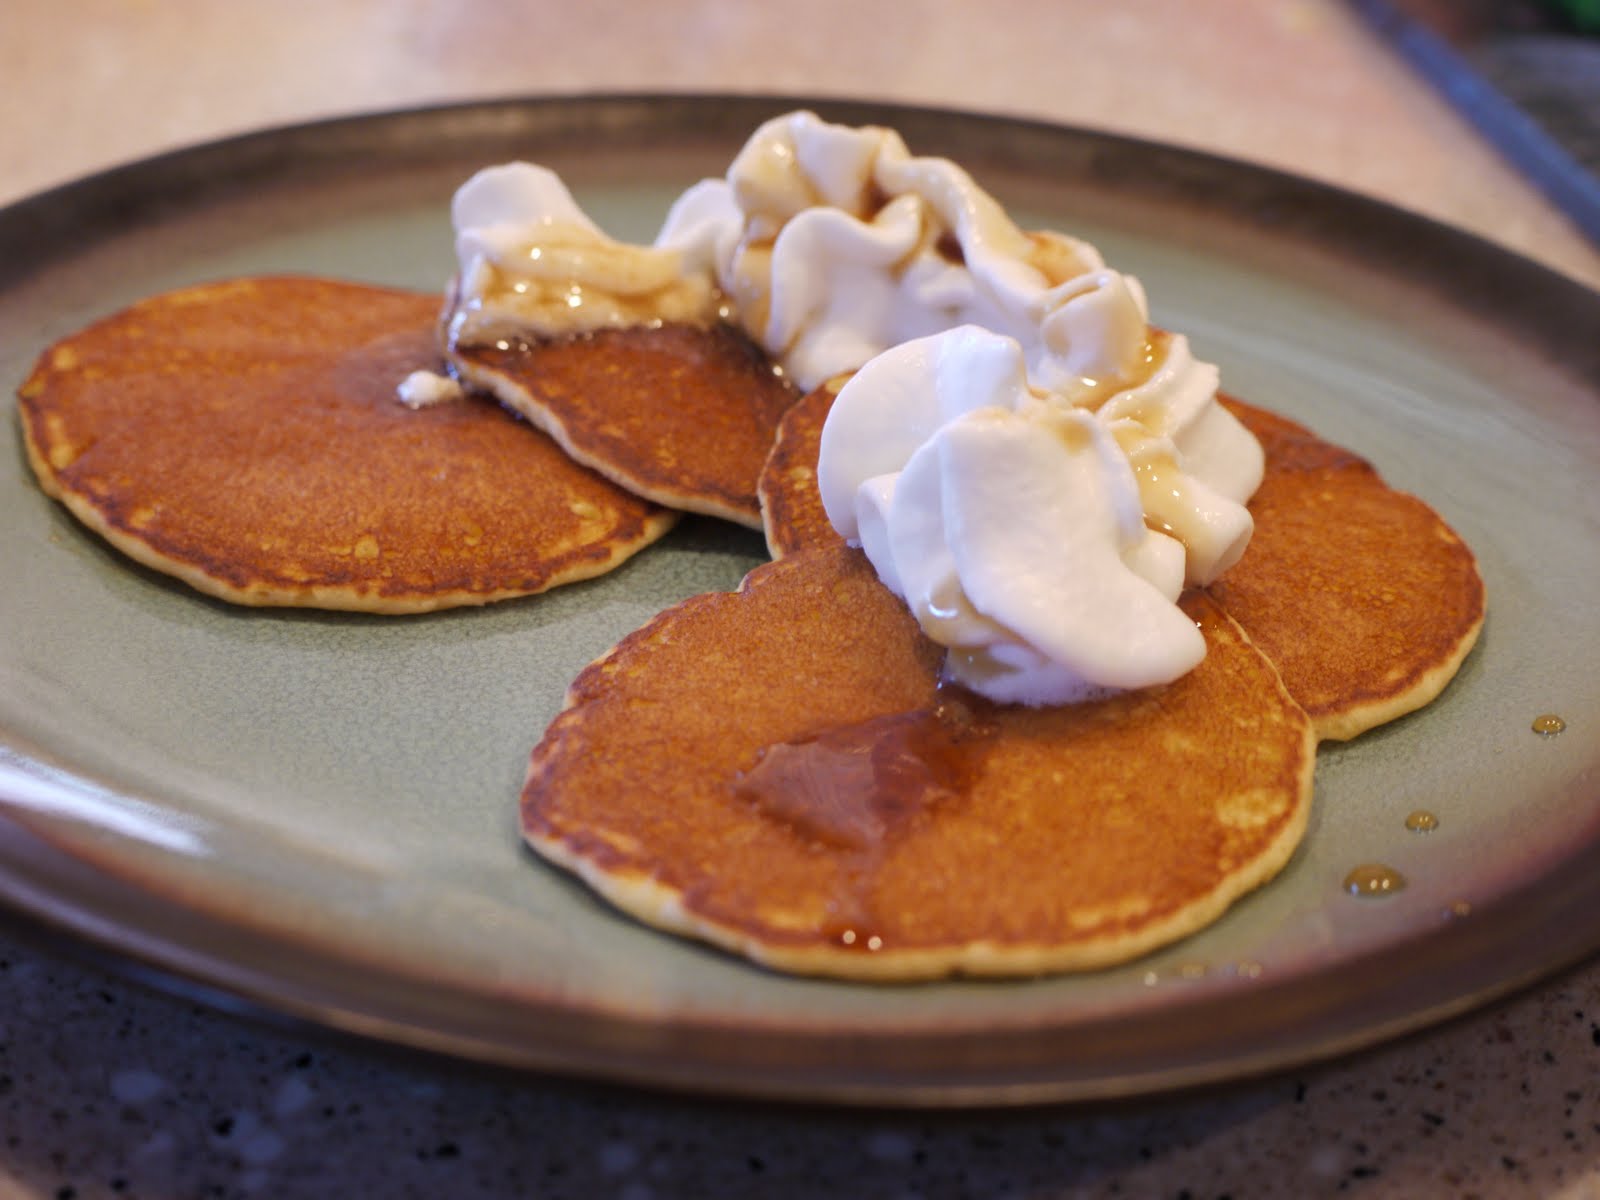
Our boys like their pancakes with whipped cream on top, in case you're wondering. Enjoy!


Bruce Paltrow's World-Famous Pancakes

Yield: 3 dozen 5-inch pancakes
Active preparation time: 20 minutes
Total preparation time: 20 minutes plus overnight resting

3 cups unbleached all-purpose flour
1/4 cup plus 2 tablespoons granulated sugar
1 tablespoon plus 1/2 teaspoon baking powder
2 teaspoons fine salt
3 cups buttermilk (OR 3 tablespoons white vinegar OR lemon juice, plus milk to make 3 cups)
6 tablespoons unsalted butter, melted and cooled, plus more butter for cooking
6 organic large eggs
Up to 1 cup milk, as needed to thin batter
Real Vermont maple syrup, warmed, for serving

Whisk the dry ingredients together in a large bowl. Whisk the buttermilk, butter and eggs together in another bowl. Add the wet ingredients to the dry ingredients, whisking just enough to combine (small lumps are okay). Let the batter sit, covered, overnight.

The next morning, heat up your griddle or favorite nonstick pan and slick it with a little butter. Add enough milk to the batter to thin it to the right consistency--the thicker the batter, the thicker and heavier your pancakes; the thinner the batter, the more delicate your pancakes--neither is wrong.

Cook the pancakes on the griddle, flipping them after bubbles appear on the surface of the uncooked side. Let cook 2-3 minutes more, then remove, and eat with lots of warm maple syrup.

Sunday, May 22, 2011

Taste & Create: No Knead Bread

Taste & Create is a fabulously fun food blog event created by my friend Nicole, of For the Love of Food. Participants are randomly paired off, and you have to make something from your partner's blog. Easy and super fun! Sign up and tell all your friends!

Go here to find out how to sign up, by the 8th of each month.

My partner this month is Gerry of Foodness Gracious. I have to say I love that blog name!! After perusing his blog again and again, I was really tempted by his Buffalo Chicken Wraps. I WILL make them. But for now, being a huge fan of Artisan Bread 5-minutes-a-day method, I decided to try his No-Knead Bread as a comparison.

I will say that the Artisan Bread is much easier, and has the advantage of making a big batch of dough all at once and storing it in the refrigerator. The No-Knead Bread has a lot more rising time (12-18 hours and then 15 minutes and then 2 hours) compared to the Artisan Bread's time (3 to 5 hours, then 40 minutes each loaf). I also typically get a lot more rise out of the Artisan Bread. I don't think the No-Knead dough even doubled. Mine certainly didn't press against the plastic wrap like Gerry's did.

There are also less steps to the Artisan Bread, just measure & mix, let rise, quickly form and rise, then bake. With this No-Knead Bread, you measure & mix, let rise (for more than double the amount of time), then flour and rise, then cornmeal and rise, prep the baking dish, and finally bake. I am hoping to get a decent loaf that is worth the extra effort! (including laundry)

I have a similar-to-Le-Creuset enameled cast iron pot, and although I was worried it might be too big, that is what I decided to use. *Glad I did, because I went to the original post and found the required pot size to be 6-8 quart.*

So. I baked the bread. It looked promising. I wish I had listened to my instincts and used Kosher salt, instead of plain sea salt. Or maybe more salt. The bread looks good, but it ends up being covered in cornmeal. I don't mind cornmeal on the bottom that mostly gets tapped off, but cornmeal almost everywhere is a bit gritty for my taste.


The problem for me is that I'm comparing this loaf to my consistently fabulous Artisan bread loaves. The flavor of this bread just doesn't compare. And then there's the texture of the cornmeal overall, it's just too much. This bread has promise, and it's a decent, crusty loaf with a great consistency and crumb, but it's just not very flavorful. Factor in the huge amount of time (inactive time, but time all the same) and I'm just not convinced it's worth it for me, especially when it gives me two more towels that need to be washed.

*This is not to say that you won't see me eating this entire loaf of bread, on my own if I have to. I said it was decent and crusty, I didn't say it was bad...


A bread that creates its own laundry needs to be spectacular...and I'm sad to say this loaf wasn't.


So please, you try it if you'd like to. Use Kosher salt, or more salt, less cornmeal, figure it out. Lots of people love this bread, and I have nothing against them. I simply prefer mine. And you should try my favorite recipe too. Let me know what you think!

And Gerry, I'll definitely be back for those Buffalo Chicken Wraps!!


No-Knead Bread
(you can see Gerry's recipe here, attributed to The Amateur Gourmet)

3 cups all-purpose or bread flour
1/4 teaspoon instant yeast
1 1/4 teaspoons salt
1 1/2 cups of warm water (I used a bit more, TAG suggests 1 5/8 cups)

Mix all the dry stuff into a large size bowl (with room to rise) and then add the water and mix roughly with your hands. (I used my dough whisk). Cover with plastic wrap and leave for at least 12 hours or more if you can. (mine did not rise as much as I expected)

After that, turn out the dough onto a well-floured work surface and roughly turn into itself to form a ball, cover (I used same plastic wrap) and let rest for 15 minutes.

Spread a clean towel with cornmeal and sit the dough on top. More cornmeal for the top of the dough and another towel to cover. Leave for another two hours.

Meanwhile 30 minutes before the two hour mark, turn on the oven to 450 degrees F and put in your 6-8 quart Dutch oven/Pyrex/ceramic dish and lid and let it get hot in the last 30 minutes. (Gerry used the ceramic inside part of a crock pot; I used my enameled cast iron Dutch oven, similar to Le Creuset). At 2 hours pull out the dish and plop the dough in, lid goes back on and in the oven for 30 minutes. Take of the lid and bake for another 20 - 30 minutes until nice and golden.

Remove to a rack and let it rest for at least 30 minutes, then enjoy.
Blog Widget by LinkWithin