Showing posts with label Sauces. Show all posts

Wednesday, May 11, 2016

SALTED CARAMEL SAUCE

This dessert sauce is easy to make. Children and adults will have fun watching the sugar melt and transform. Sauce is great over ice cream or other desserts.


Salted  Caramel  Sauce
Makes 1 cup


1 cup granulated sugar
6 tablespoons butter, cut into 6 pieces
½ cup regular or heavy whipping cream at room temperature
½ to ¾ teaspoon salt

1. Heat granulated sugar in heavy 1-quart or 1.5-quart saucepan over medium heat, stirring constantly with a high-heat-resistant rubber spatula or a wooden spoon. Sugar will form clumps and then melt into a thick, amber-colored liquid as you continue to stir.
2. As soon as sugar is completely melted, add pieces of butter. Be careful, because caramel will bubble vigorously as butter is added.
3. Stir butter until it is completely melted, about 2 minutes.
4. Very slowly and carefully drizzle cream into pan while stirring. Expect mixture to rapidly boil and possibly splatter at this stage.
5. Allow mixture to boil only 1 minute. It will rise in pan as it boils.

6. Remove from heat and stir in salt. Allow to cool somewhat before using. Pour into leftovers into jar and refrigerate.


NOTE:
Make several batches if necessary rather than doubling recipe.

Thursday, June 27, 2013

Honey & Chili Chicken


Modified only slightly from theKitchn. Follow link to see a picture.

Honey & Chili Chicken
with Creamy Cilantro Sauce
Serves 8


½ cup amber ale
¼ cup cider vinegar
¼ cup honey
2 tablespoons olive oil
2 tablespoons chili powder
3 pounds boneless, skinless chicken thighs
Roughly chopped cilantro for garnish

Creamy Cilantro Sauce
1 cup sour cream
1 ½ cups loosely packed cilantro leaves (about 1 bunch)
1 lime’s zest and juice
½ teaspoon salt


1. Whisk together ale, honey, vinegar, olive oil, and chili powder in a large mixing bowl.

2. Add the chicken thighs to the bowl and stir until the thighs are evenly coated. The chicken can be cooked immediately or marinated in the fridge for up to three hours.

3. Arrange chicken thighs on a baking sheet or in a roasting pan, keeping the chicken pieces slightly separated. Drizzle any remaining dressing over chicken.

4. Roast in 450°F. until cooked thoroughly and the thickest part of the thighs register 165°F. with an instant-read thermometer, about 25 to 30 minutes.

5. If cilantro sauce wasn’t made up to a day ahead, then, while the thighs are roasting, make the cilantro sauce by placing all sauce ingredients in a small food processor.

6. Process continuously until the cilantro is minced very finely and the sauce is light green.

7. Serve the chicken after spooning any extra glaze from the pan over the hot chicken and garnishing it with roughly chopped cilantro. Serve with Creamy Cilantro Sauce.


NOTE: Easy, quick, and delicious! Easily multiplied. Great for a crowd. Good served with rice. Sometime try substituting apple juice for ale.

              Chicken thighs can be grilled covered over high heat for 4 minutes on each side.

Monday, November 12, 2012

Salsa Verde

Without further ado, my assignment for the Secret Recipe Club this month was:


Amy has many tempting recipes, including the Puffy Apple Pancake (quite similar to my Baked Pancake, but with apples!), Baked Vanilla Doughnuts (doughnuts, again?!!), and Pollo al Chilindron.  In the end, I ran across this Salsa Verde recipe (link below), and I had to make it for several reasons:

  • It is one of Rick's recipes.  
  • I love salsa verde, but I have never made it.   
  • Reading the recipe made me crave it, so I ran to the store for tomatillos and chips!  

I doubled it from the start, except I left out half of the water.  Below is the double batch recipe, follow the link for Amy's proportions.
This recipe is easy to put together, and tastes fresh and delicious!  Enjoy some today!


Salsa Verde
makes about 2 cups

1 pound (10 to 12 medium) tomatillos, husked and rinsed
2 jalapeno pepper, stemmed and seeded
10 or 12 sprigs fresh cilantro, roughly chopped 
1/2 cup finely chopped onion
1/4 cup water
coarse salt
 
Roughly chop the tomatillos and the chiles.
 

In a blender or food processor, combine the tomatillos, chiles, cilantro and water. Pulse briefly to a coarse puree; scrape down sides.  


Rinse the onion under cold water, then shake to remove excess moisture. Pulse a couple times into the salsa, then scrape into a serving dish.
 

Season with salt to taste.


Secret Recipe Club

Tuesday, October 18, 2011

Pumpkin Parmesan Pasta Sauce

This recipe is inspired by part of a gift we received from our good friends Alice and Doug as a housewarming gift two years ago: A jar of Williams-Sonoma Pumpkin Parmesan Pasta Sauce. The jar said, " A rich, creamy sauce featuring pumpkin and aged Parmesan cheese seasoned with caramelized onions, roasted garlic and sage." It was delicious. I wrote down the ingredients so I could try to make it from scratch, because there is no Williams-Sonoma anywhere near here.

I didn't end up using all the same ingredients, (namely water and butternut squash) and of course there aren't amounts on a jar of sauce from the store. So this is my own creation, inspired by Williams-Sonoma. I used leftover fresh pumpkin puree I had in the freezer from last year's Halloween!


Number One proclaimed, "This tastes like fall." H-Bomb, after initially saying he didn't want sauce, said he loved it. Sawed Off ate it, but wouldn't commit to liking it. I thought it was delicious, and I'm proud to say the sauce turned out on the very first try!

While it's not as orange or quite as smooth as the jarred sauce was, I can say that I know exactly what is in it, and we liked it!

Pumpkin Parmesan Pasta Sauce
Serves 6 to 8 (I'm sort of guessing because we had a lot of leftovers)

1 pound spaghetti or pasta of your choice

2 tablespoons butter
1/2 onion, finely chopped
1 clove garlic, minced
1 cup chicken broth
3 cups roasted pumpkin puree
kosher salt, to taste
freshly ground pepper, to taste
1 teaspoon sugar
1 tablespoon sage leaves
1 cup half-and-half or heavy cream
1/3 to 1/2 cup grated Parmesan
1 tablespoon lemon juice
grated Parmesan, to serve

Put a pot of water on to boil for the pasta.

In a large pan, saute onions and garlic in olive oil over medium-low heat, until onions are translucent and just starting to brown. Stir in chicken broth and heat. Stir in pumpkin puree and spices, then simmer on low while preparing your pasta as directed. (I actually simmered my puree for about 20 minutes, because it had been frozen and needed to simmer out some of the water.)

Whisk half-and-half into the pumpkin mixture, and heat gently. Stir in Parmesan, adding more if desired. Minutes before serving, stir in lemon juice.

Drain pasta and place in large bowl, pour sauce on top of pasta. Serve with more freshly grated Parmesan on top, if desired.

Saturday, September 10, 2011

Kara-Áge Tilapia and Homemade Ponzu Sauce


As part of the Foodbuzz Tastemakers program, I received a free box of Kikkoman Kara-Áge Soy-Ginger Seasoned Coating Mix. I have never heard of Kara-Áge [KAH-rah AH-geh] before, but reading the box and the letter from foodbuzz informed me that it is Japanese-style fried chicken, or fish. "One of the most popular cooking techniques in Japan...Kikkoman has made age-old traditions modern, by simplifying the recipe for today's family."

For the Kara-Áge, my husband thawed and cut up tilapia in 1-1/2" square pieces. The coating mix is very fragrant, right out of the box. It smells delicious. The method couldn't be easier: add mix to a bag, toss fish pieces, then fry in 1/4" oil for 2 to 4 minutes.


The box recommends serving the chicken or fish with Kikkoman Ponzu or Lime Ponzu. Of course I didn't have any Ponzu, and didn't have a clue what Ponzu is, or how to make it, but thank you very much google! I found a recipe in The New York Times. Then reading the Ponzu recipe, I didn't know what dried bonita flakes are...google told me they are dried fish, which of course I didn't have, so I added a splash of fish sauce. That may be completely wrong, but I don't know any better! I used the sake and sugar in place of the mirin, and tossed in a piece of toasted seaweed instead of kelp.

Kara-Áge Tilapia and Homemade Ponzu Sauce

I had such high hopes for this Kara-Áge fish...but the aromatic mix doesn't contribute much flavor to the final product. It tastes like fried fish, which is fine, because that is indeed what it is. It is better dipped in the Ponzu sauce, but overall just not something to get excited about. The Ponzu sauce is fairly tasty, and it will be interesting to see how it is with other dishes.

Personally, the fish made my lips and mouth go a bit numb, so there must be some ingredient to which I was having a reaction. At first I really thought it was the sake in the sauce, but after the numb sensation had worn off, I ate several pieces of fish with no sauce, and surprisingly my mouth went numb again, definitely from the fish itself. I have no idea what that's about, and it's unfortunate, I'm just glad it wore off quickly!

Ponzu Sauce

Source: The New York Times

Yield 2 1/2 cups

Time 15 minutes, plus 2 hours


Homemade ponzu will keep for several days with no loss in quality.


  • 2/3 cup fresh lemon juice, more to taste
  • 1/3 cup fresh lime juice, more to taste
  • 1/4 cup rice vinegar
  • 1 cup good-quality soy sauce
  • 1/4 cup mirin (or 1/4 cup sake and 1 tablespoon sugar)
  • 1 3-inch piece kelp (konbu)
  • 1/2 cup (about 1/4 ounce) dried bonito flakes
  • Pinch cayenne

  • In a bowl, combine all ingredients. Let sit for at least 2 hours or overnight. Strain. Just before using, you might add a small squeeze of fresh lemon or lime juice. Covered and refrigerated, ponzu will keep for at least several days.


Wednesday, August 17, 2011

Lobster Ravioli with Brown Butter Sauce

We had another package of Lobster Ravioli to eat. (Sadly, I am not sharing a recipe for Lobster Ravioli). I have already posted this sauce recipe, when I made the brown butter sauce to go with some Wild Mushroom Agnolotti.

And while I do prefer Lobster Ravioli with this delicious Citrus Chardonnay Sauce, we were completely out of Chardonnay. I know, I couldn't believe it either! So we made Brown Butter Sauce again, with Italian parsley.

The photo turned out so good, I just had to share it. (NOW you know why you're here!)


Follow the links for the other recipes, and let me know what sauces you would pair with these fancy pastas! Or if you have a pasta to recommend, by all means let me know about it!

*Someday I will make my own pastas, but someday isn't here yet...*

Wednesday, June 22, 2011

Nicole's Super Fast Pizza Sauce

When my family went over to Colorado to visit Nicole's family, she whipped up some pizzas for dinner. She made this sauce, it was so delicious and so unbelievably simple! Nicole is my friend who lives in Germany and writes the blog For the Love of Food.

When my brother and his family came to visit us last week, we made individual, make-your-own pizzas, and everyone loved them. I just didn't feel like I had time for a batch of my marinara sauce, (and believe it or not, I did not have any stashed in the freezer!) but I didn't want to buy sauce either, so it was Nicole's sauce to the rescue!

I shaped pizzas out of Artisan bread dough, my brother put together the pizza sauce, and everyone prepared their own pizza using a variety of toppings including pepperoni, mushrooms, mozzerella, goat cheese, roasted chicken, roasted red peppers. (I wish we had had fresh basil for the roasted chicken and goat cheese pizzas, but no such luck).

Yum. Go here for the artisan pizza dough technique, and here is Nicole's sauce recipe.

Pizza Sauce


¼ Cup of Tomato Paste
2 Tablespoons of Water
dash of Salt, Pepper, Garlic powder, and Onion Powder


Place all ingredients in a bowl and mix until combined. Add more tomato paste for a thicker consistency, or more water for a thinner consistency.

Wednesday, May 4, 2011

Hot Dogs with "Michigan Sauce"

The television was on for some reason the other day, and Rachael Ray started talking about "Michigan Sauce." What??? She claimed it was a hot dog topping...I'm a Michigan native, and I've never heard of it. Huh. Then she proceeded to make a "mac & cheese" and mix it with the "Michigan meat sauce," where she lost me. Ick. Then she put it all on top of a hot dog. Blech.

Honestly, I was intrigued by the first HALF of the recipe, the so-called "Michigan Sauce." It took some searching to find the right recipe on her website, but here it is. I have taken the liberty to omit everything to do with that mac & cheese debacle. We will top our hot dogs with this meat sauce and see what happens. Everyone loves a good chili dog.

I did a little more research on this mystery "Michigan sauce," and was surprised to find some information...it's not from Michigan at all! It's from New York or possibly somewhere else, but definitely not Michigan. In fact, wikipediastates "Oddly enough, "Michigan hot dogs" are never referred to by that name in Michigan itself, nor anywhere else in the Midwest." That explains everything!

Rachael also put the raw meat in with all the other ingredients...I wasn't sure about this. Follow the link if you'd like to see the whole original recipe...

Rachael tops her sauce with a bit of raw chopped onion...now that sounds like a good idea to me. And maybe just a bit of mustard...

okay. So to be honest and blunt, I'm NOT a fan of Rachael Ray's recipes. But I feel like, hey, she's got her own show, she's got her own burgeoning foodie products empire, there's got to be SOMETHING redeemable about one of her recipes. Someday. Right? So I try another one occasionally.

Given that I've never had/heard of Michigan sauce, I was still surprised about the consistency of the "sauce." It was much thicker than I expected, not "saucy" at all. I think that's a mistake, especially when you look at what's pictured here. I'd like it to be more saucy. I'll have to work on that. I'm wondering if Rachael made it less saucy because she ultimately mixed it with the mac and cheese...we shall never know, unless she comes to the blog and tells us. So, we shall never know. I do have another recipe for Michigan sauce that I may try...let's hope it's saucier.

I do like the spiciness of Rachael's Michigan sauce...and it was delicious topped with mustard and raw onion. Number One also had grated Cheddar on top of his, mostly because he likes cheese. I look forward to making this again, but with more liquid somehow.


"Michigan Sauce"

1/2 pound ground beef
1 cup tomato sauce
3-4 teaspoons grated onion
2 cloves garlic, finely chopped
1 teaspoon cumin
1 1/2 teaspoons Ancho chile powder
1 teaspoon Tabasco or other hot sauce (I used Cholula)
1/2 teaspoon red pepper flakes
Salt and pepper

Place all ingredients in a pot over low heat. Cook, stirring occasionally, and simmer for 45 minutes, until very thick.

Tuesday, January 25, 2011

Citrus Chardonnay Sauce

I picked up the packages of Lobster Ravioli at Costco without hesitation. Lobster is H-Bomb's absolute favorite food, and the pastas from Costco have always been delicious. Not sure why it's red-striped, but se la vie. You can imagine my delight when I turned the package over, ready to serve this luscious ravioli with a plain-Jane alfredo sauce, but saw this recipe for a lovely chardonnay sauce. No contest!

A delicious, light, savory pasta in a fabulous, tangy sauce! I'm sure this sauce would be delicious on many kind of pasta. And it's easy to make, too!

The only change I made was to cook the ravioli AFTER I made the sauce, which turned out to be a good choice. The sauce took a while to reduce, so I had a pot of water simmering, waiting until the sauce was closer to being done, then cooked the ravioli.


Citrus Chardonnay Sauce

1 (15 ounce) tray of Pasta Prima Lobster Ravioli
1 tablespoon olive oil

2 tablespoons shallots, minced
1 lemon, juiced (about 3 tablespoons)
1 cup chardonnay wine
1/2 cup heavy cream (all I had was half-and-half)
2 sticks (8 ounces) unsalted butter, cubed
1 tablespoon fresh parsley leaves, chopped fine
salt and white pepper to taste

1. Bring large pot of water to a boil. Add Pasta Prima Lobster Ravioli, and cook for 3 1/2 to 4 1/2 minutes until desired tenderness. Drain, toss with 1 tablespoon olive oil, cover and keep warm.

2. At the same time combine the shallots, lemon juice, and Chardonnay in a medium sauce pan over high heat. Bring to a boil, reduce heat to medium and simmer until liquid is reduced by half. Add the heavy cream and continue to simmer until liquid is reduced by half.

3. Remove the simmering cream from the heat and immediately whisk in the butter cubes one at a time until fully incorporated. Stir in the parsley then season with salt and white pepper to taste.

Spoon Citrus Chardonnay Sauce onto a plate, put 5 ravioli onto the top of the sauce and sprinkle with parmesan cheese. Serve immediately.

Friday, December 10, 2010

Raita

This recipe is for my father-in-law, who recently tried raita at our favorite Indian restaurant. Perhaps for the first time? Anyway, I told him it's easy to make at home.

I've made this many times over the years, the recipe comes from the Moosewood Cookbook. I am going to disagree with Mollie just a tad: cucumber and onion are not optional, Molls. No way. I do like that you are free to play around with spices and additions until you figure out what strikes your fancy.

So here we go.

Raita
Preparation time: just a few minutes
Yield: 2 cups (serves 6)

"One of the many condiments served in a traditional Indian meal, raita is a yogurt preparation with small amounts of seasoning and a hint of minced or grated fresh vegetables. It is designed to cool and relax the palate in between bites of heavier, more intensely seasoned dishes. Serve raita with any curry, or with samosas...This can be put together in just minutes.

Note: For a deeper flavor, the cumin and optional fennel seeds can be lightly toasted first. Cook them without oil in a small, heavy skillet over medium heat, stirring frequently, for about a minute, or until they give off a toasty aroma."

2 cups plain yogurt
1 teaspoon cumin seeds
1 small cucumber (about 5 inches long), peeled, seeded and minced or grated
1/4 cup finely minced onion
salt and cayenne, to taste

OPTIONAL ADDITIONS (add some or all):
1 small ripe tomato, diced
1/2 cup finely minced bell pepper (any color)
1/2 teaspoon fennel seeds

Combine everything in a small bowl and mix gently. Cover tightly, and refrigerate until serving time.

Thursday, December 2, 2010

Biscuits & Gravy

Although you can use any biscuits you'd like for this ultimate comfort food meal, I'd recommend MaryJane's Sourdough Buttermilk Biscuits. If you have no sourdough starter, you could make some. Here are recipes for two starters that we use: Virgil and Horatio. (yes, they have names)

But if you don't feel like waiting for the starter to develop, you could always whip up a batch of my Baking Powder Biscuits. (a recipe I've held onto since Eighth Grade Home-Ec.)

Once you decide on the biscuits, and have them baking, you're ready to start on the gravy. For this recipe, we adapted a Milk Gravy recipe from Betty Crocker's Country Favorites to include sausage. YUM.

(photo coming soon!)


Number One's Sausage Gravy

1 pound sausage (we use Jimmy Dean's, Regular or Sage)
1/4 cup flour
1/2 teaspoon salt
2 cups milk

Brown sausage; do not drain. You should have at least 1/4 cup drippings, add some oil if needed.

Stir in flour and salt. Cook over low heat, stirring constantly to loosen any brown particles from skillet, until smooth and bubbly; remove from heat. Slowly pour milk into skillet, stirring constantly. Heat to boiling over low heat, stirring constantly. Boil and stir 1 minute.

Serve over biscuits, with freshly ground pepper to taste.

Tuesday, August 10, 2010

Peanut Sauce

I love peanuts. Peanut butter. Peanut butter cookies. Roasted peanuts. Spicy peanuts. There is something about the flavor of peanuts that is very appealing to me and I am so very grateful I do not suffer from peanut allergies.

That said, I don't eat many peanuts anymore because I mostly eat almonds. Almond butter, roasted almonds, etc. So, it is always a special treat when I decide to make peanut sauce for something like peanut noodles or Gado Gado, a traditional Indonesian vegetable salad covered in peanut sauce. Yum. That always brings me back to one of my favorite places on earth: Indonesia- the inspiration for this sauce.

So, here's your warning: This isn't really a quick sauce to prepare. You need to follow through with a few steps, but it is well worth the time and effort, I promise.

Step 1: Thinly slice 4 cloves of garlic and fry them with 3-5 dried Thai chilies (I always go with 5) in a couple tablespoons of peanut oil until the garlic is golden and toasted and the chilies are a little puffed.


Step 2: Remove these from the heat and oil to stop them from cooking. Let them cool on some paper towels while prepping the rest of the sauce.


In my kitchen, I have a step 3: Make peanut butter. I put 2 cups of peanuts in the Vita-Mix and make fresh peanut butter in about one minute's time. If you don't own a Vita-Mix yet, make sure you are using real peanut butter. Basically, that means please, please, please only use peanut butter if the the ingredients read: Peanuts. Or, Peanuts and Salt.

Step 4: In a bowl or large Pyrex measuring cup, add approximately 1 cup of peanut butter. Everything in this recipe is approximate, so you can play with the flavors and add more of something or less according to your tastes.

Next, add:
  • 5 TB soy sauce
  • 1/2 cup honey
  • juice from 2 lemons
  • juice from 1/2 lime
  • 1/4 cup warm water (it is easier to mix with warm water rather than cold)
Mix this well.

Step 5: Grind your garlic and chilies in your mortar and pestle.


I have a special attachment to my mortar and pestle because I bought it in Indonesia.


Add the garlic and chilies to your sauce and mix well.


I made a big bowl of peanut noodles with this sauce. Too bad I didn't double the recipe and store some in the fridge for a week or so. Next time.

Monday, May 24, 2010

Chicken Piccata with Pasta

This is a recipe from Ree Drummond, aka Pioneer Woman. It looks very good, and I thought the boys would like it too. But holy cow, did I have to make some changes. If this recipe is in her cookbook, just pull out your copy and a pen and save yourself a lot of time and hungry children by making changes now.

First, I had an issue with the cooking time Ree claims on the chicken, even with pounding to even out the breasts, I cooked mine for 6 minutes on a side (double what PW suggests) and they STILL weren't done. Call me crazy, I have issues with serving raw chicken. Just cook your chicken until done, I think I cooked mine about 8 minutes per side, then begin to reduce all that wine and broth and lemon juice, and realize that there is No Way In Hell dinner will be ready in 30 minutes.

=)

I only used 1 lemon, and I am sooooooo glad. The flavoring was perfect, tangy and delicious. I would have hated it with two whole lemons. (gee, PW, "expect a real tang" and "expect to add more broth and cream"?? why not just knock off a lemon in the beginning??) The sauce didn't really thicken up very well. Could be I was getting impatient and starving...

Number One and I loved the chicken, and I will make it again, following my adaptation. The boys were another story. I don't know if they were just full from snacking while dinner took For-Ever to cook, or if they truly didn't like it, as they claimed. I'll try to serve their leftovers tomorrow and report back I guess.


Chicken Piccata & Pasta
Adapted from Pioneer Woman's Chicken Piccata

Prep Time: 15 minutes
Cook Time: 15 minutes (more like an hour, at least!!)
Servings: 4


4 whole Boneless, Skinless Chicken Breasts
Kosher Salt To Taste
Freshly Ground Black Pepper, To Taste
4 Tablespoons All-purpose Flour
4 Tablespoons Butter
4 Tablespoons Olive Oil
1 cup Dry White Wine
¾ cups Low Sodium Chicken Broth
2 whole Lemons (I used juice from 1 whole lemon)
3/4 Cup Heavy Cream
Chopped Fresh Parsley
1 pound Angel Hair Pasta (we were out of angel hair, I used spaghetti)

Have a pot of water simmering for the pasta.


If chicken breasts are overly thick, pound until slightly flattened. Sprinkle with salt and pepper on both sides, then dredge in flour.


Heat 2 tablespoons butter and 2 tablespoons of oil in a large skillet over medium-high heat. Fry two of the chicken breasts at one time until golden brown on both sides, about 3 minutes on each side; a little longer if breasts are thicker, a little shorter if breasts are thinner. (I fried mine for 6 minutes on a side, and the big ones were still raw in the middle. I'm sure I fried the breasts for about 8 minutes per side) Remove to a plate, then add the other 2 tablespoons each of butter and olive oil. Fry the other two breasts until golden, monitoring the oil/butter mixture to make sure it doesn’t burn. Decrease heat as needed!


After removing the chicken, have the heat on medium to medium-low. Pour in wine and chicken broth, and squeeze in the lemon juice. Whisk the sauce, scraping the bottom of the pan. Allow sauce to cook and bubble and thicken until reduced by about half. (this takes at least 20 minutes, even raising the heat back to high)


Reduce heat to low and pour in cream. Whisk together and allow to cook for a couple of at least ten more minutes until sauce thickens. Taste and adjust seasonings. Sprinkle in some chopped parsley and stir.


Right at the end, cook angel hair until al dente—do not overcook!


With tongs, place a medium-sized mound of pasta on a plate. Place a cooked chicken breast beside it, then spoon sauce over the chicken and the pasta. The sauce is strong, so no need to drown it. Sprinkle a little minced parsley over the top.

Monday, April 26, 2010

Kecap Manis

This is a recipe to go along with one of my Taste & Create entries this month, Curried Tilapia with Coconut Rice, which calls for Kecap Manis.

First, I had to figure out what Kecap Manis is...besides an Indonesian sweet soy sauce. I couldn't find it at the store (I don't think anyone is surprised by this), so I decided to hunt for a recipe. I found a recipe at Gourmet Sleuth spelled Ketjap Manis, but of course I changed it. I decided to use jaggery instead of sugar, and the only lemongrass I could find was in a tube. Luckily it stores "indefinitely" in the refrigerator because I only need a couple tablespoons for the fish!

Here's the recipe, adapted from Gourmet Sleuth.


Kecap Manis
Makes about 1 1/4 cups.

3/4 cup jaggery
1 cup Tamari (or soy sauce)
2 tablespoon water
1 tablespoon minced lemon grass
1 clove garlic, minced
1 star anise

Caramelize jaggery in a heavy pot.**

Gradually stir in the rest of the ingredients. Bring to a boil, lower heat and simmer for 10 minutes.

Cool and strain through cheesecloth. I couldn't find my cheesecloth, so I just used the finest sieve I have, and funneled it into an old soy sauce bottle. It will store in the fridge indefinitely!


**This is a weird process, jaggery doesn't caramelize like granulated sugar does...it will melt on the underside, but the top doesn't become shiny. When it was mostly caramelized, I stirred it (a huge no-no in the sugar world, I know). Then I added the liquids--not gradually enough, I might add. The jaggery hardened up immediately. I boiled/simmered longer than 10 minutes to try to incorporate the jaggery.*

Tuesday, April 6, 2010

Sweet and Sour BBQ Sauce


This BBQ sauce is based off of the flavors from a traditional Vietnamese Sweet and Sour recipe given to me by an amazing chef named Duc in Hoi An, Vietnam.


First I made this pineapple and onion mix and sauteed it on medium for 10 minutes until the onions were soft and the pineapple was partially cooked. I used:
  • 1/4 red onion, chopped
  • 4 cloves garlic, finely chopped
  • 1 cup pineapple, coarsely chopped
  • 1/2 cup white wine
  • green onion
I removed that from heat and started to mix together the base for my BBQ sauce.


I combined the following ingredients and mixed well.
  • 1 six ounce can tomato paste
  • 1/4 cup maple syrup
  • 3 TB soy sauce
  • 2 TB rice wine vinegar
  • 1 TB onion powder
  • 1 TB garlic powder
  • 1 TB toasted sesame oil
Then, I put the BBQ sauce base in my Vita-Mix with all but 1/2 cup of the pineapple onion mixture and blended it for 30 seconds or so.

Wednesday, March 31, 2010

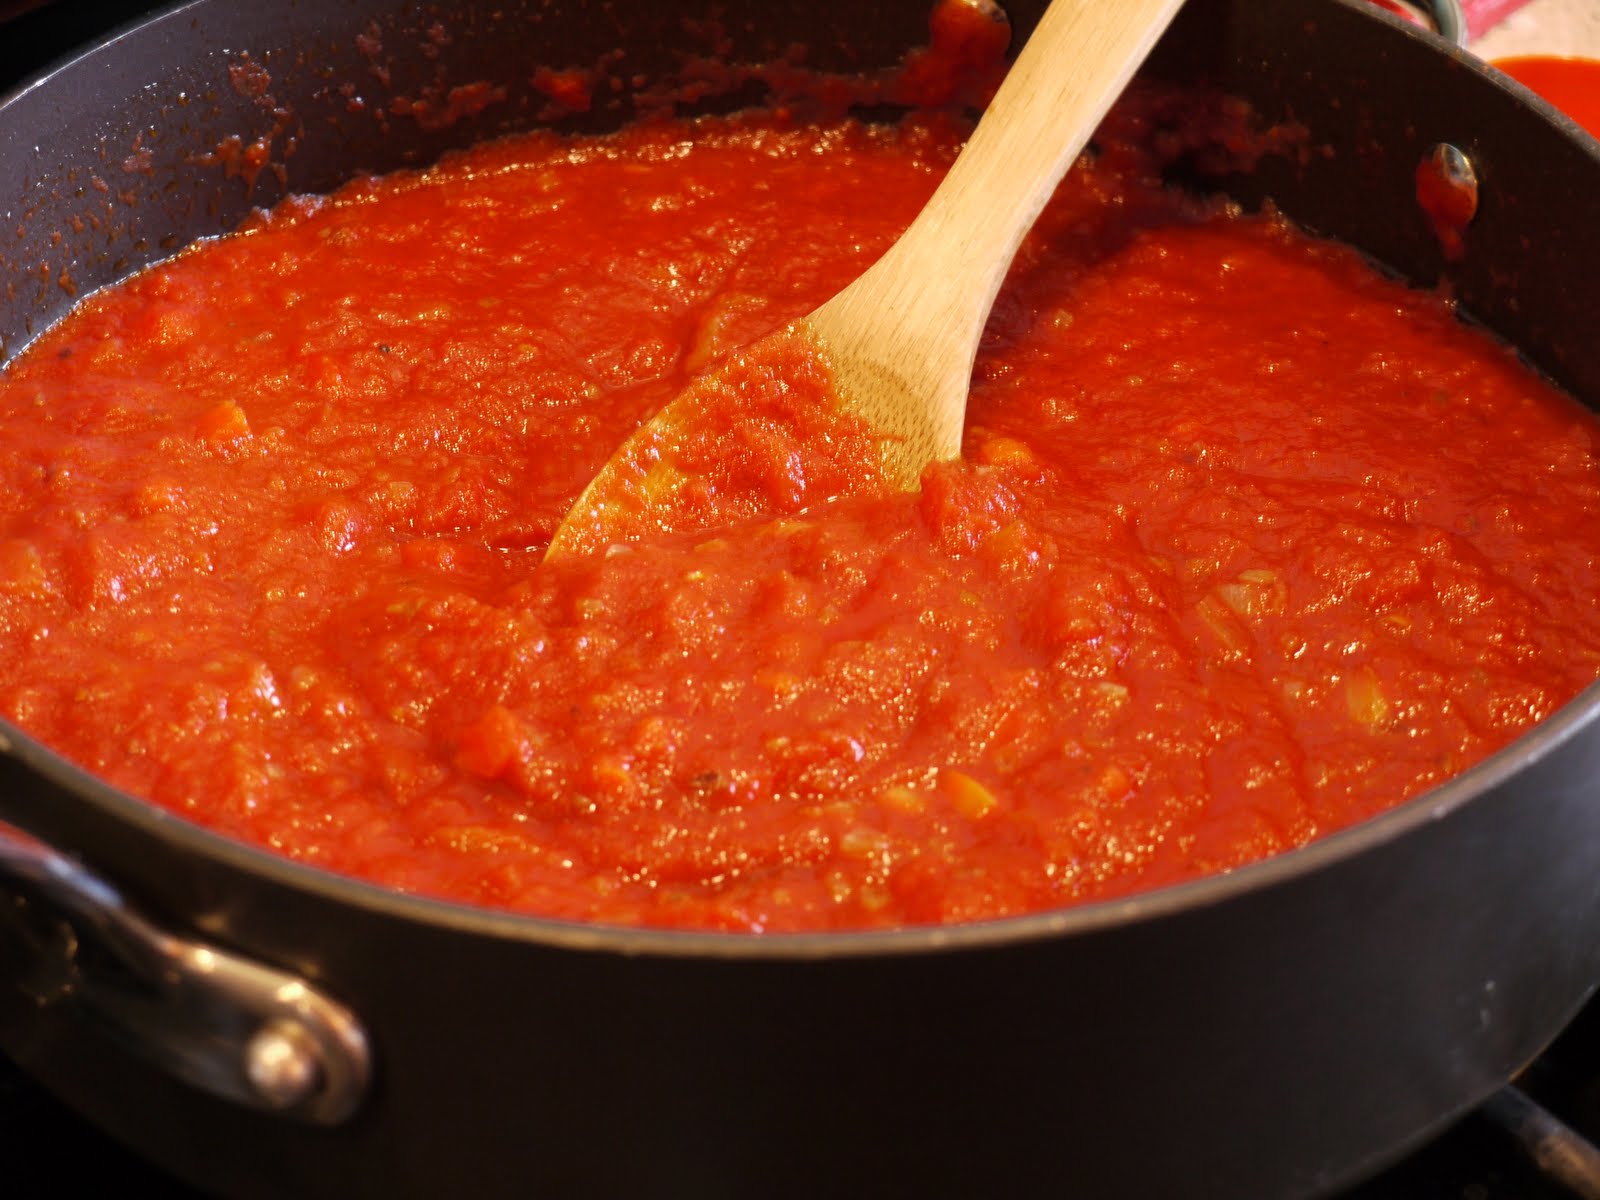
Marinara Sauce


I knew there had to be a decent tomato sauce for pasta that was easy to make, yet didn't come out of a jar! So I pulled out my trusty cookbook by the lovely Giada De Laurentiis, Everyday Italian. Since it hasn't been tomato season for months, I was happy to note that her marinara recipe calls for canned crushed tomatoes.

I was considering lessening the amount of olive oil, 1/2 cup seems excessive to me, but I do trust Giada. (It really wasn't too oily). I did like that I didn't have to sit and chop everything at once. I chopped the onions and garlic, then while they were cooking chopped the carrots and celery. It's really quite simple.

Other than that, medium-high was a bit too high for the onions and vegetables, so I reduced the heat to just under medium. It could simply be my burner (it's a big one), so for the simmer I moved to a different burner. Just keep an eye on things so they don't get too brown before you add the tomatoes.

Giada says this is the basic tomato sauce she uses the most, and this recipe makes a healthy amount (probably enough for freezing). Giada doubles the recipe and freezes half in two-cup portions, which gets another vote from me!


Marinara Sauce

Makes about 2 quarts (8 cups) 1 quart will serve 4 over pasta as a first course

1/2 cup extra-virgin olive oil
2 small onions, finely chopped
2 garlic cloves, finely chopped
2 celery stalks, finely chopped
2 carrots, peeled and finely chopped
1/2 teaspoon sea salt, plus more to taste
1/2 teaspoon freshly ground black pepper, plus more to taste
2 (32-ounce) cans crushed tomatoes (the only size I had were 28-ounce, so that's what I used)
2 dried bay leaves

In a large pot, heat the oil over a medium-high flame. Add the onions and garlic and saute until the onions are translucent, about 10 minutes. Add the celery, carrots, and 1/2 teaspoon each of salt and pepper. Saute until all the vegetables are soft, about 10 minutes. Add the tomatoes and bay leaves, and simmer uncovered over low heat until the sauce thickens, about 1 hour. Remove and discard the bay leaves. Season the sauce with more salt and pepper to taste.

The sauce can be made 1 day ahead. Cool, then cover and refrigerate. Rewarm over medium heat before using.

Store extra sauce by allowing it to cool completely, then pour two-cup portions into freezer bags and freeze for up to three months.

Monday, February 15, 2010

CAJUN COCKTAIL SAUCE and a cute way to serve it

Hi, Tamy here from OUR KrAzY kitchen, Always Eat On the Good China and 3 Sides of Crazy. Just dropping in to offer a family favorite in time for Mardi Gras which officially starts tomorrow, Fat Tuesday!

1 1/2 cups ketchup
1/2 cup chili sauce
3 cloves garlic, minced
2 tablespoons finely minced onion
2 tablespoons prepared horseradish
Juice of 1 lemon (save your rind to make the cute serving dish)
2 1/2 teaspoons Worcestershire sauce
1/4 teaspoon Frank's red pepper hot sauce
1/4 teaspoon fresh ground black pepper
salt to taste
Shrimp for dipping
  • I use my mini food processor to mix it all in until well blended.
  • Chill for a day or so before needed to allow flavors to meld together.
originally posted on Always Eat On the Good China

Thursday, October 29, 2009

Redd Ranches Famous BBQ Sauce


If you've never heard of the Redd Ranches Bull Sale, you are truly missing out. This is an annual event, I believe it was started by Number One's grandpa & grandma, Charlie & Annaley. The tradition has carried on, and the Bull Sale is now hosted by Redd Ranches (Uncle Paul & Aunt Diane's family). The sale is kicked off every year by the most delicious lunch ever, served to several hundred people.


Roast beef sandwiches with barbecue sauce, Grandma Annaley's Prairie Fire Beans, Cole Slaw, Cowboy Beans, Brownies, Lemonade. The whole family pitches in to make lunch, from Uncle Brian and crew getting the beef on the BBQ around 4AM, to all the cousins serving up the meal. The Bull Sale is known far and wide for its lunch, in addition to the quality of its bulls, and hundreds of people travel from all corners for the event.


After lunch, is the actual Bull Sale, a real live auction. It's simply a great time, and sort of like a family reunion all rolled into one day. Later, we usually stop at the old Ranch House and eat leftovers for dinner, play cards and visit with aunts, uncles and cousins.


For some pictures and more about the Bull Sale, read Left After The Cattleguard.


Here is the recipe for our favorite barbecue sauce. We are going to serve it up on BBQ Beef Brisket Sandwiches next week on branding day. I found these cool squeeze bottles, which will be handy for serving it in the corral. I bought two and told Number One he could have one squeeze bottle all to himself!


Barbecue Sauce

REDD RANCHES

makes 2 quarts


3 cups brown sugar

60 oz. catsup

1 1/2 cups vinegar

9 dashes Worcestershire sauce

2 TBL dry mustard

6 TBL chili powder

6 TBL celery seed

3 dashes tabasco sauce or cayenne pepper

3 dashes salt

6 cloves garlic, minced

3 TBL minced onion


Simmer 2 hours.


That's just how I got the recipe from Aunt Becky and Aunt Diane. Obviously you stir up the ingredients, simmer on low heat for those two hours, stirring occasionally. What I found out is that simmering barbecue sauce is sort of bubbly and messy, so if you have one of those wire mesh pot cover things, you might want to pull it out.


They say the sauce keeps well in jars in the fridge for several months (although it usually doesn't last that long!) You can and probably will eat it on anything, from beef to beans to bbq pizza.


Let us know how you use your BBQ sauce, and of course what you think of this one!


And now, I have a confession to make. I'm not sure exactly how this happened, but my first batch of bbq sauce was WAY TOO SPICY. I used the same measurement of chile powder, I really didn't think I used more than the recommended dashes of tabasco. The only thing that I can think of: I get my chile powder from the Mexican section of the grocery store, so it's REAL. Maybe Too Real. Number One tasted the sauce and said, "It tastes exactly the same, just spicier." Hmmm. So in an attempt to rectify this embarrassing situation (thank god I wasn't making this for the bull sale!), I bought another 30 ounces of ketchup and some more celery seed. I made another half batch as above, but I left out both the chile powder and the tabasco. I finished this mild sauce, then combined it with the spicy sauce. Now we got a lotta sauce! I'm going to wait until Number One gets home to give me his opinion, him being the Expert Sauce Taster that he is. I think it's pretty good, I'm just debating making yet ANOTHER half batch of mild sauce to tone it down even more. Too much? I guess we'll see.


That would give us 4 quarts of the stuff, in which case it may be a BBQ Thanksgiving AND guess what everyone is getting for Christmas! So. That's it. My name is Min, and I'm a spice-aholic.

Blog Widget by LinkWithin