Showing posts with label Recipes from Min. Show all posts

Thursday, October 1, 2015

Wild Cherry Hibiscus Soda

I've wanted to try this recipe for several months, and last week I finally assembled all the ingredients and made it!  (would you believe I had to go out of town for plain sparkling water??)

I ordered the exotic ingredients such as wild cherry bark and hibiscus flowers from a wholesale company, where I also got this recipe.  Let me know if you need help finding them and I'll see what I can do. 

I have been wondering about using frozen or even fresh cherries (thawed, then dried?) instead of the expensive dried cherries.  I was also wishing that the leftover solids could be used somehow, but not with bark in the mix...

I am not sure how many drinks this will end up making, I got almost a quart of concentrated extract, and have been using about one shot (just under 1 ounce) per drink.  They are refreshing and delicious and I'm so glad I have that extract in the fridge!

**They call it ale, I call it soda.**


Wild Cherry Hibiscus Soda
Recipe from Frontier Co-op

4 cups water
1 cup dried cherries, chopped into ¼ inch pieces (do not use vegetable oil treated cherries!)
1 tablespoon Frontier Wild Cherry Bark
1/4 cup Frontier Hibiscus Flowers
2 cups Frontier Organic Cane Sugar

Place water in pan and add dried cherries and wild cherry bark.
 
Bring pot to boil, reduce to simmer, cover and let simmer for 1 hour, stirring occasionally.  Turn off heat, add hibiscus flowers and sugar and stir until dissolved. Cover and let steep until cool, about 1 1/2 hours.
 
Strain liquid through a fine mesh sieve, then through one or more coffee filters into a clean, sterile jar. Store concentrated extract in refrigerator for up to three months.

To mix: Use a 1:6 ratio of concentrate to sparkling water. Adjust the ratio for more or less sweetness 
 according to your personal dietary preferences and desired taste.

Serve over ice.  Garnish the drink with whole frozen, pitted cherries.

Friday, August 7, 2015

Dutch Oven Cornish Game Hens with Red Potatoes

For Easter this past spring, my husband decided he wanted to cook Cornish Game Hens in the Dutch oven.  I was totally on board, and am I ever glad!  They were sooooo beautiful and delicious!

Here's how we did it.  The amounts below aren't exact; adjust the recipe to suit the size of your Dutch oven and/or how many people you are serving.  We serve 1 whole Cornish game hen per person, the kids just LOVE having their own "little chicken." 


Dutch Oven Cornish Game Hens with Red Potatoes
Serves as many people as there are hens

Red potatoes, scrubbed and whole if small, halved or quartered if bigger, to at least cover bottom of Dutch oven
thinly sliced bacon (2 slices per hen)
2-3 shallots, peeled and thinly sliced
Kosher salt
Freshly ground pepper
Fresh rosemary sprigs
1 Cornish game hen per person

We used a 16" round Dutch oven for 7 Cornish hens.

Layer potatoes on bottom of Dutch oven, scatter shallots and rosemary on top and season with salt & pepper.  Nestle hens on top of potatoes.  Top hens with bacon (my husband liked an "X" of bacon on each hen), more shallots and rosemary, and sprinkle with salt & pepper.

Prepare charcoal for cooking.  My husband says the general Dutch oven rule is "2 under and 2 over" the diameter of your oven, so for a 12" oven you'd start with 10 hot briquettes evenly spaced under the Dutch oven and 14 hot briquettes on top.

That being said, he cooked our hens quite a long time, and used more charcoal to speed things up.  He probably cooked for about 2 hours total, adding more hot coals as needed.  Every half hour, he rotates the pot and the lid (spin without lifting) in opposite directions to eliminate any hot spots.  He says Dutch ovens are very forgiving, so it's hard to go wrong.  More charcoal makes things cook faster, and it's kind of hard to burn them.  You want to cook your hens until they are golden and the joints move freely, and potatoes are tender.

This dish is flavorful and aromatic, and perfect for a special occasion.  The potatoes end up in the savory juices from the bacon and chickens, which makes a fine topping or you could make it into gravy on the stove top.

Sunday, June 28, 2015

Chocolate Mint Cupcakes

A friend of mine hired me to make cupcakes for her daughter's 7th birthday party.  Her daughter requested chocolate mint cupcakes, which I'd never made before, so I turned to One Sweet Cupcake.

I pretty much followed the recipe, except I used bittersweet chocolate and didn't measure it, reduced the vanilla, and I had to guess how long to bake them.  For some reason, there aren't a lot of baking times in the recipes.

These turned out so great, I ended up making 2 batches, that's right, 48 freaking cupcakes, because I wanted some for my family too!  I frosted them with Vanilla Mint Buttercream, and garnished with half an Andes Creme de Menthe Thin (my friend's idea) and a sprig of fresh mint (my idea) and they turned out FABULOUS and DELICIOUS.  See for yourself.  And then make some for yourself!


Chocolate Mint Cupcakes
Adapted from One Sweet Cupcake
Makes 24 cupcakes


4 oz. high-quality bittersweet chocolate bar, chopped into small pieces
1/2 cup boiling water
1/2 cup sour cream
1/2 cup unsweetened applesauce
1/2 cup vegetable oil
3 large eggs
2 teaspoons pure vanilla
1 teaspoon peppermint extract

1-1/2 cups all-purpose flour
1 cup granulated sugar
1 tablespoon baking powder
1/2 teaspoon salt
1/2 cup cocoa powder

Preheat oven to 350 degrees F.

Place chocolate in the bowl of a stand mixer.  Pour boiling water over chocolate and let sit for 1 minute.  Using the whisk attachment, mix until smooth.  Scrape down the sides of the bowl.

Add sour cream, applesauce, oil, eggs, vanilla, and peppermint.  Mix well.

In a separate bowl, sift flour, sugar, baking powder, salt, and cocoa powder.  Turn the stand mixer on low, add dry ingredients and mix until just incorporated and smooth.

Line two standard muffin tins with paper baking cups.  Fill each cup two-thirds full with batter.  Bake about 20 minutes, until the tops spring back at the touch of your finger and a toothpick inserted into the center comes out clean. 

Remove from tins and cool completely on wire rack before icing.

Frost with Vanilla Mint Buttercream and garnish with halved Andes Creme de Menthe Thins and fresh peppermint leaves, as shown.


Vanilla Mint Buttercream

Inspired by One Sweet Cupcake, I halved the recipe for Vanilla Buttercream and also made it minty to top off some Chocolate Mint Cupcakes.  (I didn't like her recipes for Peppermint Buttercream OR Grasshopper Buttercream for the purposes of this party)  I colored the frosting pale kelly green for a birthday party, but white or any other color would be just as nice. 


Vanilla Mint Buttercream
Adapted from One Sweet Cupcake
Makes enough to frost more than 48 cupcakes in method shown above.  :-)

1 pound butter, softened
pinch of salt
2 pounds powdered sugar
1/8 cup milk
1 tablespoon pure vanilla
1/2 tablespoon peppermint extract


In a stand mixer bowl with the paddle attachment, beat butter and salt until light, completely smooth and fluffy.  Turn the mixer speed to low and add half of the powdered sugar.  Mix until smooth. 

Add vanilla and peppermint to milk. 

Alternately, add remaining powdered sugar and milk extract mixture, beating until smooth and creamy.  Add green food coloring (I use Wilton paste colors) and mix until desired shade is reached.

Frost cupcakes as desired.  I garnished each cupcake with

Andes Creme de Menthe Thins and fresh peppermint leaves/sprigs.


**I will elaborate on my technique above if anyone would like me to!

Thursday, January 22, 2015

Chicken Lettuce Wraps

OMG.  These are seriously soooo delicious.  And super easy!  Trust me, you need to make these ASAP.

I doubled the original recipe and served 4 of us, but we had this as a meal--only had about 1 cup of meat leftover.  So I'm going to post the ingredients for a double recipe and say it serves 4.  If you're serving it as an appetizer, it will probably serve more than 4.  You judge it for your own family, leftovers are terrific!

The original recipe says it's a "copycat" of PF Chang's.  We don't have a PF Chang's around, so I have no way of knowing whether or not this tastes anything like what they serve. 

I decreased a couple of the ingredients, and these were perfect.  Even my picky 8-year-old LOVED them.  I mean it, make these today!


Chicken Lettuce Wraps
Adapted from Damn Delicious
Serves 4

1 tablespoon olive oil
2 pounds ground chicken
4 cloves garlic, minced
about 1/2 large onion, diced
1/2 cup hoisin sauce
4 tablespoons soy sauce
2 tablespoon rice wine vinegar
2 tablespoons freshly grated ginger
2 scant teaspoons Sriracha, or to taste
1 (8-ounce) can whole water chestnuts, drained and finely diced
4 green onions, thinly sliced

1 head butter lettuce

Heat olive oil in a skillet over medium high heat. Add ground chicken and cook until browned, about 3-5 minutes, making sure to crumble the chicken as it cooks.

Stir in garlic, onion, hoisin sauce, soy sauce, rice wine vinegar, ginger and Sriracha.  Cook and stir until onions have become translucent, about 1-2 minutes. Stir in chestnuts and green onions until tender, about 1-2 minutes.

To serve, spoon several tablespoons of the chicken mixture into the center of a lettuce leaf, wrap and eat!

Tuesday, June 17, 2014

Slow Cooker Taco Soup

This soup is super easy and has become a family favorite!  It's a recipe I got from my neighbor/best friend, with whom I've been meal planning, cooking and eating for several months now.  All the kids love it, which is a challenge when you're feeding two families including five kids of varying ages and tastes.  This one is a winner!

(picture soon!)

Taco Soup
(double if serving more than 4-6 people)

1 pound ground beef
1 packet taco seasoning

2 cans tomatoes
2 cans pinto beans, drained
1 can black olives, drained

tortilla chips

toppings:
sour cream
avocados
grated cheese
diced tomatoes
olives
diced onions
lettuce
etc!

Brown ground beef, stir in taco seasoning and place in slow cooker.  Add tomatoes, beans & olives, stir to combine.  Cover and cook on low for 2-3 hours, until heated through.  While soup is cooking, prep toppings as desired.

Stir again before serving.

To serve:  Crush tortilla chips in a bowl.  Top with taco soup, and any toppings you wish.  Enjoy!

Sunday, April 13, 2014

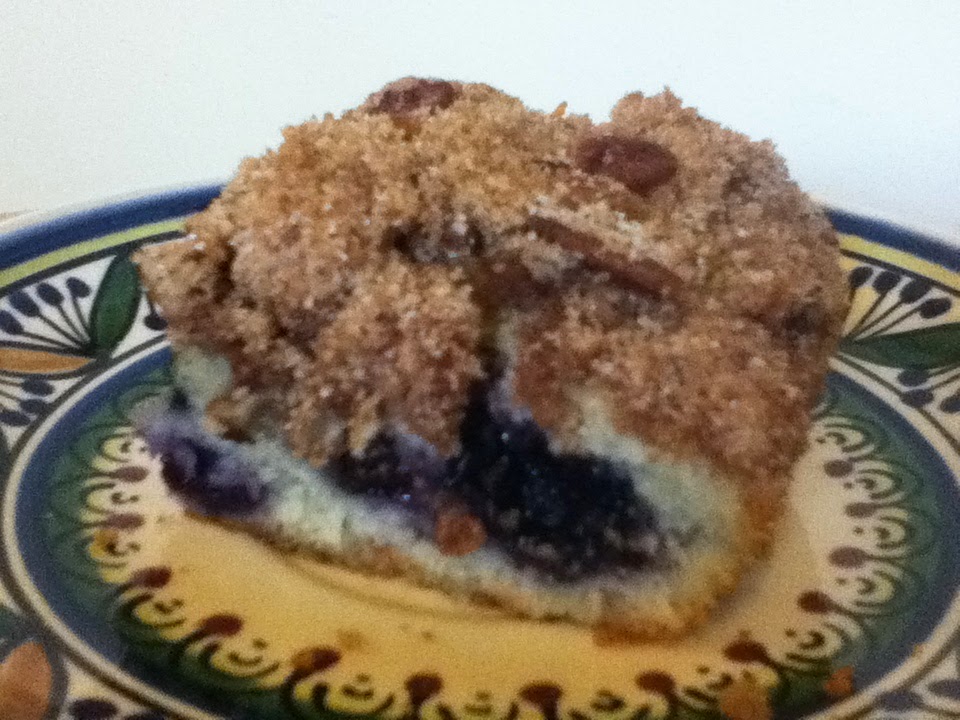
Blueberry Streusel Cake


For this month's Secret Recipe Club, I was assigned Anne-Marie of This Mama Cooks!

I was intrigued by her Avocado Ricotta Pound Cake, and totally have her Mexican Breakfast Casserole on my list, but ended up choosing this Blueberry Streusel Cake

It was easy to put together.  I did make a few changes, and if there is a next time I will make more changes. To me, in the morning, even with coffee, the cinnamon in the streusel is overpowering, as is the sheer amount of streusel.  I thought about leaving some off as I was dumping it over the batter, but I didn't.  Next time I will, and I'll probably also cut back on the dry ingredients and increase the butter.  But maybe that's just me.

I had to bake this cake almost double the suggested time--15 additional minutes!  At 20 minutes it was still raw (I know this because my pan is clear (see below) AND the toothpick came up with batter on it.  In the end it turned out fine, but if you have somewhere to be, maybe choose a quicker recipe.

H-Bomb likes this cake a lot, and ate two pieces for breakfast!  Sawed Off is refusing to try it (nothing new) and Number One said he'll have some later. 

So, it's a good cake and we'll probably eat it all, but to be honest it makes me long for my mom's amazing Blueberry Tea Cake.  I wish that is the cake I'd made.  I'll have to get that recipe from her and share it soon.


Blueberry Muffin Streusel Cake
Adapted from This Mama Cooks via a friend via Holly Clegg?  
(I'm not sure where the recipe originally came from, but I found it at This Mama Cooks!
Makes 12 servings

1 cup all-purpose flour
1 1/2 teaspoons baking powder
1/2 cup sugar
1/2 cup milk
1 egg
1 teaspoon vanilla
2 tablespoons oil
1 cup fresh blueberries

Streusel Topping (recipe follows)


Preheat oven to 375°F.  Coat a 9x9x2-inch square pan with nonstick cooking spray or butter.

In bowl, mix together flour, baking powder, sugar, milk, egg and vanilla.

Stir in oil and blueberries, only until mixed.

Sprinkle 1/2 cup reserved Streusel Topping (recipe below) on bottom of pan. Carefully spread cake mixture on top. Cover with remaining reserved Streusel Pecan Topping.

Bake 20-25 minutes or until toothpick inserted in middle comes out dry.

Streusel Topping
1/3 cup sugar
1/3 cup brown sugar
1/2 cup all-purpose flour
2 teaspoons ground cinnamon
1 teaspoon vanilla extract
3 tablespoons butter, softened
1/2 cup chopped pecans

In small bowl, mix together sugar, brown sugar, flour and cinnamon.
Cut in vanilla and butter using pastry blender or fork.
Reserve 1/2 cup topping and add pecans to remaining topping.


Secret Recipe Club

Friday, April 11, 2014

Slow-Cooked Kalua Pork

Once you taste this pork, you will never believe it has only three ingredients!  It is succulent and flavorful and simply amazing.  We plan to make it again and again.  We made two batches of this to feed two families totaling 10 people (5 adults and 5 kids).  We ended up stirring the two slow cookers into one after the meat was shredded.  I don't have a picture because we proceeded to eat a TON of pork sandwiches.  We'll be making it again soon though, so stay tuned!!

The recipe comes from January 2014 The Costco Connection, attributed to Michelle Tam.  I used Red Hawaiian Sea Salt from Frontier for the recipe. (follow the link to purchase--I am glad I bought a pound of red salt as this recipe is a keeper!)  The only thing we changed was adding more bacon and slow-cooking the meat overnight, then we shredded it and reheated before dinner.  The salt colors the outside of the meat a deep, beautiful red, and any crunchy outside bits are the best!  We served ours on rolls with coleslaw (on top or on the side).  It makes a lot.  Buy the best pork roast you can find and make this recipe!

Slow Cooker Kalua Pork
Serves a lot.

3 bacon slices (we used 1/2 package of bacon per slow cooker)
5-pound Boston butt pork roast (bone in or boneless)
1-1/2 tablespoons coarse (or 1 tablespoon fine) Red Hawaiian Sea Salt
toasted rolls, for serving
coleslaw, for serving


Line the bottom of the slow cooker with strips of bacon.  Evenly salt the pork with the red Hawaiian sea salt.  Place the roast in the slow cooker on top of the bacon, skin side up.

Cook the roast on low for 16 hours.
Shred the meat with a couple forks, discarding any excess fat chunks.  You can either do this right in the slow cooker, or by taking the meat out, shredding it on a pan, then mixing it back in with the liquid in the slow cooker.  This reheats beautifully, so if you don't want to get up at 1 or 2:am to turn on your slow cooker, it's not a big deal to cook it when it's more convenient.  Just be sure you allow 16 hours for cooking!

Friday, March 7, 2014

Quick Cherry Cobbler

***Taste & Create is a fabulous monthly blog event 
in which participants are randomly paired off 
to choose and prepare a dish from their partner's blog. 
 If you'd like to join us, please email me at 
cowgirlmin07 [at] gmail [dot] com for more information!  
We'd love to have you.**


For February's Taste & Create, I was paired with Carol from No Reason Needed.  Carol is a long-time T&C participant, so we've been paired up before.  I always enjoy seeing what's new and perusing her blog until something catches my eye.

This time I chose a recent recipe, her Cherry Cobbler.  It was super easy to put together, but only half of my family liked it.  I use "country style" cherry pie filling, which isn't as sickly sweet as regular cherry pie filling.  I debated leaving out the lemon juice for this reason, but didn't.  I wonder if leaving out the cinnamon would have made the other two like the cobbler more?  I do like that this recipe uses less sugar, and it tasted great to me and my oldest son.  But sadly I can't make it a go-to recipe if my husband and other son don't love it...perhaps I'll try it again with no cinnamon and see what happens...

If you try it, let me know what your family thinks!


Cherry Cobbler
via No Reason Needed

batter:
1/2 cup butter, melted
1 1/4 cup flour
2 teaspoons baking powder
1/2 cup sugar
1 cup milk

filling:
1 can of cherry pie filling (I prefer country style)
1 teaspoon cinnamon
1 tablespoon lemon juice

Preheat oven to 325 degrees F.  Mix together all the filling ingredients, let the cherry mixture sit while you make the batter.

In a separate bowl mix batter ingredients with a fork, and pour into a 9 x 13 glass baking dish. Carefully spoon the cherry pie filling over the batter evenly. Bake for 25 minutes at 325 degrees F, then turn heat to 350 degrees and bake for an additional 10 minutes or until golden brown on top.  The batter will rise over the top of the filling.

Sunday, February 9, 2014

Coconut Lime Pull-Apart Bread

You probably know I regularly participate in a couple monthly blog events.  Both of these events expose me to new food blogs, and who doesn't enjoy perusing new blogs?  ;-)

Taste & Create is a fun one, (created by my friend Nicole who passed the torch to me when she opened her own bakery/cafe in Germany), in which participants are randomly partnered up and tasked with creating a recipe from each other's blog.  (click the link above and email me at cowgirlmin07[at]gmail[dot]com if you'd like to join us!)

The Secret Recipe Club is interesting too, participants are assigned blogs and make recipes, but there are no partners, everyone is in sort of a daisy-chain of food.  (click on the logo at the bottom of this post to get on the list for this one)

This month, the blog I was assigned for Secret Recipe Club was:


It didn't take long to decide on one of Jeanie's Pull-Apart Breads!  The hard part was deciding whether to make Orange or Coconut Lime!!  A quick question to Number One, and Coconut Lime Pull-Apart Bread was the winner.

This bread goes together easily, rises beautifully and isn't too hard to put together, if a bit messy!

The results are so good that we'll be making this again, in Orange, Cinnamon, and whatever other flavor we can think of!


Coconut Lime Pull-Apart Bread, before glazing


Coconut Lime Pull Apart Bread
 Adapted from The Tasty Cheapskate
Makes 1 loaf 
Prep time: 20 minutes
Rise time: 1 1/2 hours
Cook time: 30 minutes

1/3 cup milk
1/4 cup butter
1/4 cup water
1/4 cup sugar
2 1/4 teaspoons yeast
1 1/2 teaspoons vanilla
2 eggs
2 3/4 cups all-purpose flour (added by the cup)

Filling:

1/2 cup sugar
1/4 cup butter, melted
Grated zest of 2 limes (reserve about a teaspoon or so for topping)
1/2 cup coconut (I prefer dried raw, unsweetened)

Heat milk and butter until butter melts (Jeanie does this in the microwave, so I did too). Add cool water, so that the mixture is warm to the touch, but not hot (about 110 degrees). Stir in yeast and sugar. Add eggs and vanilla and mix well.

To this, add 1 cup of flour and mix. Then add another cup of flour and mix. It should be about ready to turn out to knead. (If not, add another 1/2 cup flour). Turn it out to knead adding remaining flour as it gets sticky. I actually ended up using 3 cups of flour total, including what I put on the pastry sheet and kneaded in. The dough should be soft, but not sticky.  It is a nice, substantial dough.

Place dough in a bowl, cover with a lint-free towel and let rise for about an hour, until doubled in size.

Punch the dough down and roll it out into a rectangle that is about 12 x 20 inches, about 1/4 inch thick, on a well-floured surface.

Melt butter for filling and drizzle it on, spreading around with a pastry brush so it covers the entire surface area.

Mix sugar, lime zest and coconut well.  Sprinkle evenly over dough.

Cut the dough short-ways into 5 (12x4") strips.  Stack the strips on top of each other. I scooped up the sugar, zest and coconut that fell off and sprinkled it back on the layers.

Cut this long stack into 6 rectangles that are roughly 2 inches wide. Carefully stack them cut side up in a well-greased loaf pan.  Scoop up any sugar mixture that's fallen off and sprinkle it on top.

Cover and let the loaf rise again.

Bake at 350 degrees F for 30-40 minutes. 

Jeanie says:  "The top will get a little crusty and you'll worry you might be cooking it too long, but don't worry, that's just caramel-y sugar forming on top. Remove from oven, let it cool slightly, and then take it out of the pan and, yup, tear it apart." 

Unless you want some glaze, in which case, continue on:


Coconut Lime Glaze

4 tablespoons coconut milk
1- 1 1/2 cups powdered sugar
juice from one lime
reserved lime zest for looks

Mix together and pour over bread while it's still warm.
THEN tear it apart and enjoy!!


Secret Recipe Club

Sunday, December 15, 2013

Cinnamon Roll Custard Oats

You probably know I regularly participate in a couple monthly blog events.  Both of these events expose me to new food blogs, and who doesn't enjoy perusing new blogs?  ;-)

Taste & Create is a fun one, (created by my friend Nicole who passed the torch to me when she opened her own bakery/cafe in Germany), in which participants are randomly partnered up and tasked with creating a recipe from each other's blog.  (click the link above and email me at cowgirlmin07[at]gmail[dot]com if you'd like to join us!)


The Secret Recipe Club is interesting too, participants are assigned blogs and make recipes, but there are no partners, everyone is in sort of a daisy-chain of food.  (click on the logo at the bottom of this post to get on the list for this one)

This month, the blog I was assigned for Secret Recipe Club was:


One look at Heather's blog was all it took for me to realize I really wanted to try one of her "custard oats" recipes.  But which one??  Well, I decided to try her Cinnamon Roll Custard Oats out on my boys, who LOVE the oatmeal that I make for them.  I love custard, I love oats, I love cinnamon rolls!

I'm sorry to say the boys did not love this oatmeal. I didn't have any cream cheese, and since they usually don't have toppings, I didn't add any.  I don't know whether that would have made a difference.  It was plenty sweet, they usually like a bit of brown sugar on top of oatmeal but they didn't ask for any of that either.  I guess when you have a winner for before-school breakfast, you just need to stick with it!

As for me, I really enjoyed the flavor, but there was a texture issue.  (this is no one's fault, I have trouble eating an entire container of yogurt b/c of the texture!)  Number One isn't an oatmeal fan from the start, so he didn't try it.  I may play with this recipe more and see what happens, or try one of Heather's other variations.  I am still intrigued by the whole idea!!  If you try it, let me know what you think!

*Incidentally, I doubled the recipe below and had more than enough oatmeal for the three of us, so just keep that in mind.*


Cinnamon Roll Custard Oats
from Fit Mama Real Food
Serves 1

1/2 cup oats
1/4 tsp vanilla extract
1/2 tsp cinnamon
1 tbsp maple syrup
1/4 cup unsweetened applesauce
1 cup milk or water *(I was running low on milk, so I used half & half and water in equal measure)
1 egg
heaping 1/16th tsp sea salt

Toppings: 1 tbsp cream cheese mixed with 1/2 tsp maple syrup, walnuts and raisins

In a small pot over medium heat add all ingredients except the toppings. Whisk together and continue to whisk every 2 or so minutes as the oats cook. (lower heat and whisk more if the oats start bubbling and splattering)  Once thickened up, about 5 minutes or so, remove and top with cream cheese frosting, walnuts and raisins if desired.


 Secret Recipe Club

Sunday, November 10, 2013

Homemade Soft Pretzels

I thought I'd tell you:  I regularly participate in a couple monthly blog events.  

Taste & Create is a fun one, (created by my friend Nicole who passed the torch to me when she opened her own bakery/cafe in Germany), in which participants are randomly partnered up and tasked with creating a recipe from each other's blog.  (click the link above and email me at cowgirlmin07[at]gmail[dot]com if you'd like to join us!)


The Secret Recipe Club is interesting too, participants are assigned blogs and make recipes, but there are no partners, everyone is in sort of a daisy-chain of food.  (click on the logo at the bottom of this post to get on the list for this one)

This month, the blog I was assigned for Secret Recipe Club was:


I was initially tempted by Dee's various apple recipes...Apple Pie Swedish Pancakes led to Apple and Walnut Coffee Cake and Apple Skillet Pancake and
Apple Almond Crostata and...and...and...

Somehow, I ran across this recipe for a savory, spicy little treat called Jalapeño Three-Cheese Swirls.  And at that moment, I had chosen.  Or so I thought!

When I had gathered the ingredients and the time came to make the Jalapeño Swirls, I clicked over to Dee's pizza dough recipe, where I stumbled across THIS

I've been wanting to make Soft Pretzels for years, and never bit the bullet.  The Time Is NOW.


I was really intrigued with the sausage-wrapped pretzel option, but I'm all out of sausages of any sort.  Next time.  For now, I'm just going with a classic Soft Pretzel.  And I am SO EXCITED!!!

The dough is super easy to mix up.  The trickiest part is getting the pretzels OUT of the simmering water...I used a slotted spoon, but was wishing for a flatter utensil which must be down at the ranch!  Take it from me, tongs definitely do NOT work!  ;-)

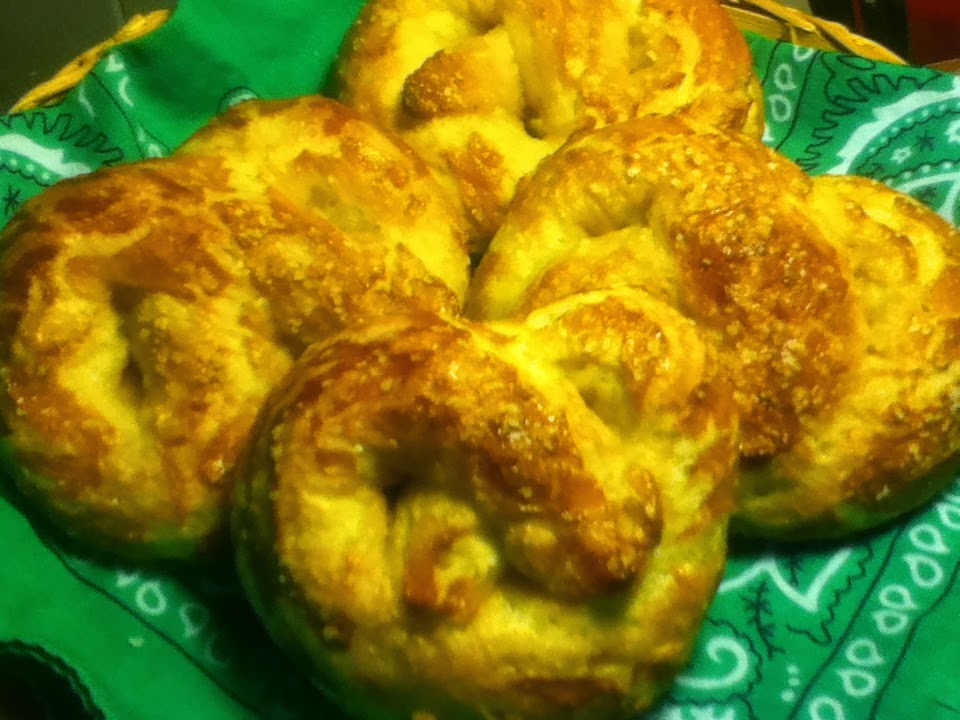
The other tip I would add:  roll the pretzel "snakes" long and skinny, then form.  We shaped ours not taking into account the rising they would do, so they turned out more like rolls than a classic pretzel.  Not that I'm complaining!


For some reason our first pan also came out a lot lighter than Dee's...I baked the second pan a few minutes longer, and they browned right up.  I may actually prefer the lighter, softer pretzels as opposed to the crunch of the darker pretzels.  I think I'll need to keep making and eating more pretzels to "perfect" this recipe!  ;-)  Delicious with a dab of Dijon!  Can't wait to try them with sausage inside.


Homemade Soft Pretzels

Recipe adapted from On The Move, via Growing Up Gabel


1 cup warm water
1 Tablespoon active dry yeast
1 Tablespoon sugar
2 Tablespoons oil
1 teaspoon salt
2¾ cups all-purpose flour
 
12 cups water
¼ cup baking soda
 
1 egg yolk, lightly beaten
1 Tablespoon water
Coarse salt, to taste


In a large bowl, combine water, yeast, and sugar.  Add 1 cup flour.  Add in oil and salt and 1 more cup of flour. Stir to combine.

Add enough flour to make a smooth, elastic dough, slightly tacky is fine. (At this point, I hadn't realized that the "enough flour" was about 2 3/4 cups, so I think I only used about 1 additional cup--it seemed to match the smooth, elastic, slightly tacky description...Fingers crossed!)  Knead dough a few times in the bowl.  Cover bowl and let dough rise until doubled (about 1 hour).

Pre-heat oven to 475 degrees. Grease baking sheets. (I used parchment paper instead)

Bring the 12 cups of water to a boil in a large stock pot. SLOWLY add in baking soda (slowly to minimize foaming). Keep water simmering.

Gently punch down dough and divide in to 6 or 12 pieces (depending on size of pretzel you want).

Roll each piece of dough out to an 12-18″ rope. Shape in to pretzel shape and pinch ends to close up. OR, use a dough rope to wrap up a link or smaller piece of sausage, encasing it completely and pinching the ends to secure. Repeat with remaining dough and sausages.

Boil each pretzel for 10-15 seconds, making sure all sides are boiled.  Place pretzels on greased baking sheets, 1 inch apart.  Cover pretzels and let rest for 5 minutes.

Whisk together egg yolk and water and then brush on top of pretzels. Sprinkle salt on pretzels.  Bake for 10-12 minutes or until golden brown.


Secret Recipe Club

Tuesday, September 24, 2013

Pumpkin Streusel Bread

(marks on top are from turning out onto rack)

I saw a recipe for Vegan Pumpkin Walnut Bread floating around facebook the other day.  Since I've learned the hard way not to trust "recipes" on facebook, I tracked down an original version from 2009 by Joy the Baker.  I was fully prepared to follow the vegan recipe, but then I decided I just didn't want to.  There is no reason at all for me to forgo eggs and butter and dairy products, especially when the tradeoff is a cup or two of vegetable oil.  I asked in a comment what the substitutions would be...to get the recipe back from vegan.  Well, that was four days ago and I'm still waiting for an answer.  (I know the post is four years old, but still!  Don't I try to answer all your comments here, no matter how old the post?)  Anyway, I do hope I get an answer some day but I just couldn't wait any longer! 

So I did some more searching.  Shell has a recipe on here for Pumpkin Bread.  I found several other recipes around the internet too, each calling for different ingredients (sour cream, milk, oil, butter, etc.) and different spices in different proportions.  I decided to pick and choose the ingredients I wanted and equalize the proportions to make two loaves of pumpkin bread.  I also naturally wanted to use my own roasted pumpkin puree that I had in the freezer.  (directions for roasting pumpkin are within my Fresh Pumpkin Pie post--which the boys requested when they saw the pumpkin thawing!)  Unfortunately I didn't have walnuts, so I went with a streusel topping instead.  Next time I will definitely add walnuts along with the streusel topping, so they are listed below. 

This recipe worked perfectly for me!  I have two beautiful loaves of Pumpkin Streusel Bread cooling right now, although the boys have tasted it and proclaimed it delicious.  The bread is tender and the texture is just right.  I'll definitely be making this one again, and I'm so glad I have two whole loaves!  Okay, a loaf and a half...


Pumpkin Streusel Bread
makes 2 loaves

4 cups all purpose flour
2 teaspoons baking soda
2 teaspoons baking powder
2 teaspoons salt
2 teaspoons ground cinnamon
2 teaspoons ground cloves
2 teaspoons ground ginger (I am out of ginger at the moment, but I fully intend to add it next time)
1 cup (2 sticks) butter, softened
1 cup brown sugar

4 large eggs

4 cups fresh roasted pumpkin puree
2 teaspoons vanilla extract

1 cup sour cream
1 cup buttermilk (or 1 tablespoon lemon juice + milk to equal 1 cup)

2 1/2 cups chopped walnuts

Streusel topping:
1/2 cup flour
1/2 cup sugar
1/2 teaspoon salt
2 tablespoons cinnamon
2 tablespoons butter
1/2 cup chopped walnuts

Position rack in center of oven; preheat to 325°F.

Butter two 9x5x3-inch loaf pans.

 Stir dry ingredients together in a medium bowl, set aside. Using electric mixer, beat butter in large bowl until light, about 2 to 3 minutes. Gradually beat in brown sugar. Beat in eggs one at a time. Beat in pumpkin and vanilla.

Whisk sour cream and buttermilk in small bowl. Beat flour and sour cream mixtures alternately into batter in 2 additions each. Fold in 2 1/2 cups of nuts. Spoon batter equally into pans; smooth tops.

For streusel topping, stir together flour, sugar, salt and cinnamon.  Cut in butter, stir in walnuts.  Sprinkle tops of loaves with streusel topping. Bake bread until toothpick inserted into center comes out clean, about 1 hour 10 minutes. Cool in pan 10 minutes. Loosen edges with a butter knife, turn out onto rack and cool.

Sunday, August 11, 2013

S'mores Brownies

This month, the blog I was assigned for Secret Recipe Club was:


Originally I was planning to make Melissa's Peach Ice Cream, but I was going to make it with apricots since my tree was producing a ton and my peach tree wasn't ripe yet.  I didn't get around to it quickly enough, and before I knew it my apricots were no longer in season.  Peaches still aren't in season around here.

So I decided to search for a brownie recipe.  For obvious reasons.  ;-)

I didn't get past the very first brownie recipe in the category before my mind was made up:

S'mores Brownies.


The bottom brownie recipe is a bit fussy, but goes together quickly and turns out delicious!  Easier if you have all your ingredients ready to whisk in ahead of time.  Next time, I will sprinkle the chocolate chips on brownies before adding the marshmallows and graham crackers so they melt a bit more.

The brownies were a hit!  Everyone loved them!

S’mores Brownies

originally adapted from The Science of Good Cooking
makes 24

Brownie Ingredients:
⅓ cup cocoa powder
½ cup plus 2 tablespoons boiling water
2 oz. unsweetened Baker’s chocolate, finely chopped
4 tablespoons unsalted butter, melted
½ cup plus 2 tablespoons vegetable oil
2 eggs
2 egg yolks
2 teaspoons. vanilla extract
2½ cups sugar
1¾ cups flour
¾ teaspoon salt
1 cup milk chocolate chips
½ cup mini marshmallows (optional)

Topping Ingredients:

3 cups mini marshmallows
5 graham crackers, broken
½ cup milk chocolate chips

Adjust the oven rack to the lowest position. Preheat oven to 350°. Line a 13ʺx9ʺ pan with foil and grease the foil.

 Whisk cocoa and boiling water together in a large bowl until smooth. Add unsweetened chocolate and whisk unto chocolate is melted. Whisk in oil and melted butter (mixture may look curdled).

Add the eggs, yolks, and vanilla. Continue to whisk until smooth and homogenous. Whisk in the sugar until fully incorporated.

With a rubber spatula, stir in the flour and salt. Fold in the milk chocolate chips and marshmallows, if using.
Transfer the batter to the prepared pan.

Bake 30 minutes, rotating the pan halfway through.

Meanwhile, combine the marshmallows and the graham crackers in a medium bowl.

Pull the brownies out of the oven and sprinkle the marshmallow mixture evenly over the surface. Sprinkle the chocolate chips over the marshmallows.

Return the brownies to the oven and bake another 10–15 minutes, until the marshmallows are puffed and golden.

Cool in the pan on a wire rack for 10 minutes. Remove the brownies from the pan using the foil liner. Set them back on the wire rack and let cool completely, about 1 hour.

Cut into squares and serve.

Secret Recipe Club

Sunday, July 14, 2013

Grilled Pineapple Chicken

This month, my assignment for Secret Recipe Club was:


Maria has lots of great-sounding recipes, but it's summer and it's hot and I wanted to cook something on the grill.  So I made my choice:  her Grilled Pineapple Chicken Kabob Foil Packets.  While the name is a mouthful, the recipe is pretty darn good.  Easy to put together, I had just about everything in my kitchen to whip these up.  We make Campfire Potatoes a lot, but I don't remember doing any packets with meat in them, not sure why.

I packaged mine up ahead of time, then tossed them on the grill just before dinner. 

My husband didn't make it home for dinner, so I had two younger taste-testers.  My oldest boy liked it and ate his whole dinner.  I should have made rice to go with these!  My youngest said he didn't like the chicken, but he did eat a couple bites.

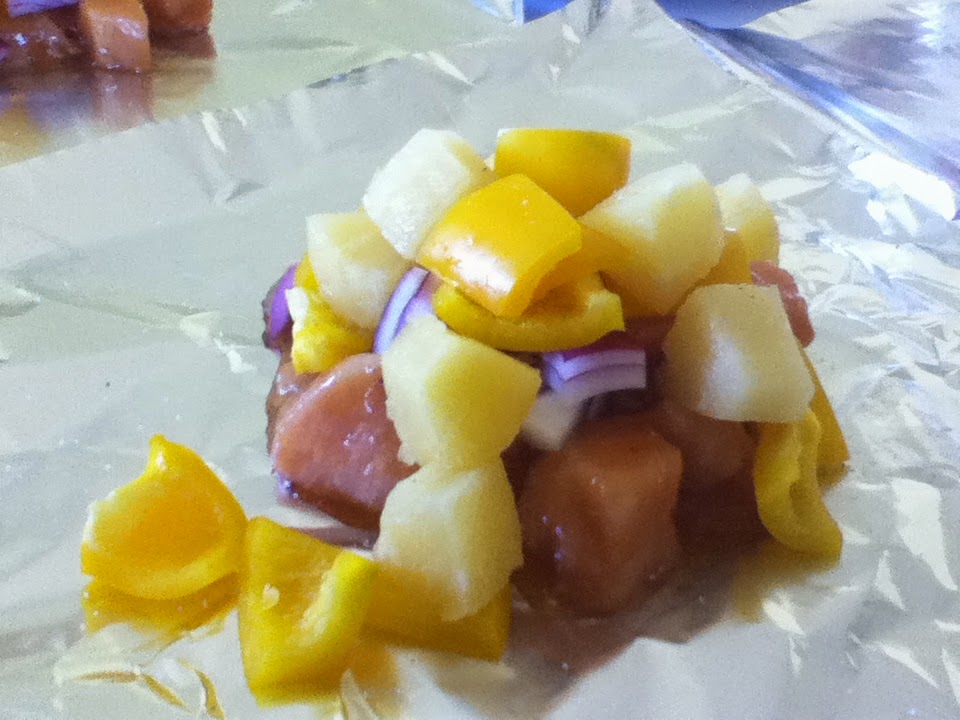
These would be very good with rice, and I think next time I'll cook them just a bit less.  I used my own peach jam from last summer, and I decided to coat the chicken with the preserve mixture first, instead of piling it on with the vegetables.  It worked great.

Before grilling, 1 serving


Grilled Pineapple Chicken Foil Packs
Adapted from Close to Home 
Makes 4 servings
 
1/3 cup pineapple, peach or apricot preserves (I used my own peach jam)
2 tablespoons packed brown sugar
1 tablespoon soy sauce
1/4 teaspoon crushed red pepper (I used a pinch)
4 boneless skinless chicken breasts, cut into 2-inch cubes (1 lb)
1 medium red bell pepper, cut into 1 1/2-inch cubes (I used 2 yellow peppers I had)
1 cup pineapple chunks
1 red onion, cut in 1 inch cubes (I only used 1/2 an onion)
salt, to taste

Heat grill on medium heat.  In small bowl, stir together pineapple preserves, brown sugar, soy sauce and crushed red pepper.  Add chicken breast chunks and toss until coated.

Cut 8 (12×12-inch) sheets of heavy-duty foil. Divide coated chicken, bell peppers, pineapple chunks and onion evenly among foil sheets. Sprinkle each lightly with salt. Seal edges tightly, folding and rolling in toward the center three or four times.  Seal opposite sides, then fold edges in on last two sides and roll in a similar fashion, taking care not to package the food too snugly but sealing edges carefully so juices don't leak out when flipped.

Reduce grill to low.  Place packets on grill over low heat. Cover grill; cook 6 minutes. Using tongs, carefully turn packets over, taking care not to puncture foil. Cook 10 to 12 minutes longer or until chicken is no longer pink in center and vegetables are crisp-tender.

***If you're looking for a fun new food blog event, look no further!  Taste & Create is a fabulous monthly blog event in which participants are randomly paired off to choose and prepare a dish from their partner's blog. 
 If you'd like to join us, please email me at 
cowgirlmin07 [at] gmail [dot] com for more information!  
We'd love to have you.***


Secret Recipe Club

Saturday, June 29, 2013

Blueberry Butter

This recipe comes from a new-to-me cookbook, that I borrowed from a friend and decided was so good I just had to have my own copy!  The book is from Michigan, and is called Hollyhocks & Radishes: Mrs. Chard's Almanac Cookbook, which you may remember from the delicious Rhubarb Bundt Cake I posted a few weeks ago. There are so many recipes on my list to try.

I was planning on making this with a case of blueberries I bought, and even successfully found and purchased some mace, but my boys beat me to the fruit.  My friends in Oregon just harvested 163.4 pounds of blueberries, so I am publishing this for them.  I am sure it's fabulous.  Here's the book, you might as well go order your copy now!


Blueberry Butter
Yield:  8 pints
Prepare: 15 minutes
Cook: 1 hour

2 quarts fresh blueberries
8 large, green cooking apples
8 cups sugar
1 teaspoon allspice
1 teaspoon nutmeg
1 teaspoon mace

Wash and drain blueberries; peel, core and slice apples.  Combine in a Dutch oven or pot with remaining ingredients. 

Bring to a boil, stirring.  Lower heat and simmer 1 hour, stirring periodically, or until right consistency for spreading.

May be stored in the freezer or water-bath canned.  If the latter, process 10 minutes (or adjust for your altitude).

Sunday, June 16, 2013

Potato-Fennel Gratin

My friend gave me this recipe after we each received a big fennel bulb in our weekly Bountiful Baskets.  She said it's one of her favorites, and when she says that you know it's good!

This is a savory, comforting dish, with the delicate flavor of fennel and sauteed onions.  I used regular Swiss as I was out of Gruyere and it was great.  Next time I'll watch mine a little closer, I had to run a long errand and put my husband in charge, and the edges were a bit burned, but still delicious!

Try some the next time you run across some fresh fennel!


Potato-Fennel Gratin 
From Ina Garten, The Barefoot Contessa Cookbook
Total Time: 2 hr 15 min
Prep 20 min
Inactive 10 min
Cook 1 hr 45 min

Yield: 10 servings

2 small fennel bulbs
1 yellow onion, thinly sliced
2 tablespoons good olive oil
1 tablespoon unsalted butter
2 pounds russet potatoes (4 large potatoes)
2 cups plus 2 tablespoons heavy cream
2 1/2 cups grated Gruyère cheese (1/2 pound), or regular Swiss cheese
1 teaspoon kosher salt
1/2 teaspoon freshly ground black pepper


Preheat the oven to 350 degrees F.

Butter the inside of a 10-by-15-by-2-inch (10-cup) baking dish.

Remove the stalks from the fennel and cut the bulbs in half lengthwise. Remove the cores and thinly slice the bulbs crosswise, making approximately 4 cups of sliced fennel. Saute the fennel and onions in the olive oil and butter on medium-low heat for 15 minutes, until tender.

Peel the potatoes, then thinly slice them by hand or with a mandoline. Mix the sliced potatoes in a large bowl with 2 cups of cream, 2 cups of Gruyère, salt, and pepper. Add the sauteed fennel and onion and mix well.

Pour the potatoes into the baking dish. Press down to smooth the potatoes. Combine the remaining 2 tablespoons of cream and 1/2 cup of Gruyère and sprinkle on the top. Bake for 1 1/2 hours, until the potatoes are very tender and the top is browned and bubbly. Allow to set for 10 minutes and serve.

Saturday, June 15, 2013

Coconut Granola

I found this recipe for granola on The Frugal Girl, and was intrigued because it uses coconut oil instead of vegetable oil.  Even healthier, right?

The good news is that this granola is fabulously delicious AND easy to make.  I made a double batch and took it to our family quilting retreat this week, and it was a HIT!  We ate it for breakfast two mornings in a row.  It's a keeper!
 
Picture to come!

Coconut Granola
Adapted from The Frugal Girl

6 cups regular oatmeal
1 cup chopped nuts (I used almonds and topped them off with peanuts to make a full cup)
1 cup dried fruit (I didn't use fruit, so I say Optional.  If it's bigger than a raisin, I'd chop it too)
1 cup raw dried coconut (find this in the organic/baking section of your grocery, if you're lucky!)
1/2 cup honey
1/2 cup coconut oil
3 tablespoons dark brown sugar
3 teaspoons vanilla extract

Preheat oven to 300 degrees.

In a large bowl, combine oats, nuts, fruit (if using), and coconut.

Heat the honey, oil and brown sugar on low heat in a small pot.  Stir until sugar is dissolved.  Stir in vanilla.

Pour honey mixture over oat mixture and stir well. Spread onto two rimmed baking sheets.

Bake for 15 minutes, then stir. Bake for another 5 minutes and stir. Bake in additional 2-5 minute intervals until granola is light golden brown.

Sunday, June 9, 2013

Baby Nutella Cheesecakes

This month, my assignment for Secret Recipe Club was:


As soon as I saw Sarah's recipe for Baby Nutella Cheesecakes, I knew what I was making! 


I only have one mini muffin pan, so the rest of my crust and batter are resting in the fridge for later.  I did have some trouble with the crust.  I couldn't get the crust to stop sticking to my wooden tart former, no matter how much butter I used to grease it.  I added another 1/4 stick of melted butter to the crust mixture, then ended up using a square of waxed paper over the tart former, which worked great.  Otherwise it was too fussy for me, I tried buttering my fingers, everything!

The only other change was halving the sugar in the sour cream topping. 

These little babies are soooo good!  Everyone loved them.  I'm glad I still have more to make.  Perfect little bites.


Baby Nutella Cheesecakes
Adapted from Everything in the Kitchen Sink

Crust:
1 package (about 8 full squares) of graham crackers
1/4 cup sugar
1/2 teaspoon salt
1/2 a stick of butter, melted  (I used 3/4 stick of butter)

Preheat the oven to 350 F.  Using the food processor, grind up the graham crackers into crumbs.  Add the sugar and salt, pulse 3 times, then add the melted butter.  Pulse a few more times and transfer to a small bowl, being sure to scrape any butter trapped under the blade.
Add 1-1/2 teaspoon of graham cracker crumbs to each well of the 24-mini muffin pan.  Press down using another mini-muffin pan, a tart former, or your fingers.

Bake for 5 minutes at 350 F.  Let cool while you prepare the cheesecake.

Cheesecake:
1 8-ounce package of cream cheese
1/2 cup mayonnaise
1/2 cup sugar
2 eggs
1/2 teaspoon vanilla extract
3/4 cup Nutella (6 ounces)

Let the cream cheese, mayonaise, eggs, and nutella come to room temperature.  For best results, let cream cheese sit overnight and the mayo and eggs brought out 1 hour before you want to bake, just to come to room temperature.  Combine the cream cheese and mayonaise with a hand mixer.  Add the sugar then beat in the eggs one at a time.  Add the vanilla and Nutella and combine well.

Sarah uses ziplocs as pastry bags to distribute the cheesecake filling and topping, but I just used spoons.

Fill the wells with cheesecake batter, almost to the top.  Lightly tap the pans to get rid of any bubbles.
Bake for 12 minutes at 350 F.  The tops will be puffed.  Let cool while you prepare the sour cream topping.

Sour Cream Topping:
1 cup of sour cream
2 tablespoons sugar *(I used 1 tablespoon)
1/2 teaspoon vanilla extract
pinch of salt *(I omitted)
Combine all ingredients.  Fill the divets in the cheesecakes created from cooling.  Bake for 2 more minutes, let come to room temperature, then refrigerate for 2 hours. 

To remove, use a butter knife slightly warmed with hot water to most cleanly retrieve your baby cheesecakes.

Serve chilled.
Secret Recipe Club

Friday, May 24, 2013

Greek-Style Panini

 
***Taste & Create is a fabulous monthly blog event 
in which participants are randomly paired off 
to choose and prepare a dish from their partner's blog. 
 If you'd like to join us, please email me at 
cowgirlmin07 [at] gmail [dot] com for more information!  
We'd love to have you.**
 
 
For this month's Taste & Create, I was paired with Pavani of Cook's Hideout.  She has a lot of great recipes, but I wanted something simple and these paninis caught my eye!  Pavani's recipe is for one sandwich, but we have 4 in our family so I increased all the ingredients.  I mixed most of a package of frozen spinach with an entire 4 ounce container of feta, and there is probably enough of the spinach mixture left to make two more sandwiches.  

I was generous with the hummus, using more than 2 tablespoons per sandwich (I just spread some on), and unfortunately I didn't have any roasted red peppers!  Our teeny tiny grocery store doesn't carry them, (quite honestly I was shocked to finally find feta there) and my stash was gone, so I bought some roasted red pepper hummus as a compromise.
 
My panini press is at the ranch and I was making these in town, so I improvised with a cast iron pan that fit inside my regular frying pan to weight the sandwiches down.  Worked great but I missed those signature ridges from the press!
 
 
These sandwiches are light but filling, and my husband and I thought they were delicious although they received mixed reviews from our sons.  I think I'll be making these again, at least for the adults!  I know they'll be even better when I get my pantry stocked up with roasted red peppers too.
 
Serves about6
 
6 Kaiser rolls, cut in half
about 1 cup frozen spinach, thawed and excess water squeezed out
4 ounces Feta cheese, crumbled
Jarred Roasted red peppers, cut into thin strips
Hummus (I used store-bought as Pavani did, but I agree, homemade would be even better!)

In a small bowl, combine thawed spinach and feta cheese. Spread this mixture on the bottom roll and top it with the red pepper strips. Spread hummus on the top half of the roll.
 
Heat skillet on medium-high heat. Pour about 1-2 tablespoons olive oil in pan.  Set the sandwiches on the skillet, pour a bit of olive oil on top of each one.  Weigh the sandwiches down with something heavy or with heavy cast iron skillet. Cook 2-3 minutes on each side until toasted and golden.
 
 
Blog Widget by LinkWithin