~If you're interested in sending review copies of cookbooks or products for testing, please feel free to contact me at cowgirlmin07 [at] gmail [dot] com.
This recipe was given to me by my friend Amber, who is a fabulous cook. She got it from a cookbook called Hollyhocks & Radishes: Mrs. Chard's Almanac Cookbook, which is actually a book from Michigan. (hey, me too!) It has lots of great recipes in it, and I look forward to purchasing my own copy and trying many more! Some that have caught my eye: Old-Time Doughnuts (which I'm hoping are similar to the ones my Great Grandma used to make), Smoked Whitefish Pâté, and Double Chocolate Pound Cake. These are just the tip of the iceberg!
This cake is pretty easy to put together, as cakes go, and is a wonderfully flavored light cake, tangy with bits of rhubarb. Yum. The only problem I had was I felt too anxious to get it out of the pan, so I didn't wait until the cake was cool, and it split in half! The top half stayed in the pan. My advice to you: Grease the pan WELL and WAIT until the cake is cool before you attempt to turn it onto a plate. I ended up digging the top out of the pan and setting it on top, which is why you may notice there isn't a picture here! Luckily the mishap didn't affect the flavor of this fabulous cake.
Here's the recipe. Don't forget to buy the cookbook!
Rhubarb Bundt Cake Serves 12 or more Prepare: 20 minutes Bake: 1 hour
1-1/2 cups finely chopped rhubarb (I used almost 2 cups)
2 tablespoons sugar
2 teaspoons cinnamon
1/2 cup butter, softened
2 cups sugar
4 large eggs
1/2 cup light vegetable oil
3 tablespoons lemon juice
2 teaspoons vanilla
3 cups sifted unbleached flour
1 tablespoon baking powder
1/2 teaspoon salt
1/2 cup milk
1 cup chopped pecans or walnuts
Preheat oven to 350 degrees F. Generously oil a 3-quart Bundt pan.
Combine rhubarb with 2 tablespoons sugar and 2 teaspoons cinnamon, and set aside.
In a large mixing bowl, cream together butter and remaining 2 cups sugar. Beat in eggs, 1 at a time, then oil, lemon juice, and vanilla.
Sift together flour, baking powder and salt. With a wooden spoon or rubber spatula, stir flour mixture into mixing bowl in 3 batches, alternating with milk. Fold in nuts.
Spoon 1/3 of batter into prepared pan. Top with 1/2 of the rhubarb mixture. Repeat, then cover with remaining 1/3 of batter.
Bake 60-65 minutes, or until an inserted skewer comes out clean. Set cake pan on cooking rack. When cool enough to handle, invert onto serving plate. Before serving, you may wish to dust top with powdered sugar and a sprinkling of cinnamon. (I felt this to be unnecessary)
***Taste & Create
is a fabulous monthly blog event in which participants are randomly
paired off to choose and prepare a dish from their partner's blog. If
you'd like to join us, please email me at cowgirlmin07 [at] gmail [dot]
com by the 8th of the month!! ***
My partner this month was Tamy of 3 Sides of Crazy. We've known each other for a while, I used to be a regular contributor to her Our Krazy Kitchen, and she's actually a contributor to The Bad Girl's Kitchen as well! She's also a loyal supporter of Taste & Create. At any rate, there is always a new recipe to be found over on Tamy's blog, and this time, Swedish Meatloaf sounded perfect. (visit the link for Tamy's recipe...here come my changes!)
I did make a couple changes, for one I didn't have any bread, and my favorite regular meatloaf uses oatmeal, so that's where that came from. I also added some parsley to lean toward a more classic "Swedish" flavor, and didn't have any allspice, so I just used nutmeg. I also didn't add any brown sugar and lessened the salt.
For the sauce, I was kind of in a hurry so I added an extra tablespoon of flour. (even so, my sauce was a bit thin because I rushed it). I would have preferred beef broth, but chicken worked in a pinch. Although this sauce is good, next time I'm going to try for a more classic Swedish meatloaf-flavored sauce. I like the classics!
Tamy also said she often doubles the recipe and freezes one loaf for later--I will definitely be doing that next time!
Baking this in a loaf instead of meatballs is inspired, and this meatloaf is excellent! A new favorite, thanks Tamy!
1 egg 1/4 cup heavy cream 1 cup oats 8 ounces ground pork 8 ounces ground beef 1 small onion, finely diced (1/2 cup) 1/4 cup fresh parsley, chopped 1/4 teaspoon freshly grated nutmeg 1/8 teaspoon pepper 1/2 teaspoon salt
Preheat oven to 350 degrees F.
Whisk egg and cream together in small bowl. Stir in oatmeal and set aside to soak. Gently blend ground beef and pork, onion, nutmeg, pepper and salt.
Add oat mixture to beef mixture and gently blend until well mixed. Put in loaf pans.
Bake about 45 minutes.
During the last 15-20 minutes, prepare the sauce.
(Sauce)
1 tablespoon butter 2 tablespoons all-purpose flour 1 1/2 cups chicken broth (I would prefer beef broth here, but didn't have any) 1/2 cup heavy cream 2 teaspoons juice from 1 lemon Salt and freshly ground black pepper
Melt butter, add flour and cook, stirring constantly with whisk, until flour is light brown.
Slowly whisk in broth and bring to simmer.
Reduce heat and cook until sauce is reduced to about 1 cup, about 5 minutes.
Stir in cream and return to simmer. Stir in lemon juice; season with salt and pepper to taste and serve over meatloaf.
For classic recipes like pesto, I often turn to Mollie Katzen's Moosewood Cookbook. This one comes from the original cookbook that I picked up at a yard sale several years ago. I also have the 15-year anniversary edition, but it's not with me at the moment so I can't tell you if she updated or changed the recipe at all.
One of the things I love about this recipe is that you have several options of nuts. This comes in handy, especially since I can't bring myself to pay $20/bag for pine nuts right now! Unfortunately walnuts are also way UP in price, last time I checked a one-pound bag was about $8, which I also just can't do. So luckily, I have a bunch of almonds in the freezer, and that's what I've been using for my pesto.
The first batch I made using my homegrown Lemon Basil and almonds, and it is amazing. My generous FedEx driver dropped off a huge bag of homegrown Basil yesterday, so I am making more pesto today, again with almonds. I stick the pesto in small freezer containers, so we can have that fresh green summer flavor all year long.
3 packed cups fresh basil leaves (removed from stems)
2 large cloves fresh garlic
1/2 cup pinenuts, walnuts, almonds or a combination
3/4 cup (packed) fresh-chopped parsley
3/4 cup fresh-grated Parmesan
1/2 cup olive oil
1/4 cup melted butter
salt to taste
Combine everything in a blender or food processor on low, then medium speed. Arrange things so the blender blade will turn efficiently. Thoroughly work everything into a smooth paste. Toss with hot, drained pasta.
*This keeps excellently in the freezer too, just thaw before tossing with pasta.
The other day, I did a search for Southwestern Breakfast Burritos. I was asked to bid on a catering job, and that item was one that was suggested that the client may want for breakfast. So I googled. I ran across several different recipes, all of which I'll be trying and reporting on here.
This one sounded the best, in particular because Joelen makes these in advance and keeps them in the freezer. That, as you know, is right up my alley. I haven't gotten it together to prep these during the day, so we decided to make them for dinner and freeze the leftovers.
I made a few changes, and next time I will make a few more. We ended up with 9 burritos (and despite doubling the eggs from the original recipe, I still had to scramble up a few more to use up the rest of the sausage). When I make chorizo and eggs, I use a pound of chorizo and a dozen eggs, so that is the formula I will stick with next time. I also increased the peppers and added half & half to the eggs because that is how I roll.
These burritos were a hit! Our somewhat-picky 6 year old ate an entire burrito! Everyone in the family liked them a lot. We can't wait to have them again for breakfast, and I can definitely see these becoming a staple around here as well as spawning many many variations.
*The only problem I can see, is that after 2 weeks in the freezer, upon reheating, the tortillas became somewhat chewy, not the best texture, although the filling was still good. This does limit their "make ahead-ability."
1 pound pork sausage
1 tablespoon taco seasoning
1/2 green bell pepper, diced
1/2 red bell pepper, diced
1 medium onion, diced
9 eggs *(next time I will use 12 eggs)
2 tablespoons half & half
salt & pepper to taste
9 burrito sized flour tortillas
shredded taco cheese
In a medium skillet, crumble in sausage and cook until browned. Add onions and bell peppers; cook until softened. Remove from heat and allow to cool.
In a medium sized bowl, whisk the eggs and season with salt and pepper as desired. Cook the eggs in a hot skillet and scramble. Add the eggs to the sausage and pepper mixture; toss to combine. Allow mixture to cool.
Heat flour tortillas on a dry skillet until warmed and pliable.
Place a desired amount of cheese on one side of a flour tortilla. Top with a couple spoonfuls of sausage & egg mixture. Carefully roll up the tortilla in a burrito fashion. Wrap the burrito in foil and place in a gallon sized freezer bag; freeze.
To serve, no need to defrost - just cook up from frozen. Heat up foil wrapped frozen burritos in a 350 degree oven for 30-35 minutes... or remove frozen burrito from foil, wrap in a damp paper towel and microwave for 2-3 minutes on high until warmed/hot.
Yet another recipe from my friends at Real Simple. Tonight I pulled one of my Herb-Roasted Chickens out of the freezer and cut up part of it for this recipe. The boys ate the legs and wings, we'll use the remainder somehow. I found a hunk of vacuum-sealed Gruyère while cleaning the fridge this afternoon, so part of that went into these turnovers. I also had a package of puff pastry in the freezer, needing to be used. I think these turnovers were fate. The only change I made was to add a little cream (actually half-and-half) to the beaten egg for the tops of the pastries. It just seemed like a good idea to me.
The turnovers are super simple to put together, and quite honestly I usually have most of the ingredients around the house. I'm excited about the note (below) that you can make these ahead and freeze them for 3 months--I might just do that when it gets closer to my parents visiting or something like that.
I think I baked them about 5 extra minutes to get them nice and golden brown. Chicken and Gruyère Turnovers Adapted from Real Simple
Serves 4 Hands-on Time: 15 minutes Total Time: 40 minutes
1 1/2 cups shredded rotisserie chicken 1 1/2 cups grated Gruyère 1 cup frozen peas 2 sheets (one 17.25-ounce package) frozen puff pastry, thawed 1 large egg, beaten with 1 to 2 tablespoons half-and-half or heavy cream 1/4 cup Dijon mustard
1. Heat oven to 400° F. In a medium bowl, combine the chicken, Gruyère, and peas.
2. Cut the 2 sheets of puff pastry in half to form 4 rectangles and place on a baking sheet. Dividing evenly, top half of each rectangle with the chicken mixture. Fold over and seal the turnovers; brush the tops with the egg. Bake until golden, 20 to 25 minutes. Serve with the mustard.
*To make ahead, prepare the turnovers (but don’t bake them). Tightly wrap and freeze for up to 3 months. Let the turnovers thaw 20 minutes at room temperature before baking.
I knew there had to be a decent tomato sauce for pasta that was easy to make, yet didn't come out of a jar! So I pulled out my trusty cookbook by the lovely Giada De Laurentiis, Everyday Italian. Since it hasn't been tomato season for months, I was happy to note that her marinara recipe calls for canned crushed tomatoes.
I was considering lessening the amount of olive oil, 1/2 cup seems excessive to me, but I do trust Giada. (It really wasn't too oily). I did like that I didn't have to sit and chop everything at once. I chopped the onions and garlic, then while they were cooking chopped the carrots and celery. It's really quite simple.
Other than that, medium-high was a bit too high for the onions and vegetables, so I reduced the heat to just under medium. It could simply be my burner (it's a big one), so for the simmer I moved to a different burner. Just keep an eye on things so they don't get too brown before you add the tomatoes.
Giada says this is the basic tomato sauce she uses the most, and this recipe makes a healthy amount (probably enough for freezing). Giada doubles the recipe and freezes half in two-cup portions, which gets another vote from me!
Marinara Sauce
Makes about 2 quarts (8 cups)1 quart will serve 4 over pasta as a first course
1/2 cup extra-virgin olive oil 2 small onions, finely chopped 2 garlic cloves, finely chopped 2 celery stalks, finely chopped 2 carrots, peeled and finely chopped 1/2 teaspoon sea salt, plus more to taste 1/2 teaspoon freshly ground black pepper, plus more to taste 2 (32-ounce) cans crushed tomatoes (the only size I had were 28-ounce, so that's what I used) 2 dried bay leaves
In a large pot, heat the oil over a medium-high flame. Add the onions and garlic and saute until the onions are translucent, about 10 minutes. Add the celery, carrots, and 1/2 teaspoon each of salt and pepper. Saute until all the vegetables are soft, about 10 minutes. Add the tomatoes and bay leaves, and simmer uncovered over low heat until the sauce thickens, about 1 hour. Remove and discard the bay leaves. Season the sauce with more salt and pepper to taste.
The sauce can be made 1 day ahead. Cool, then cover and refrigerate. Rewarm over medium heat before using.
Store extra sauce by allowing it to cool completely, then pour two-cup portions into freezer bags and freeze for up to three months.
I love to bake quick breads, and this summer, my uncle had an overabundance of zucchini, so I started looking for recipes for zucchini bread. I wish I had my grandmother's recipe -- hers was so good. This one isn't exactly like grandma's, but it is darn good. I've modified a Paula Deen recipe (trying to make it semi-healthy). The recipe below is the one I made with various substitutions to try to lower the fat content and to adjust for personal taste (like omitting the pecans -- I hate biting into chunks of nuts in otherwise soft foods). The recipe indicates 15 minutes of prep time, but that can't possible include the grating time for the zucchini. It felt like we spent hours grating zucchini. I used a rotary grater (like the kind often used to grate parmesan cheese directly onto your dish at an Italian restaurant), but about halfway through, my hand was giving out and we switched to the mini food processor to chop it up, and that worked just fine too. I did not peel the zucchini, but if you have an aversion to peels, or seeing little green flecks in your food, you can peel it first.
This recipe yields 2 9x5 inch loaves, or 5 mini loaves.
Ingredients:
3 cups all-purpose flour 1/2 teaspoon baking powder 1 teaspoon salt 1/2 teaspoon ground cinnamon 1/2 teaspoon ground nutmeg 1 teaspoon baking soda 3 eggs 1 cup granulated sugar 1/2 cup honey (or you can omit the honey and increase the granulated sugar to 2 cups) 1/2 cup vegetable oil 1/2 cup applesauce (or you can omit the applesauce and increase the vegetable oil to 1 cup) 2 teaspoons vanilla extract 3 cups grated zucchini (original recipe called for 2 cups) 1 cup semisweet chocolate chips (I used the mini sized chips and since I didn't add nuts, I used the whole package) 1 Tablespoon orange zest 1 cup chopped pecans (optional -- I did not use them)
Directions:
Preheat oven to 350 degrees F. Grease (2) 9x5-inch loaf pans or (5) mini loaf pans (usually 5x3-inch).
In a large bowl, beat eggs until light and fluffy. Add sugar and honey and continue beating until well blended. Stir in oil, applesauce, vanilla, zucchini, pecans (if using), chocolate chips and orange zest. Make sure everything is well mixed. Stir in sifted dry ingredients until just combined. (Don't overmix -- just mix until all the dry ingredients are moistened and no large lumps remain, some small lumps are okay). Pour into prepared loaf pans.
Bake for 50 minutes (mine took closer to a full hour) or until a toothpick inserted in the middle comes out clean. Cool in pans on cooling racks for about 5 minutes, then remove from pans and finish cooling. (I used glass pans for the large loaves and removed them from the pans to finish cooling. I used the disposable aluminum mini loaf pans and did not remove those from the pans for cooling).
The loaves freeze well -- I had one mini loaf that was in the freezer for 6 months and was still delicious when thawed. This recipe would also make delicious muffins.
She said that her mom used ripe bananas to make this cake instead of banana bread, and get this: She said you can FREEZE the whole cake! Frosting and all, just stick it in the freezer and pull it out when you need a quick dessert.
I am soooo there.
Of course on the day I decide to make this, town is having a blizzard so school was canceled and we've been at the ranch all day. I discover I only have 1 cup of brown sugar and no sour cream. I also discover that school will be canceled again tomorrow, so we won't be back to town until Monday, and these overripe bananas won't last that long. But this cowgirl is nothing if not innovative, so I substituted granulated sugar, molasses and plain yogurt. Yeehaw, back in business!
(If the cake batter is any indication, we are going to be loving this cake. I can't wait! I just wish I had more bananas so I could make another one and freeze it!)
~~~~~
This cake is so delicious! I had to bake mine about 15 extra minutes, but I have altitude issues, plus I didn't take out any liquid to compensate for the added molasses. Regardless it turned out perfectly. It tastes like a spice cake to me, you can't even really taste the bananas.
Banana Cake:
1/2 cup butter
1 1/2 cup brown sugar (I was 1/2 cup short, so added 1/2 cup granulated sugar + 2 tablespoons molasses)
2 eggs
1 tsp vanilla
1/2 cup sour cream (I used plain yogurt)
2 cups flour
1 tsp baking soda
1/2 tsp cloves
1 tsp cinnamon
3 mashed bananas (I didn't mash, just tossed them right in)
Grease an 8x8" square pan; preheat oven to 350 degrees F.
Cream butter and sugar in a mixer. Add the eggs, vanilla and sour cream and mix. Combine the dry ingredients and mix into the butter mixture. Add the bananas last and mix well. Bake at 350 degrees for 25-30 minutes. (Note, this cake always falls a bit...don't worry if yours does)
When the cake is completely cooled, frost with Cream Cheese Frosting:
I am working on some make-ahead recipes for an upcoming party, so this is sort of an experiment. I took a yummy crab/cream cheese filling and stuffed it into jalapeños. Very simple, and delicious. We've done this before, but before we've just baked them and eaten them.
This time, I am freezing some to see if it will work. I'm hopeful that it will work out, the way it does for the scrumptious Bacon-Wrapped Jalapeños, and honestly I don't see why it won't. I'll freeze them for about a month, then take them out and bake them and report back.
For now, we couldn't resist eating the rest of them. We had a small taste-testing party, and everyone loved them.
And YES! I'm happy to report that freezing these babies works fine! Just bake right from frozen, probably about 10 minutes more, until they are just turning golden brown, then watch them disappear!
Jalapeños con Cangrejos AKA Crabby Jalapeños AKA Crab-Infested Jalapeños Makes 40 jalapeños, give or take, recipe can easily be halved
16 ounces cream cheese, at room temperature 10 scallions (green onions), diced 2 cans crab, drained about 20 jalapeños, halved lengthwise, seeds and white ribs removed
Mix together cream cheese, scallions and crab until well-combined. Cover and refrigerate for several hours or overnight.
To prepare the jalapeños, slice each pepper lengthwise, inserting knife tip just below the stem of each jalapeño, as close as you can get to the stem end but not cutting the stem. Pull the two halves apart, and usually the half the stem will stay on each half (this gives you a handle and it looks nice). Use a small spoon to gently scrape out the seeds and the white ribs inside (the spicy parts). Leave some ribs if you want them spicier, but do so at your own risk!
Smear each prepared jalapeño half with a generous amount of cream cheese mixture. Place jalapeños on a baking rack over a sheet pan.
Preheat oven to 375 degrees F. Bake for about 20 minutes, until cheese is melty and bubbly and just beginning to turn golden brown. Arrange artfully on a platter and serve while still warm.
My partner for this month's Taste & Create was Susan of Life at Quail Hollow. Taste & Create is a monthly food blog event hosted by my friend Nicole of For the Love of Food. Participants are randomly paired off and asked to prepare a recipe from their partner's blog. It is very fun, and I encourage each and every one of you to sign up!
So Life at Quail Hollow certainly seems idyllic, and Susan seems to always be hosting gatherings of friends and family in her lovely home. I enjoyed perusing her blog, and it didn't take me long to decide on Polpettine d'Oliva, AKA Alessandra's Meatballs. I am a sucker for an "authentic" recipe for anything, and after reading that Alessandra's kitchen is IN Italy, Tuscany to be exact, and that Susan learned to prepare this meal AT Alessandra's house in Tuscany, I was hooked.
I will admit that cooking the meat prior to forming the meatballs seemed counter intuitive to me, but I did it. I even doubled the recipe from the start because they just sound so delicious.
Although the recipe calls for green olives, I decided to use a mix of Paesana stuffed olives we had in the refrigerator, and just chopped them up. We simply had to have a taste before chilling the meat mixture, and it is amazing! We were thinking of other dishes we could use this meat mixture in, and trying not to eat the whole pan with a spoon. We were greatly anticipating the meatballs.
After the meat was chilled, we pulled it out of the fridge and were dismayed to find it difficult to form into balls. We debated adding a couple more eggs, but first we simply stirred up the meat. Some of the binding egg mixture had settled at the bottom, so to our relief just mixing the meat again corrected the problem, no added ingredients necessary.
Number One formed the meatballs (more than 80 of them!) and I dipped the ones we ate tonight in flour, egg and bread crumbs. Just regular bread crumbs, of course, because the store doesn't carry panko. You're not surprised, are you? I wasn't. We fried them in olive oil until golden brown, then served them up an a bed of spinach with some of the dipping sauce as described below.
The rest of the meatballs went onto a cookie sheet and into the freezer. When they are individually frozen, I will put them in a ziploc bag to store them for future use.
These are the best meatballs we have ever had. I'm so glad we have about 80 of them in the freezer!!
Alessandra's Meatballs
2 tablespoons olive oil
3/4 cup onion, chopped
3/4 cup carrots, chopped
3/4 cups celery, chopped
1/2 pound ground chicken
1/2 pound bulk sausage
1 1/4 pound ground beef
1 cup white wine
1/2 cup Parmesan cheese, grated
1 egg, beaten
1/2 cup parsley, chopped
1/2 cup green olives, chopped
1/4 teaspoon nutmeg
Pepper to taste
1/4 cup flour
2 eggs, beaten
Panko bread crumbs
Saute the vegetables in the olive oil in a large skillet. Add the meats and cook until done, stirring to break the meat into small pieces. Drain, if needed.
Return to the skillet and add the wine. Cook until the wine is absorbed.
Remove the mixture from the heat and add the Parmesan, 1egg, olives and the seasonings. Mix well and chill.
Once chilled, form into 1-inch balls. At this point the meatballs can be chilled or frozen.
Roll the meatballs in flour, egg and bread crumbs and fry in olive oil until brown. Serve with mayonnaise seasoned with Worcestershire sauce, basil and oregano. Makes 40 meatballs.
I was tasked with preparing a pasta dish for an upcoming family meeting of sorts. Not knowing exactly how many people would be there, or anything about the kitchen, combined with two aunts cooking other two other pasta dishes simultaneously, I decided to try this oven-baked recipe. Making it ahead will free up the stove top for our aunts, and all I will have to do on Saturday night is pop it in the oven! (That's my kind of cooking, as you may know).
I plan to make this dish tomorrow, then pop it in the freezer until we leave Friday morning, and it should travel beautifully in a cooler. When we get there, the dish will go directly into the refrigerator to thaw, and be completely thawed and ready for the oven Saturday night.
UPDATE: Although I removed this dish from my freezerearly Friday morning, and stored it in a refrigerator until Sunday evening, evidently the refrigerator was too cold because my dish was still frozen when it was time to bake! Ack! So, I was forced to bake it longer than I had anticipated, and it came out of the oven after most of the dinner was over. Our gracious family valiantly sampled some, and everyone declared their love for this dish. It really is quite flavorful and bright, I love the texture of the shredded chicken and the fresh tarragon enhances everything. Just be sure to check on the temperature of the refrigerator in which you are attempting to "thaw" your dish...
Also, a double batch is a LOT of food. Just so you know. For more on the family dinner, go here. Creamy Baked Penne and Chicken with Artichokes, Tarragon and Lemon If you can't find frozen artichokes, you can substitute3 (14-ounce) cans artichoke hearts; you will need to drain, rinse and pat them dry thoroughly before using. Shredded Italian cheese blend is a mix of 4 to 5 cheeses, often including mozzarella, provolone, Parmesan, fontina, and Asiago.
Salt 1 pound penne 4 tablespoons olive oil 3 (9-ounce) boxes frozen artichokes, thawed, patted dry and chopped coarse (or see note above) 1 medium onion, minced 8 medium garlic cloves, minced or pressed through a garlic press (about 8 teaspoons) 1/4 teaspoon grated zest from 1 lemon 1/4 cup unbleached all-purpose flour 2 cups low-sodium chicken broth 1 cup dry white wine 1 cup heavy cream 2 pounds boneless, skinless chicken breasts (about 5 breasts), trimmed 3 bay leaves 1 1/2 cups frozen peas 8 ounces shredded Italian cheese blend (about 2 cups) 3 tablespoons juice from 2 lemons Ground black pepper 3 tablespoons minced fresh tarragon leaves (for serving)
1. Bring 4 quarts of water to a boil in a Dutch oven over high heat. Stir in tablespoon salt and the pasta and cook, stirring occasionally, until just beginning to soften, about 5 minutes. Drain the pasta through a colander and toss with 1 tablespoon of the oil; leave in the colander and set aside.
2. Wipe the pot dry, then add the remaining 3 tablespoons oil, and set it over medium heat until shimmering. Add the artichokes, onion, and 1 teaspoon salt and cook until the artichokes are lightly browned, 8 to 10 minutes.
3. Stir in the garlic and lemon zest and cook until fragrant, about 30 seconds. Stir in the flour and cook, stirring constantly, until golden, about 1 minute. Slowly whisk in the broth, wine and cream.
4. Add the chicken breasts and bay leaves, partially cover, and bring to a simmer. Reduce the heat to low, cover completely, and cook until the thickest part of the chicken registers 160 degrees on an instant-read thermometer, 10 to 15 minutes.*
*If I remember correctly, the last time I cooked chicken using this method, it took a lot longer for the chicken to cook--even twice or three times as long. I'm not sure if this is due to altitude or what. I will report back tomorrow with exact cooking time for the chicken... UPDATE: After 15 minutes, my chicken was barely at 125 degrees. So yes, it took longer for me; about 25 minutes total.
5. Remove the pot from the heat and discard the bay leaves. Remove the chicken and set aside to cool; keep the sauce covered. When the chicken is cool enough to handle, shred it into bite-sized pieces. Stir the shredded chicken back into the sauce with the cooked pasta, peas, 1 cup of the cheese, and lemon juice; stir until well combined. Season with salt and pepper to taste. Transfer to a 13 by 9-inch baking dish and sprinkle with the remaining cup cheese.
6. To Store: Wrap the dish tightly with plastic wrap and then foil and refrigerate for up to 2 days or freeze for up to 1 month. (If frozen, the casserole must be thawed completely in the refrigerator, about 24 hours).
7. To Serve: Thaw completely in refrigerator, about 24 hours. Adjust an oven rack to the middle position and heat the oven to 400 degrees. Unwrap the dish and cover tightly with aluminum foil that has been sprayed with vegetable oil spray (or use nonstick foil). Bake until the sauce is bubbling around the edges, 30 to 40 minutes. Remove the foil and continue to bake until hot throughout and browned on top, 25 to 30 minutes longer. Sprinkle with the tarragon before serving.
To Serve Right Away: Bake the casserole in a 400-degree oven, uncovered, until the sauce is bubbling and the top is browned, 25 to 35 minutes. Sprinkle with the tarragon before serving.
Even though we didn't end up making this pie for this particular meal, it is on my list. I will make this pie. Someday. Until then, if you make this pie first, please let me know how it goes and what you think of it. I think it sounds fantastic.
Once again, this is from Rick Bayless's Mexican Kitchen. If you only buy one Mexican cookbook in your lifetime, let it be this one.
For the crust: 1 1/2 (6 3/4 ounces) all-purpose flour (measured by scooping and leveling) 6 tablespoons (3 ounces) chilled unsalted butter, cut into 1/2-inch bits 3 tablespoons vegetable shortening or rich-tasting lard, chilled, and cut into 1/2-inch bits 3/4 teaspoons sugar 1/4 teaspoon salt 1 egg yolk, beaten slightly
For the filling: 2 cups (about 6 ounces) pecan halves (make sure they're fresh and richly flavorful) 6 ounces semisweet or bittersweet chocolate 3 tablespoons all-purpose flour 3/4 cup (6 ounces) room-temperature unsalted butter 1 cup firmly packed dark brown sugar 5 large eggs, room temperature 3/4 cup light corn syrup 1/4 cup molasses 1 1/2 tablespoons Kahlua or brandy 2 1/4 teaspoons pure vanilla extract 1/2 teaspoon salt
2 cups sweetened whipped cream, flavored with Kahlua for serving
1. The dough. Measure the flour, butter and shortening (or lard) into a bowl or a food processor fitted with the metal blade. Quickly work the fats into the flour with a pastry blender or pulse the food processor until the flour looks a little damp (not powdery) but tiny bits of fat are still visible. If using the food processor transfer the mixture to a bowl.
Mix together the sugar, salt and 3 tablespoons of ice water. Using a fork, little by little work the ice-water mixture into the flour mixture. The dough will be in rough, rather stiff clumps; if there is any unincorporated flour in the bottom of the bowl, sprinkle in a little more ice water and use the fork to work it together. Press the dough together into a flat disk, wrap in plastic and refrigerate at least 1 hour.
On a lightly floured surface, roll the dough into a 12-inch circle. Transfer to a deep 10-inch glass pie pan (I find it easiest to roll the dough onto the rolling pin, then unroll it onto the pie pan). Decoratively crimp the edge and trim excess dough. Refrigerate 30 minutes.
2. Prebaking the crust. Heat the oven to 400 degrees. Lightly oil a 15-inch piece of foil and lay it, oiled-side down, into the crust (heavy duty foil is too stiff to work here); press down to line the crust snugly. Fill with beans or pie weights and bake about 15 minutes, until beginning to brown around the edges. Reduce the oven temperature to 350 degrees. Carefully remove the beans (or weights) and foil, return the crust to the oven and bake 8 to 10 minutes, until it no longer looks moist. (If it bubbles at this point, gently press it down with the back of a spoon). Brush the beaten egg yolk over the crust, then let cool completely. 3. The nuts and chocolate. While the crust is cooling, spread the pecans on a baking sheet and toast in the 350-degree oven until fragrant, about 10 minutes. Cool, then break into small pieces and transfer to a large bowl. Chop the chocolate into rough, 1/2-inch pieces and add to the bowl, along with the flour. Stir until everything is well coated.
4. The filling. In a food processor (or in the large bowl of an electric mixer), cream the butter and brown sugar until light and fluffy, about 3 minutes in the food processor, 5 minutes in the mixer. With the machine still running, add the eggs one at a time, letting each be completely incorporated before adding the next. Beat in the corn syrup, molasses, Kahlua or brandy, vanilla and salt.
5. Baking. Pour the filling over the chocolate and pecans and stir well to combine. Pour the mixture into the prebaked pie shell, set onto the lower shelf of the oven and bake until a knife inserted into the center is withdrawn clean, about 1 hour.
Cool completely on a wire rack. Serve slices of the pie at room temperature or slightly warm, topped with a dollop of Kahlua-spiked, sweetened whipped cream.
ADVANCE PREPARATION: The pie can be made several days ahead, wrapped in plastic and refrigerated. It freezes well. Because the pie is easiest to cut when cold, I suggest making it ahead, refrigerating it, cutting it, then warming just before serving.
VARIATIONS AND IMPROVISATIONS: Other nuts can be substituted for the pecans. Honey can replace the molasses for a lighter flavor. If you like the crystalline crunch of Mexican chocolate, reduce the semisweet chocolate to 5 ounces and sprinkle the pie with 1/3 cup rather finely chopped Mexican chocolate before baking.
I always make huge pots of chili when the weather starts to change. It is comforting to have a steaming bowl of spicy chili when the wind is blowing the leaves around and fall is in the cool air.
This recipe is an adaptation of my mom's chili, and honestly it is almost always different, but always always delicious. I have just recently started adding the bacon, which contributes a nice smoky flavor to the pot. Sometime I leave out the zucchini or even the diced tomatoes, sometimes I add mushrooms, I've even added broccoli before--it's all good! You can substitute different kinds of beans too, just make sure to use two or three different kinds.
You can make this ahead, just put the whole pot in the refrigerator for a day or two, or if you'd like to store it longer you can freeze it. Just make sure you let it cool to room temperature first. I recommend making this at least several hours before you plan to serve it, ideally a day ahead to let the flavors develop.
This recipe makes plenty of chili--some for eating and extra for freezing!
Serve with or without a dollop of sour cream, some crusty bread and or a green salad. It is equally delicious with a glass of red wine or a tall glass of milk. Or both.
Enjoy! Happy Fall!
Min's Rustic Chili Serves A Lot
olive oil 1 pound bacon, chopped 3 pounds ground beef 2 yellow onions, chopped 6 to 8 cloves garlic, minced 2 zucchini, diced 3 15-ounce cans kidney beans 3 15-ounce cans pinto beans 1 30-ounce can chili beans 2 15-ounce cans diced tomatoes 1 46-ounce can tomato juice flat leaf parsley, roughly chopped cumin chile powder basil, dried or roughly chopped fresh salt
Put a couple splashes of olive oil in the largest saucepan you have. Heat on medium heat, and add bacon. Fry bacon until it is about halfway done, then add ground beef. Stir frequently until browned. While the meat is cooking, you can chop your onions, adding them to the pot and stirring as you go. Mince and add the garlic after that, continuing to stir. Dice and add the zucchini and/or any other vegetables. Generously salt the meat mixture.
Open all your cans, then drain each can (except the chili beans) briefly and add the beans and tomatoes (if using) to the pot. Stir, then add tomato juice. Generously add spices. Honestly, I just eye it and dump them in! I use chile powder from the Latin/Mexican section of the grocery store, almost 1/2 of a 1 1/16th ounce package. Lots of cumin, at least three tablespoons if you measure. A healthy amount of dried basil. Stir and taste as you go. If you are using fresh flat leaf parsley or fresh basil, add a good amount, so flecks of green are visible in the chili.
Allow the chili to simmer over very low heat for at least two hours or more. Stir, then taste and adjust spices if needed. Remember that the spices will take some time to develop their flavors, but it should smell good and taste good while it's simmering. Making this several hours ahead, overnight if possible, will result in the best flavor.
Garnish with sour cream, cheddar cheese and/or chopped parsley.
This chili freezes very well. Just cool to room temperature, transfer to plastic containers with lids or even large ziploc bags, seal and freeze. You should probably use it within 6 months. Thaw in the refrigerator overnight if you can, or toss the frozen chili in a pan, covered, over very low heat. Stir frequently until thawed, then increase heat until heated through.
This recipe was originally posted with reddquilter's Famous Pear Pie (which you should Go Make Right Now). The pie crust is delicious, easy, and you can freeze it two ways, so I decided it deserved a post of its very own. --Min
Reddquilter's Favorite Pie Crust
1 1/4 cups pastry flour or all-purpose flour 1/2 teaspoon salt 1/2 teaspoon sugar 1/2 cup (1 stick) unsalted butter, cold 2 to 4 tablespoons ice water
I usually make a large batch in my food processor (make sure not to over mix--easy to do in the processor) WITHOUT the water. Then I package it into single pie crust portions in zip lock bags then freeze till needed. Add the water later by hand with a fork.
I also have made the pie crust including the water and then put in the freezer in individual single crust packets as well as actually rolled out the crust into the pie plate and then freeze till needed. I now prefer to just do the dry mix, works best for me.
~~~~~~~~~~~
Now, this is Min again. For those who need more step-by-step instructions, this is how I make reddquilter's delicious pie crust:
Add flour, salt, and sugar to a food processor bowl. Cut COLD butter into cubes, and add to food processor bowl. Pulse quickly in short bursts, just until the butter is reduced to pea-size lumps, don't process too much. Dump the flour/butter mixture into a small bowl, and add water by the tablespoon, mixing with a fork just until the crust starts to come together. Sometimes I need to use 6 or 8 tablespoons of water. The crust will not be completely together, it will look crumbly but should not look floury at all. Don't worry about this.
Generously flour the surface you'll be rolling your dough out on. Turn the dough out into a pile on top of the flour, then use your hands to gently push it together into a round shape. Flour your rolling pin, and roll out your dough. The key is not to work it too much. And you're done! Use your rolling pin to transfer the dough to the pie plate, and proceed with your pie!
Equal amounts of 3 ground meats, I like to use beef, pork & veal, 1lb. each Or 3lbs of one ground meat. ½ cup of chopped onions. 1/2 to 1/4 cup of dry sherry 1/2 to 1/4 cup Dijon mustard Fresh bread crumbs if desired. 1 lb. crumbled blue cheese or less to desired taste.
Instructions
Mix together all ingredients but blue cheese in very large bowl. Or can split all ingredients and make each roll separate. Then divide mixture evenly into two.
Lay out mixture on wax paper in rectangular shape as if making a pumpkin roll.
Spread half of your blue cheese on each rectangle. Roll then place in baking pan lined with tin foil. Or you may place in plastic wrap to freeze for later use.
Bake thawed or fresh at 350 degrees until brown and bubble. Time depends on width and length of roll. Most times from 30-45 mins.
Because the crackers are already crisp and salty, there is no need to toast them in the oven or season them with salt.
Follow the recipe for Toasted Bread Crumb Topping, substituting 50 Ritz crackers (1 1/2 sleeves) for the bread. Pulse with the butter to coarse crumbs, about 10 pulses. Toss the crumbs with the parsley and season with pepper. Set aside until needed.
Toasted Bread Crumb Topping Makes 2 3/4 cups; enough for one 13 by 9-inch casserole
4 slices white sandwich bread, quartered 2 tablespoons unsalted butter, melted 2 tablespoons minced fresh parsley leaves Salt and ground black pepper
Adjust an oven rack to the middle position and heat the oven to 300 degrees F. Pulse the bread and butter in a food processor to coarse crumbs, about 6 pulses. Spread the crumbs out over a rimmed baking sheet. Bake, stirring occasionally, until golden and dry, 20 to 30 minutes. Let the crumbs cool, then toss with the parsley; season with salt and pepper to taste.
Another recipe from The Best Make-Ahead Recipe. If you love having ready-made, but home-made, meals in the freezer, you really need to buy this book. There is a "southwest" variation of this recipe that I will post later, which features chiles, corn and black beans!
I made this recipe before to give away (keep one, freeze one, give one). It is easily "supersized" to make a huge quantity--directions to follow. This casserole is creamy and delicious, satisfying and comforting. And you can make it up to a month in advance. What more could you ask for?
Creamy Chicken and Rice Casserole with Peas, Carrots, and Cheddar Serves 8
After adding the rice, be sure to stir the sauce often for the first few minutes, using a heatproof rubber spatula; this is when the rice is most likely to clump and stick to the bottom of the pot. Serve with lemon wedges, if desired.
4 tablespoons (1/2 stick) unsalted butter 1 medium onion, minced Salt 3 medium garlic cloves, minced or pressed through a garlic press (about 1 tablespoon) 1/8 teaspoon cayenne pepper 1/4 cup unbleached all-purpose flour 6 cups low-sodium chicken broth 1 cup heavy cream 2 pounds boneless, skinless chicken breasts (about 5 breasts), trimmed 1 1/2 cups long-grain white rice 1 (1-pound) bag frozen pea and carrot medley (about 3 cups) 8 ounces sharp cheddar cheese, shredded (about 2 cups) 2 tablespoons juice from 1 lemon Ground black pepper 1 recipe (about 2 3/4 cups) Toasted Bread Crumb Topping 3 tablespoons minced fresh parsley (for serving)
1. Melt the butter in a Dutch oven over medium heat. Add the onion and 1 teaspoon salt and cook until softened and lightly browned, 5 to 7 minutes. Stir in the garlic and cayenne and cook until fragrant, about 30 seconds. Stir in the flour and cook, stirring constantly, until golden, about 1 minute. Slowly whisk in the broth and cream.
2. Add the chicken breasts, partially cover, and bring to a simmer. Reduce the heat to low, cover completely, and cook until the thickest part of the chicken breast registers 160 degrees on an instant-read thermometer, 10 to 15 minutes.
3. Remove the chicken and set aside to cool. Stir the rice into the pot, cover, and continue to cook over low heat, stirring often, until the rice has absorbed much of the liquid and is just tender, 20 to 25 minutes. When the chicken is cool enough to handle, shred it into bite-sized pieces.
4. Remove the pot from the heat and stir in the shredded chicken, peas and carrots, cheddar and lemon juice. Season with salt and pepper to taste. Pour the mixture into a 13 x 9-inch baking dish and sprinkle with the crumb topping.
5. TO STORE: Wrap the dish tightly with plastic wrap and then foil and refrigerate for up to 2 days or freeze for up to 1 month. (If frozen, the casserole must be thawed completely in the refrigerator, about 24 hours)
6. TO SERVE: Adjust an oven rack to the middle position and heat the oven to 400 degrees. Unwrap the dish and cover tightly with aluminum foil. Bake until the casserole is bubbling and hot throughout, about 1 hour. Remove the foil and continue to bake until the crumbs are crisp, 15 to 20 minutes longer. Sprinkle with the parsley before serving.
TO SERVE RIGHT AWAY: Bake the casserole in a 400-degree oven, uncovered, until the sauce is bubbling and the crumbs are crisp, 25 to 35 minutes. Sprinkle with the parsley before serving.
~~~~~~~~~~
Bake Half, Freeze Half Follow the recipe and divide the ingredients between two 8 x 8-inch casserole dishes (each will serve 4) or three 9 x 3-inch loaf pans (each will serve 2 or 3). The casseroles can be baked right away or wrapped tightly with plastic wrap and then foil and refrigerated for up to 2 days or frozen for up to 1 month. See reheating instructions below.
TO BAKE IMMEDIATELY(for Bake Half, Freeze Half size pans) Bake the casserole in a 400-degree oven, uncovered, until the sauce is bubbling and the crumbs are crisp, 20 to 25 minutes. Sprinkle with the parsley before serving.
TO BAKE IF REFRIGERATED(for Bake Half, Freeze Half size pans) Unwrap the dish and cover tightly with foil. Bake in a 400-degree oven until the casserole is bubbling and hot throughout, 40 to 50 minutes. Remove the foil and continue to bake until the crumbs are crisp, 15 to 20 minutes longer. Sprinkle with the parsley before serving.
TO BAKE IF FROZEN(for Bake Half, Freeze Half size pans) Thaw the casserole completely in the refrigerator, about 24 hours, then follow the instructions above for "To Bake if Refrigerated."
These enchiladas are a crowd-pleasing family favorite; whenever we serve them, we get rave reviews and recipe requests! We make up a bunch almost every year for our family reunion, and I usually try to keep a pan or two in the freezer as well. I have given these enchiladas to expectant mothers and people who've just moved to town.
Don't be shy with the cheese, but don't overdo it on the onions. With roasted chickens from the grocery store's deli, you can set up an assembly line and whip these out in less than an hour. Whether you use green chiles or jalapeños, the sauce is just perfect. Enjoy.
This recipe is for a “double batch,” which makes enough enchiladas for about 16 hungry cowboys. You can also freeze a pan or two for a month or so if you just have your little family to feed. (instructions below) If you want to make a single batch, just cut all ingredients in half. I got a variation of this recipe from my friend Karen, a fiery red-head from Texas.
A typical serving is two enchiladas.
2 roasted chickens, deboned and shredded or chopped
2 large yellow onions, diced
2.5 pounds shredded cheese (Monterey Jack, Colby/jack or a Mexican blend)
+ 40 tortillas
1 recipe Enchilada Sauce (below)
Spray 9 x 13 inch pans with Pam oil spray.
In each tortilla, tightly roll up: small handful chicken, some cheese and some onions. Roll up tightly, and place in pan with rolled part at the edge of pan and round loose end facing the middle of the pan—the round end will flap down and prevent the enchiladas from unraveling. Lift up each flap to put in the next enchilada—it’s alright if the rounded edges are sticking up a little when you’re finished.
Squeeze enchiladas tightly in the pan, and if there is space to one side of your enchiladas, put one or two on that side of the pan as well.
You may or may not use all the onions; if you run out of chicken, you can either get more or simply use cheese and onions for the remainder of enchiladas. It is important that the pans be tightly packed with enchiladas. (if you see you are running out of supplies, use a smaller pan for the last few enchiladas)
Sprinkle enchiladas generously with cheese.
At this point, enchiladas may be tightly covered with plastic wrap and foil and frozen.
To Prepare and Bake If Frozen:
Thaw enchiladas overnight in refrigerator.
Prepare Enchilada Sauce:
Mix together in large saucepan:
2 16 oz. Containers sour cream
2 14 oz. Cans chicken broth
2 4 oz. Cans diced green chilies OR diced jalapeños
Heat over medium-low heat, stirring until sour cream is melted.
Ladle generously and evenly over enchiladas, almost up to rim of pan. (you may need to make more sauce; use 1 of each of the above ingredients)
Bake at 350° to 375° for roughly one hour, until golden and bubbly.
To Prepare if not freezing:
Prepare Enchilada Sauce (follow steps under 7.b. & 7.c.), and bake at 375° for about one hour, until golden and bubbly.
I've created this site as a place everyone can come and post their favorite recipes...to share with friends, to encourage experimentation, to enjoy cooking for our families.
It is my hope that each of us will find new family favorites, have some fun, and maybe even learn something in the process! If you try a recipe from this site, please leave a comment on that recipe, let us know how it went, what you loved, what you hated, what you modified, etc! We want to know! Any (non-Spam) comments are welcome!
I look forward to frequent posts from all Bad Girls! I know you're all out there cooking, so tell us what!
If you'd like an invite to post recipes on this blog and become a Bad Girl, please leave a comment here. (include your email address!) Join us!


 , which is actually a book from Michigan. (hey, me too!) It has lots of great recipes in it, and I look forward to purchasing my own copy and trying many more! Some that have caught my eye: Old-Time Doughnuts (which I'm hoping are similar to the ones my Great Grandma used to make), Smoked Whitefish Pâté, and Double Chocolate Pound Cake. These are just the tip of the iceberg!


 . This one comes from the original cookbook that I picked up at a yard sale several years ago. I also have the 15-year anniversary edition, but it's not with me at the moment so I can't tell you if she updated or changed the recipe at all.


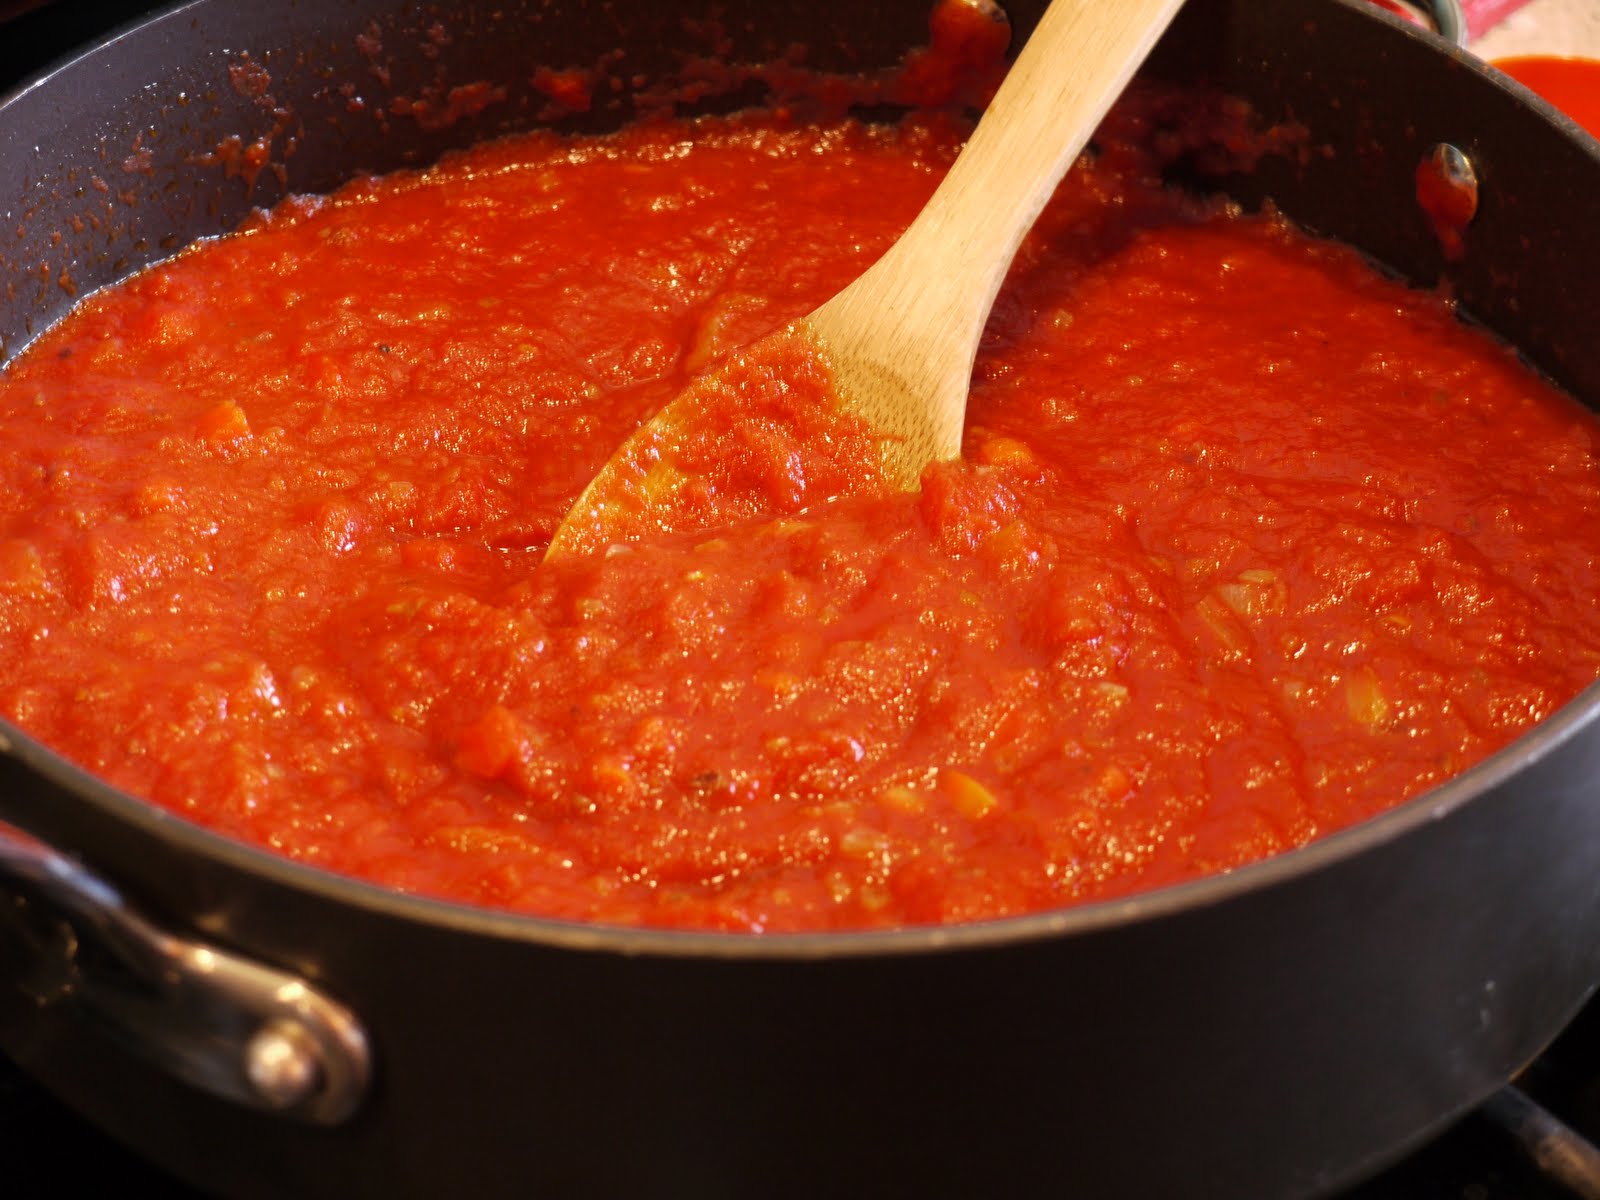
 . Since it hasn't been tomato season for months, I was happy to note that her marinara recipe calls for canned crushed tomatoes.


 has been a winner, and I expect this will be no different.

 . If you only buy one Mexican cookbook in your lifetime, let it be this one.